

Windows電腦
連接攝像頭和電腦
Shell
lerobot-find-cameras opencv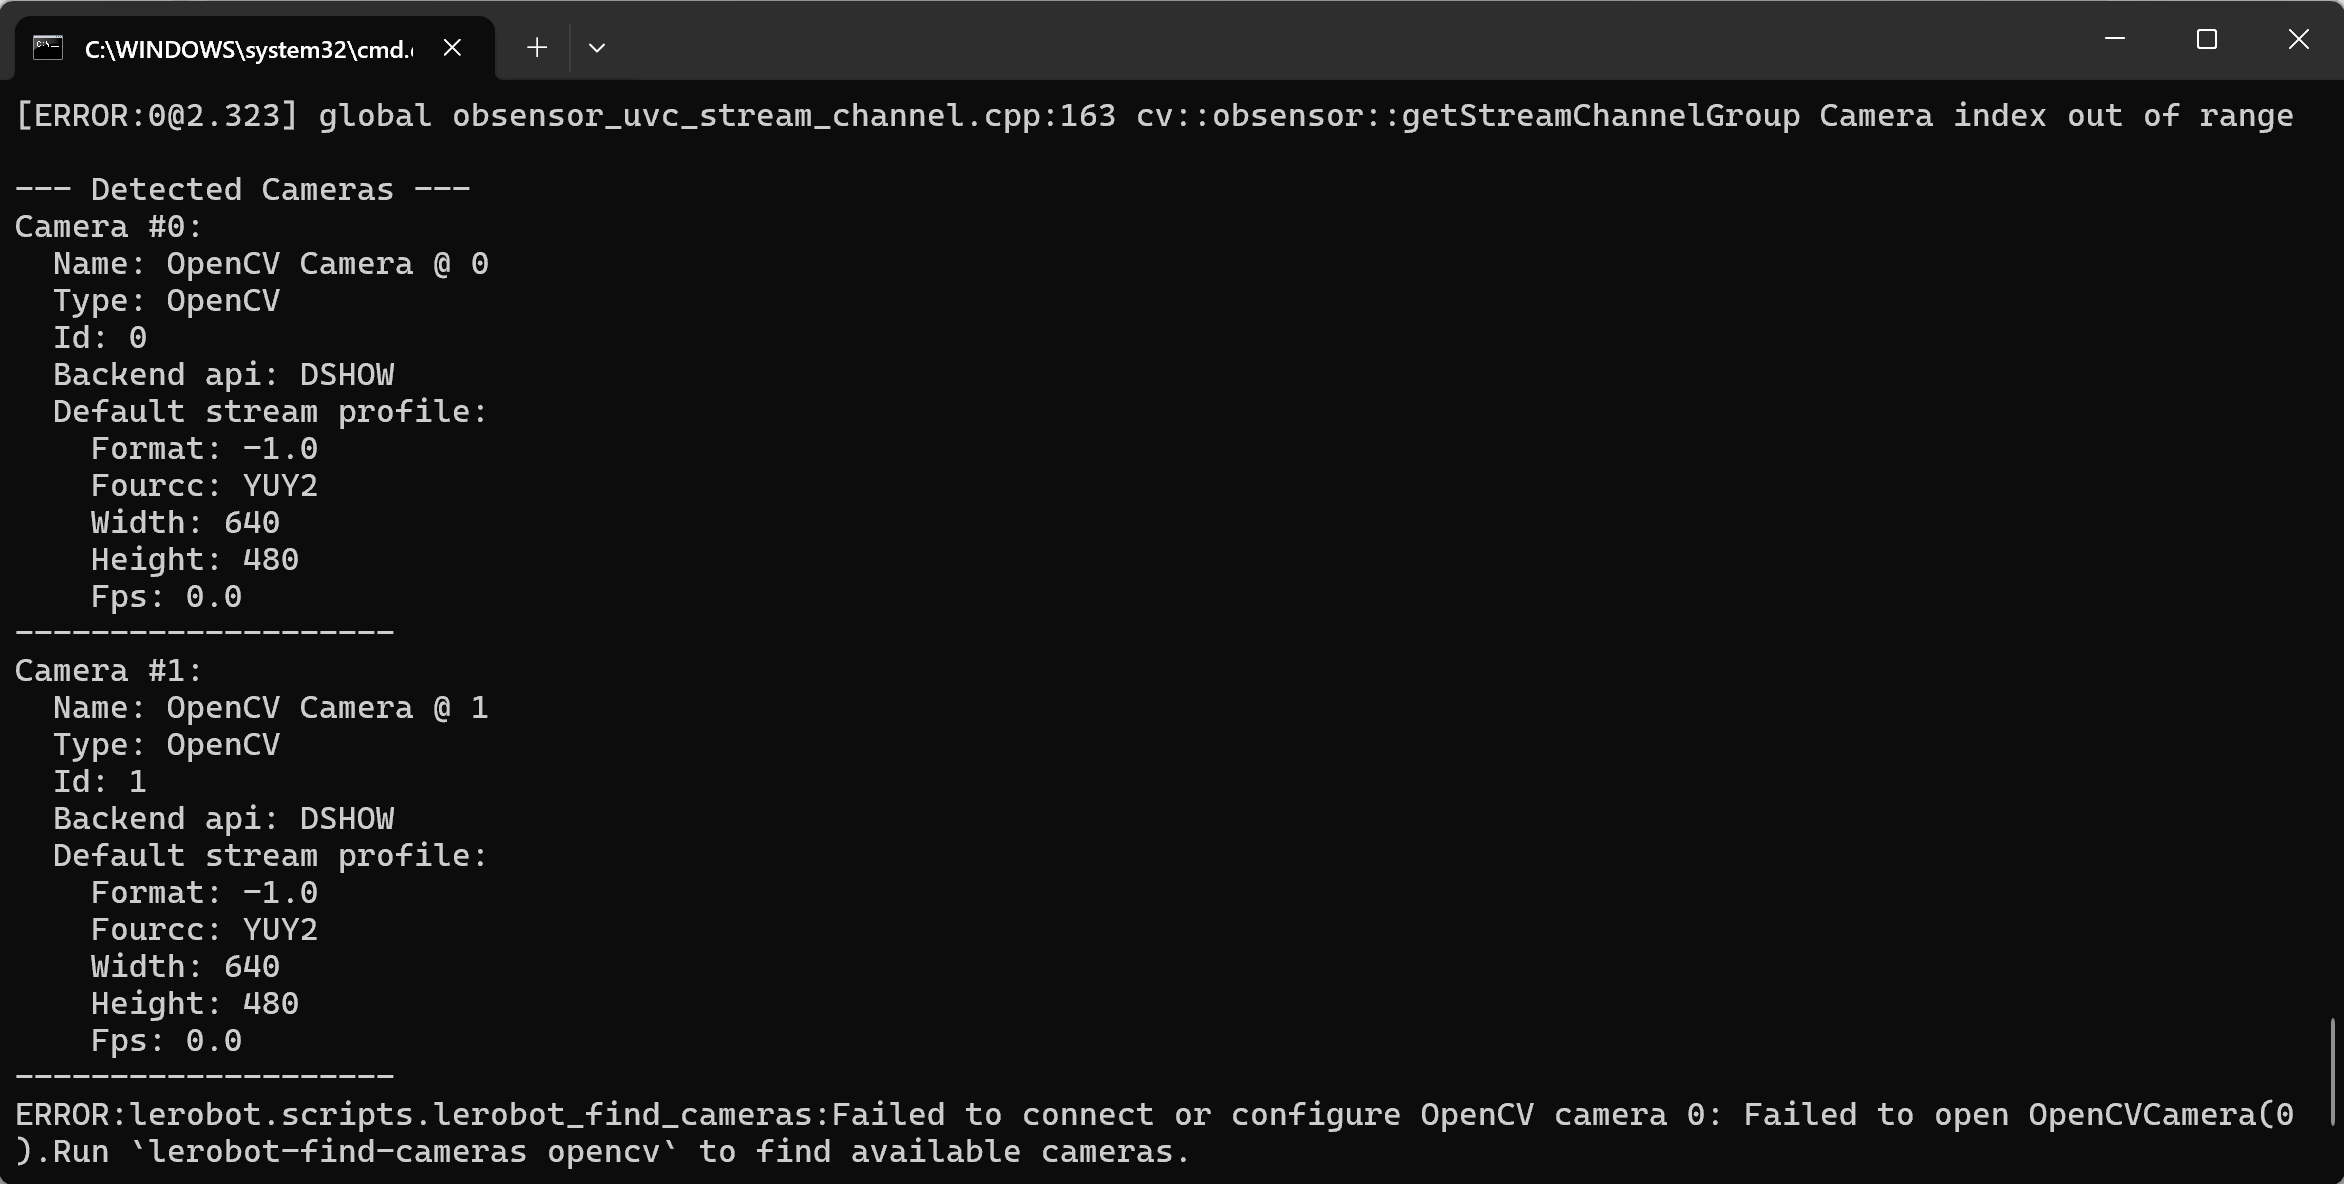
遙操作並顯示攝像頭畫面
Shell
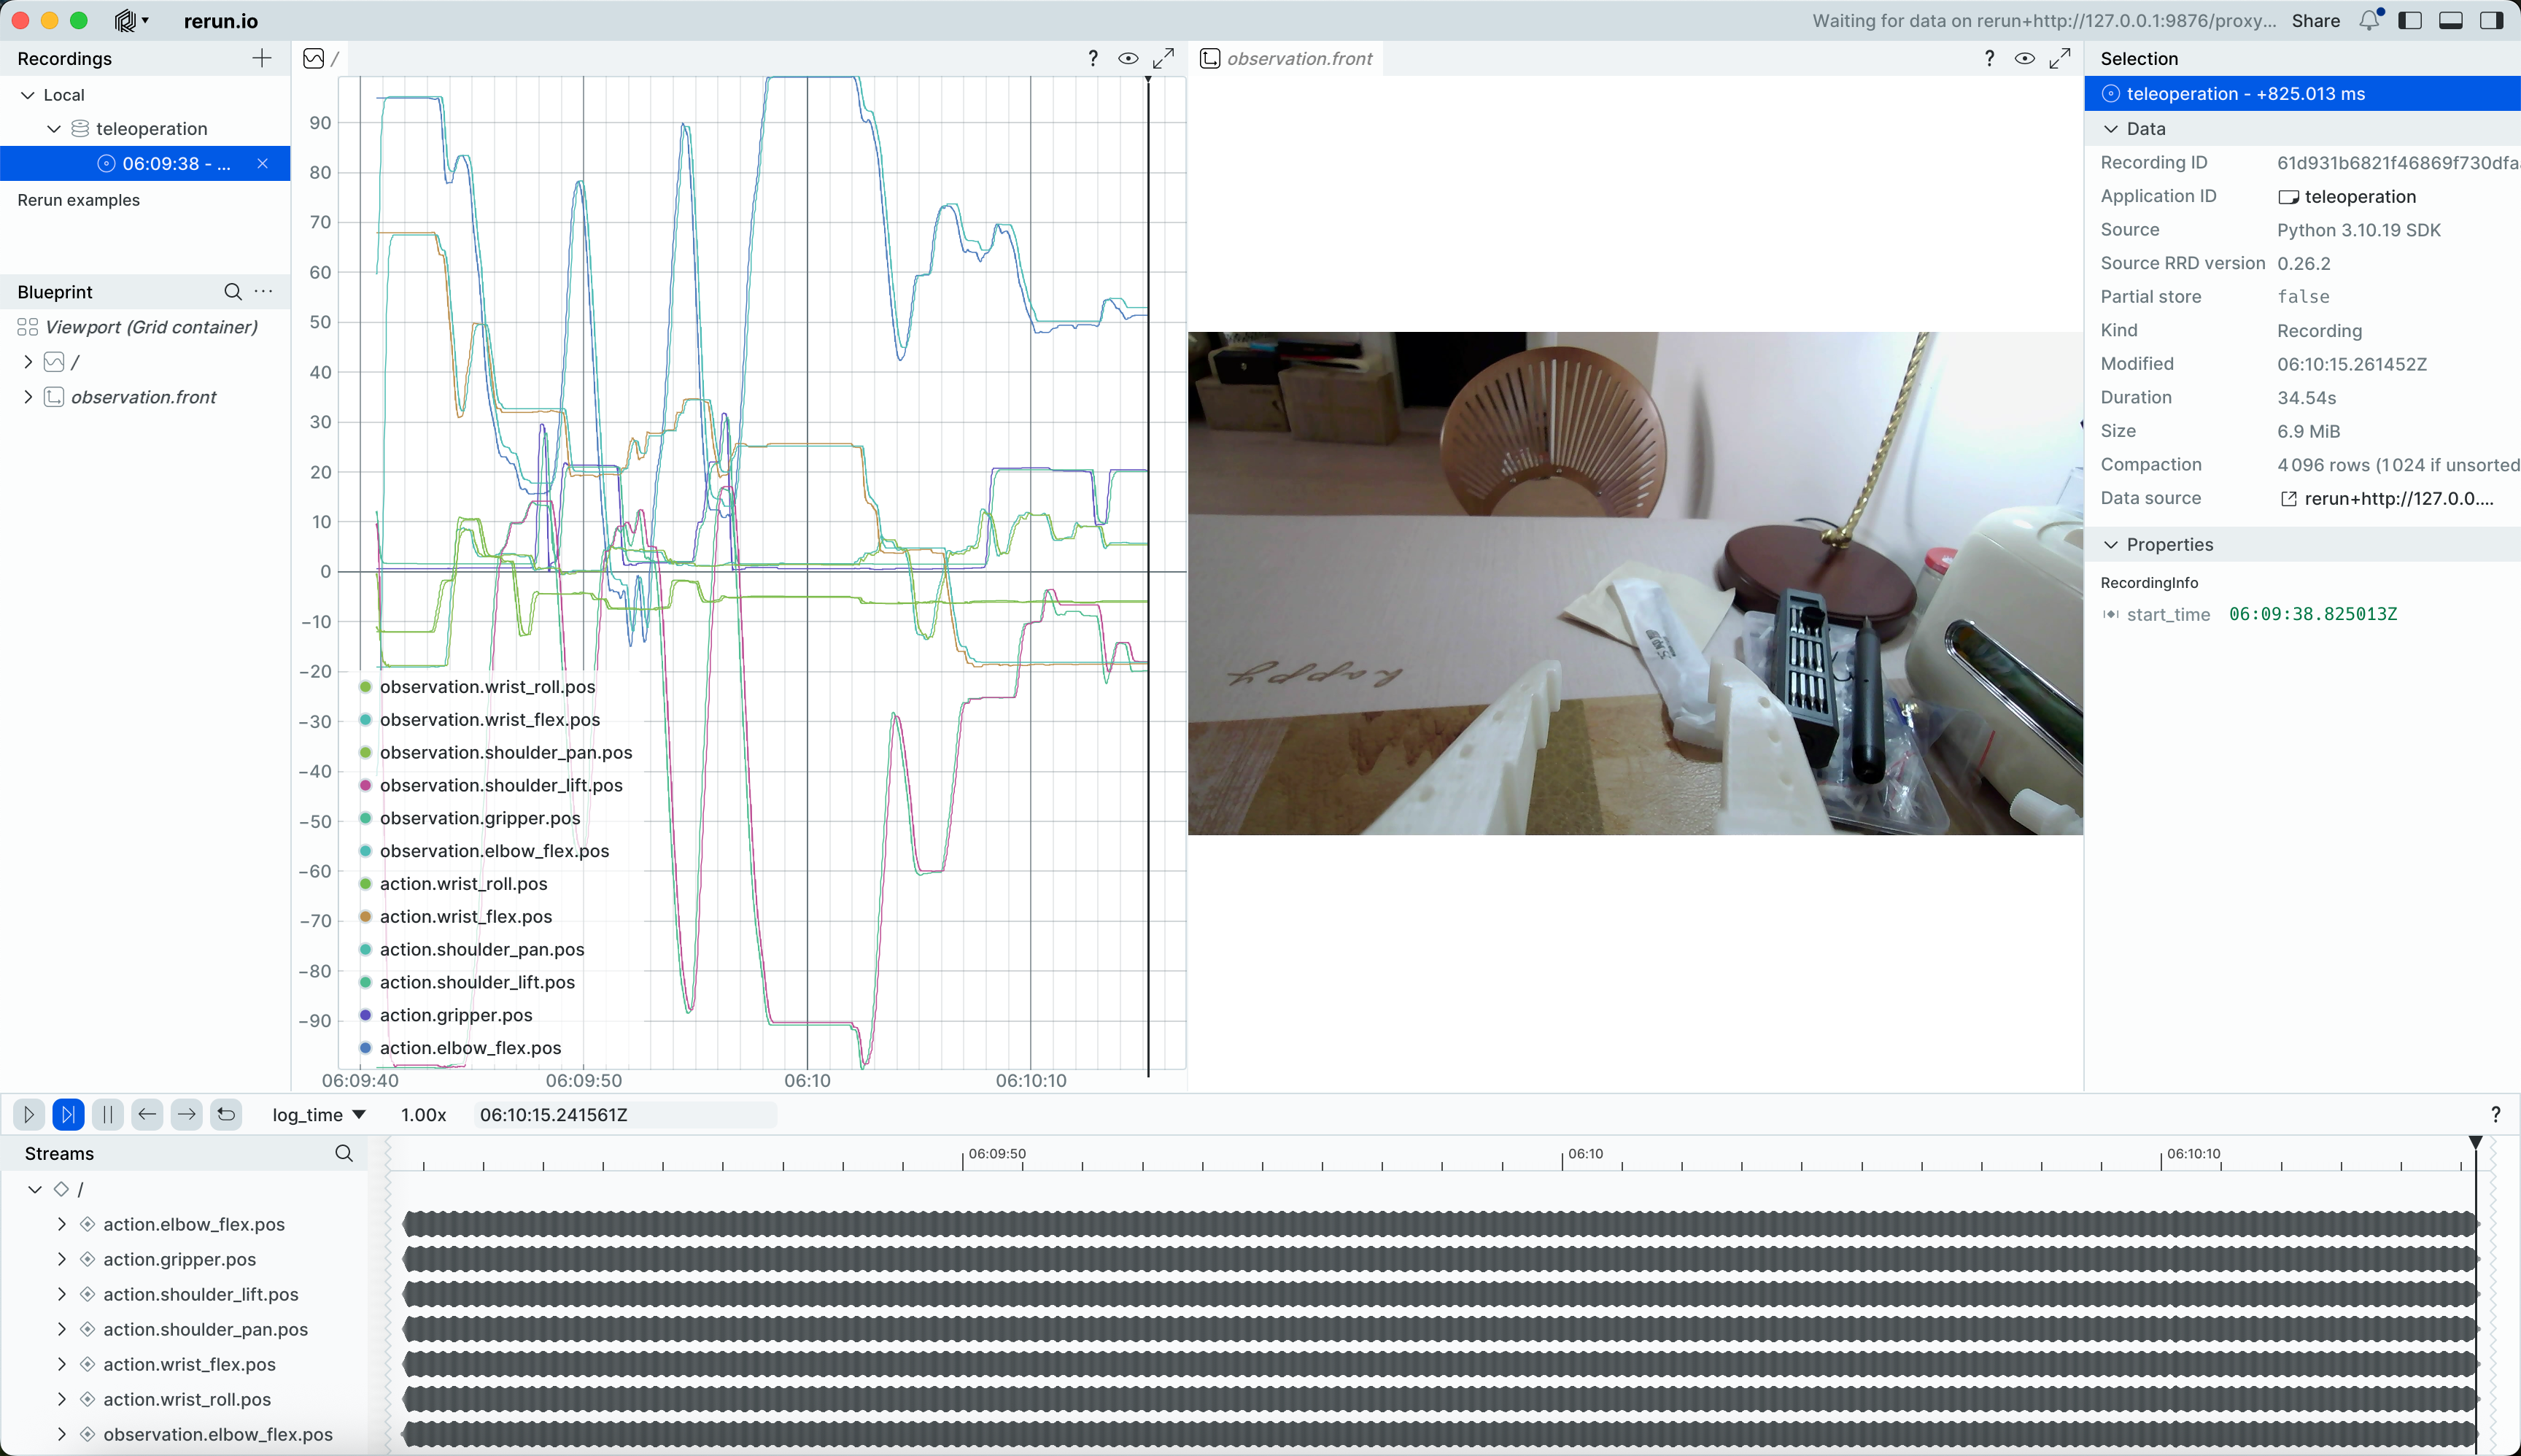
lerobot-teleoperate --robot.type=so101_follower --robot.port=COM6 --robot.id=my_follower_arm --robot.cameras="{ front: {type: opencv, index_or_path: 1, width: 640, height: 480, fps: 60, fourcc: "MJPG"}}" --teleop.type=so101_leader --teleop.port=COM7 --teleop.id=my_leader_arm --display_data=true會打開rerun.io畫面,實時顯示各個舵機關節的軌跡,以及攝像頭實時畫面
並保存圖像至C:\Users\用戶\outputs\captured_images目錄
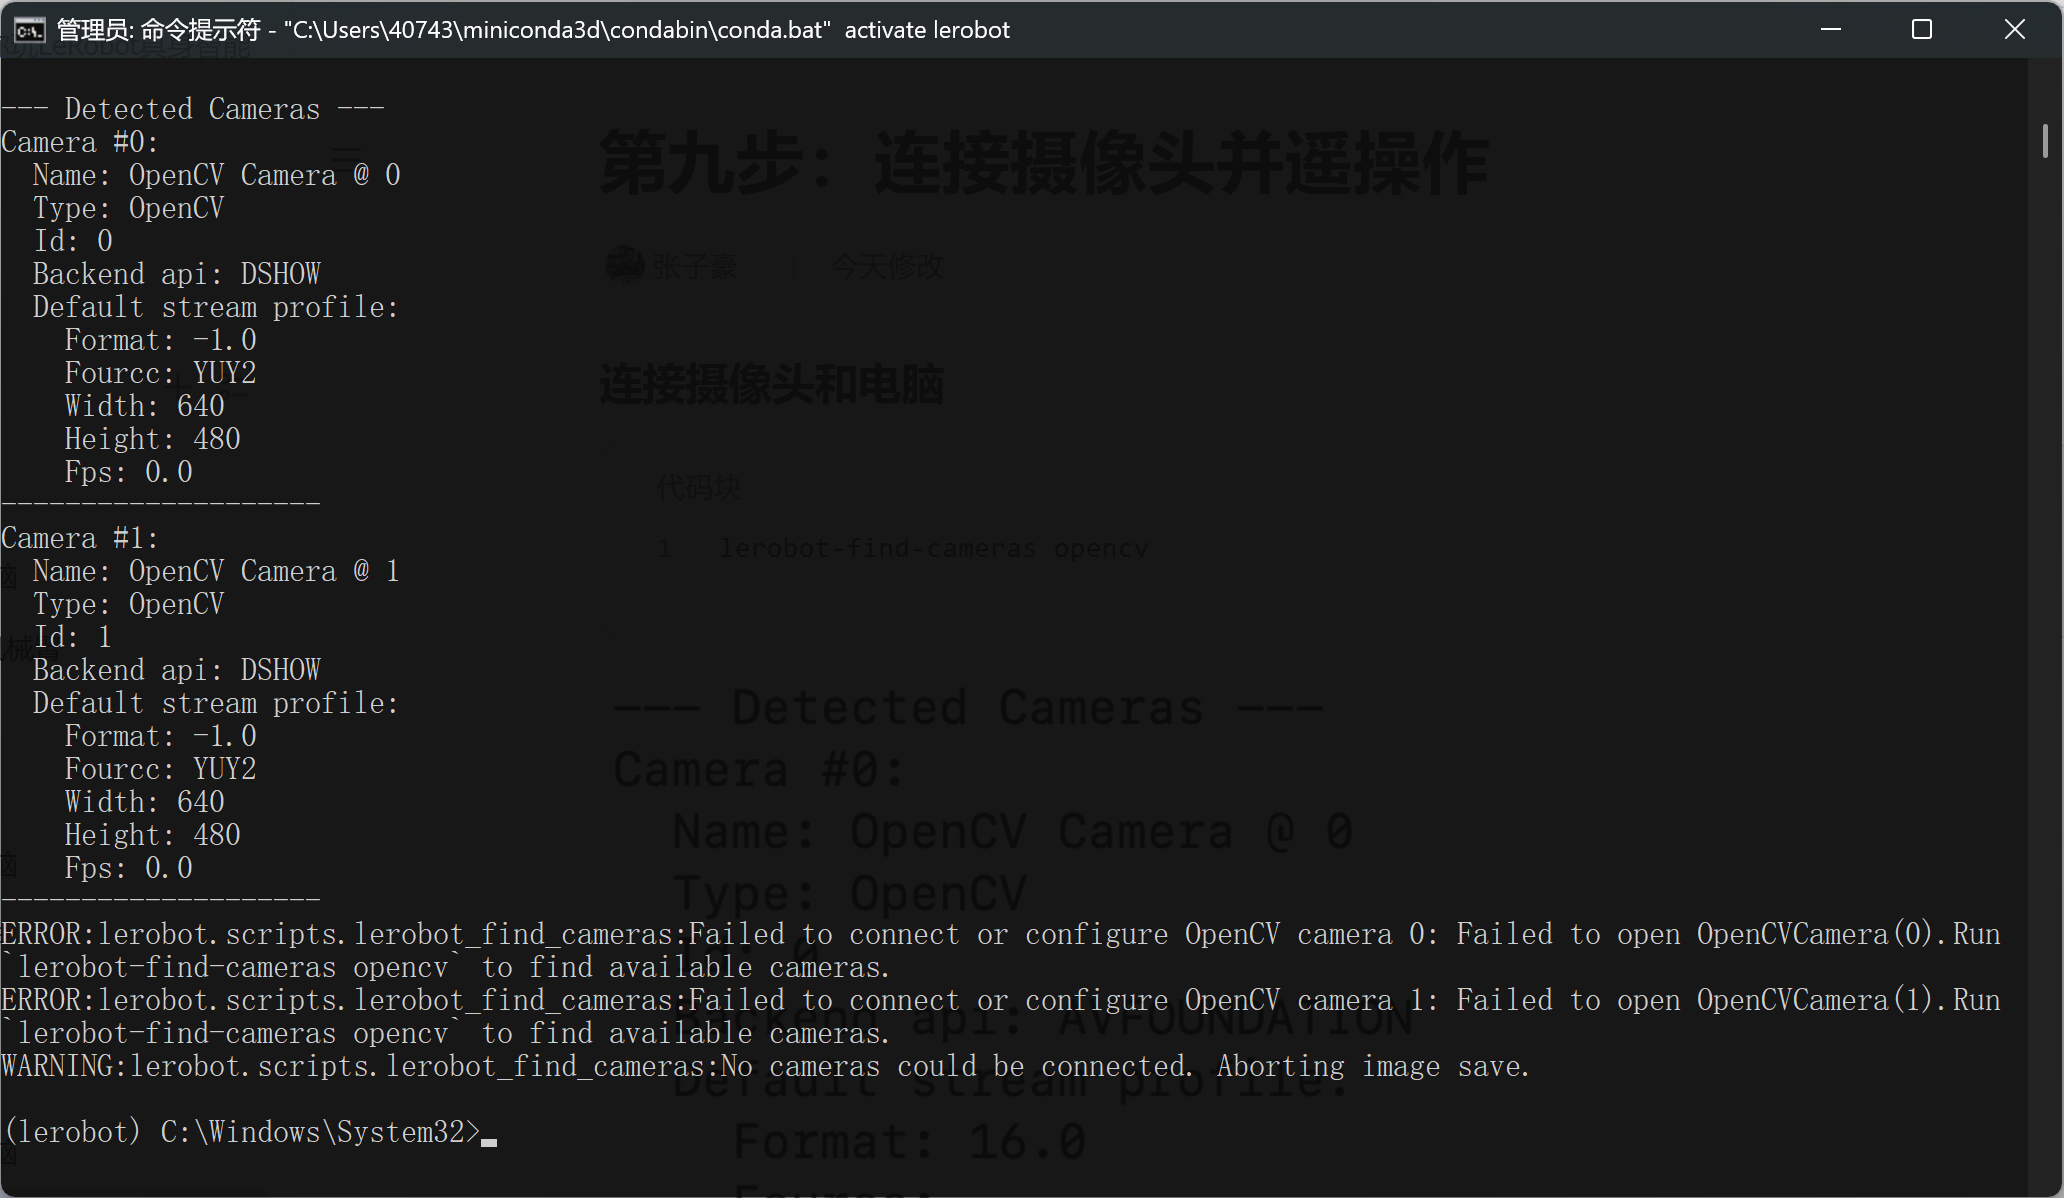
如果遇到了下面這種報錯
攝像頭連接不上,但在騰訊會議中切換攝像頭,仍然能正常開啟
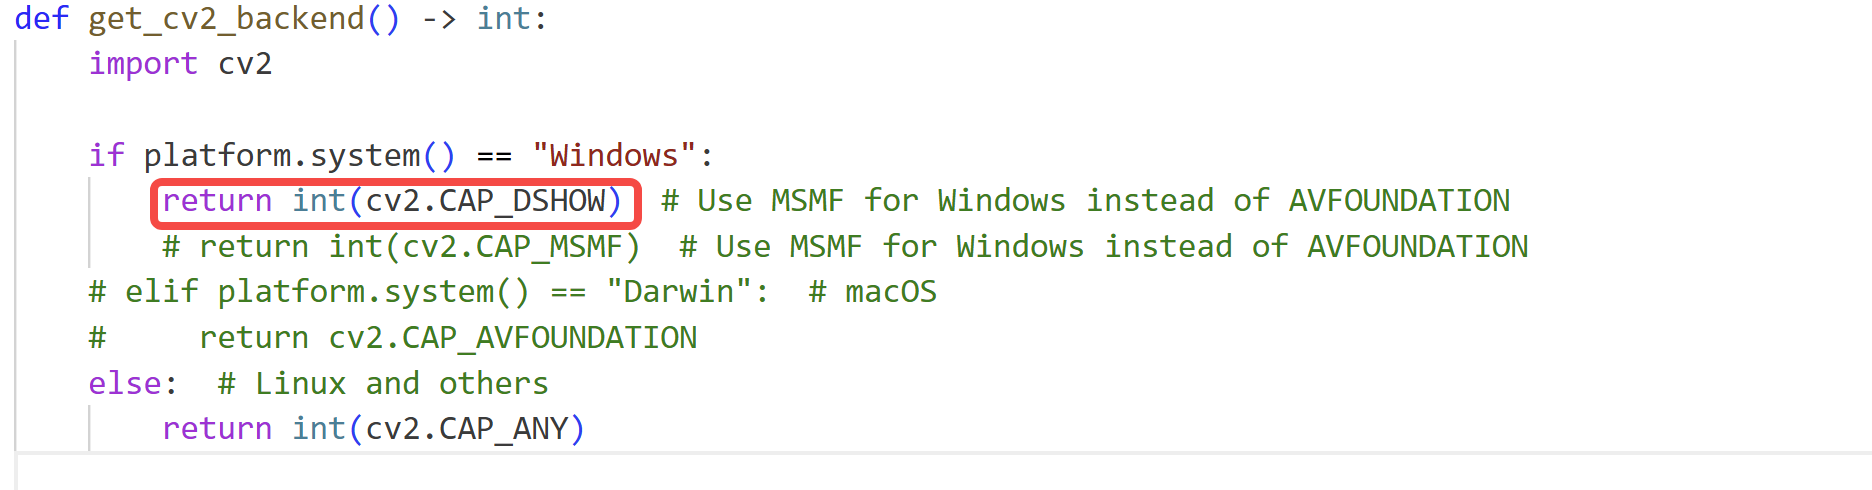
修改lerobot\src\lerobot\cameras\utils.py文件,將OpenCV後端改為cv2.CAP_SHOW
這是一個豆包都無法解決的bug,都怪lerobot庫封裝的太深了,初學者小白很難dubug
連接多個攝像頭,遙操作並顯示攝像頭畫面
Shell
lerobot-teleoperate --robot.type=so101_follower --robot.port=COM6 --robot.id=my_follower_arm --robot.cameras="{ front: {type: opencv, index_or_path: 0, width: 640, height: 480, fps: 60, fourcc: "MJPG"}, side: {type: opencv, index_or_path: 1, width: 640, height: 480, fps: 60, fourcc: "MJPG"}}" --teleop.type=so101_leader --teleop.port=COM7 --teleop.id=my_leader_arm --display_data=true