

Windows
Connect the camera and the computer
Shell
lerobot-find-cameras opencv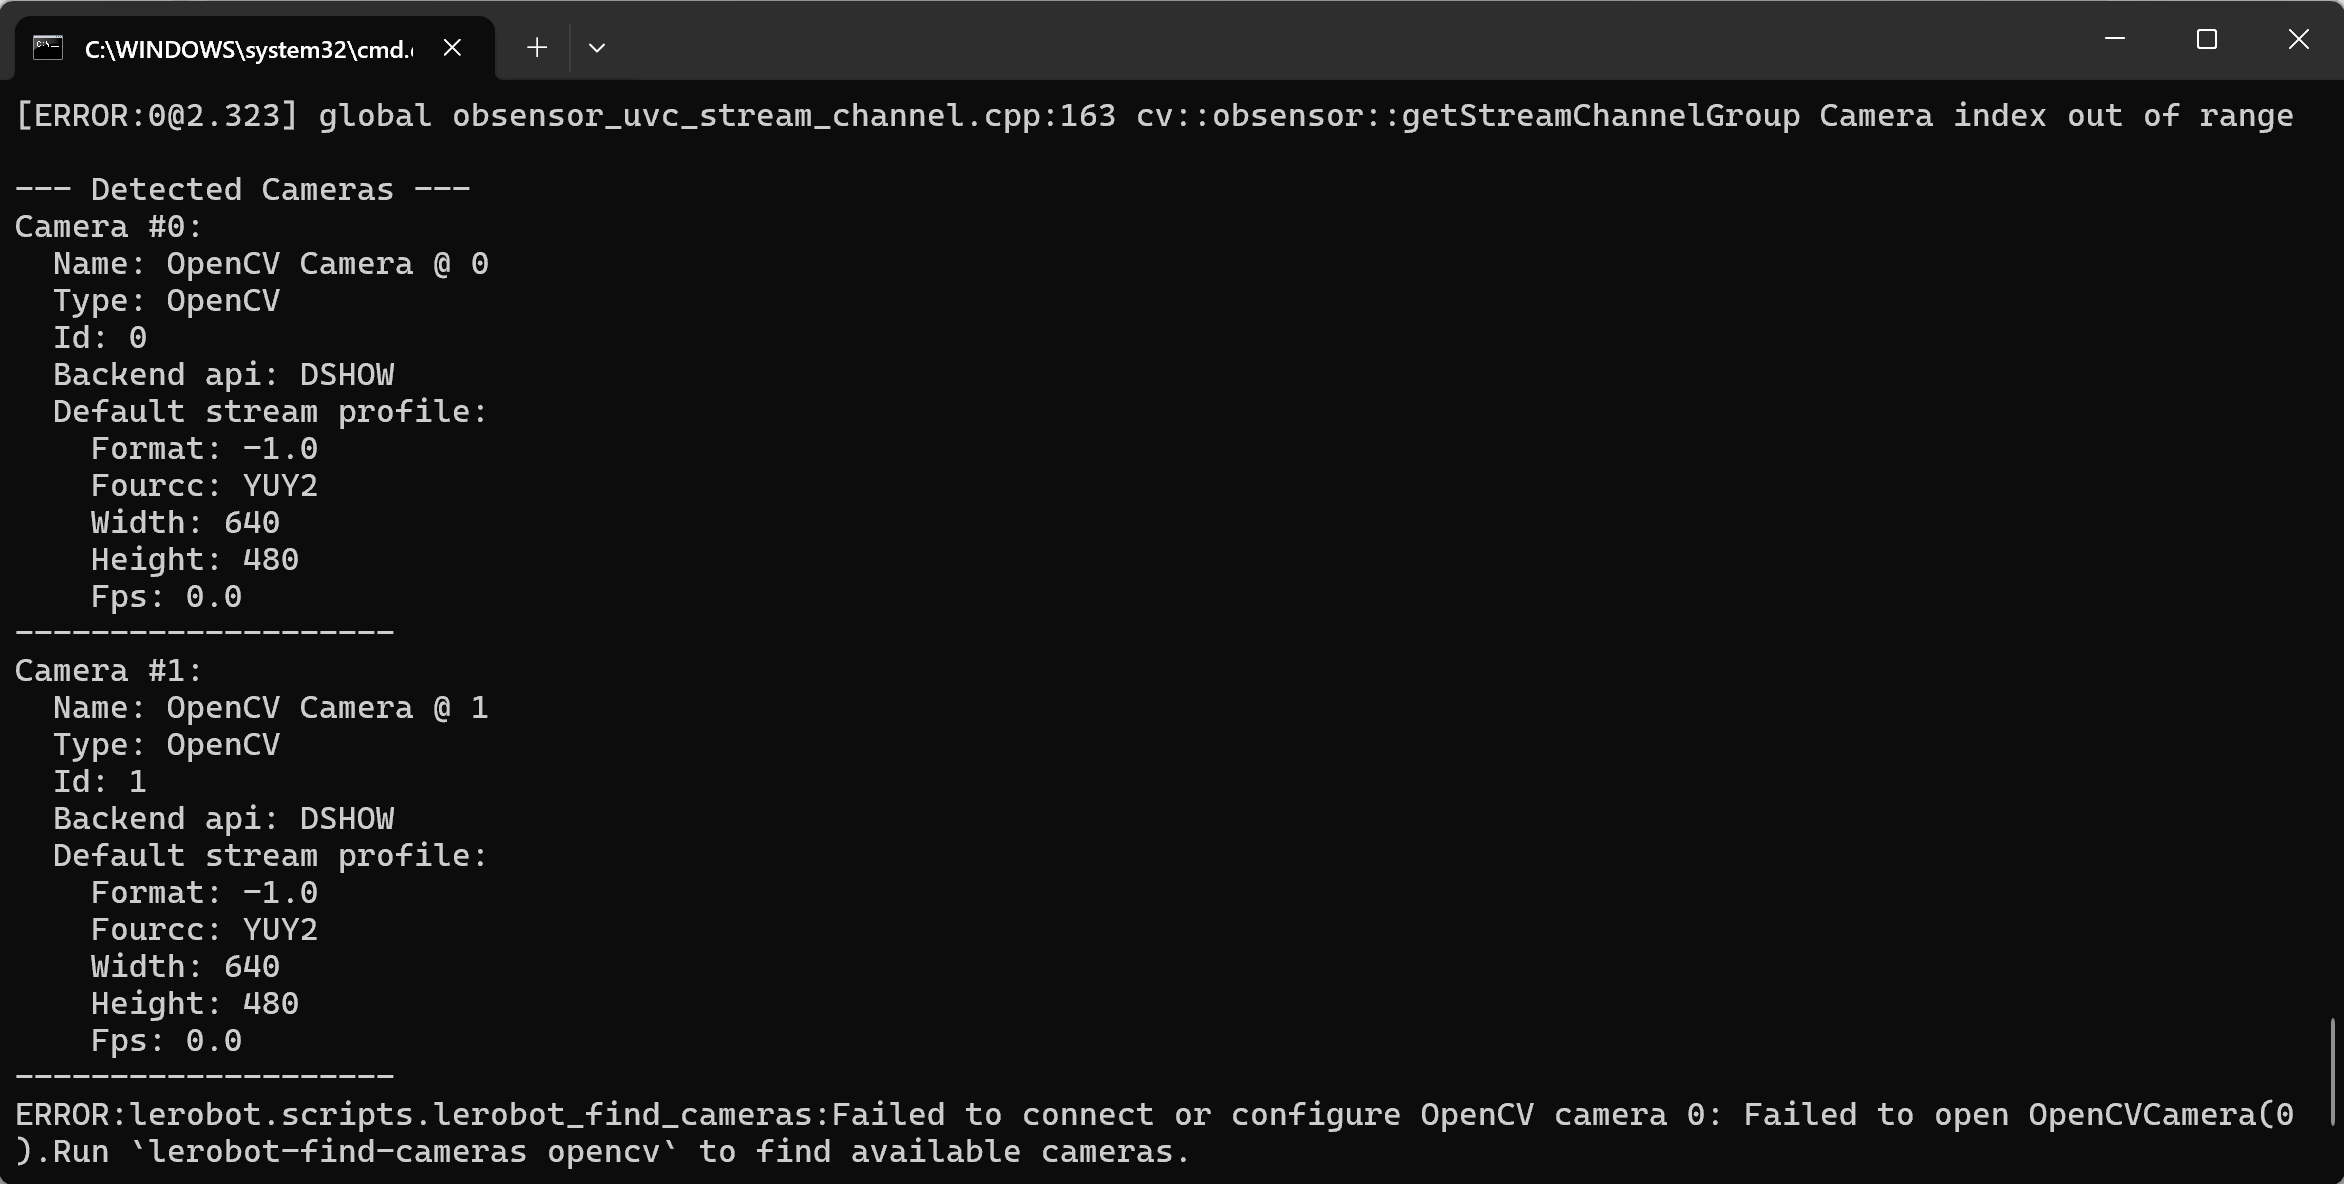
Teleoperate and display the camera feed
Shell
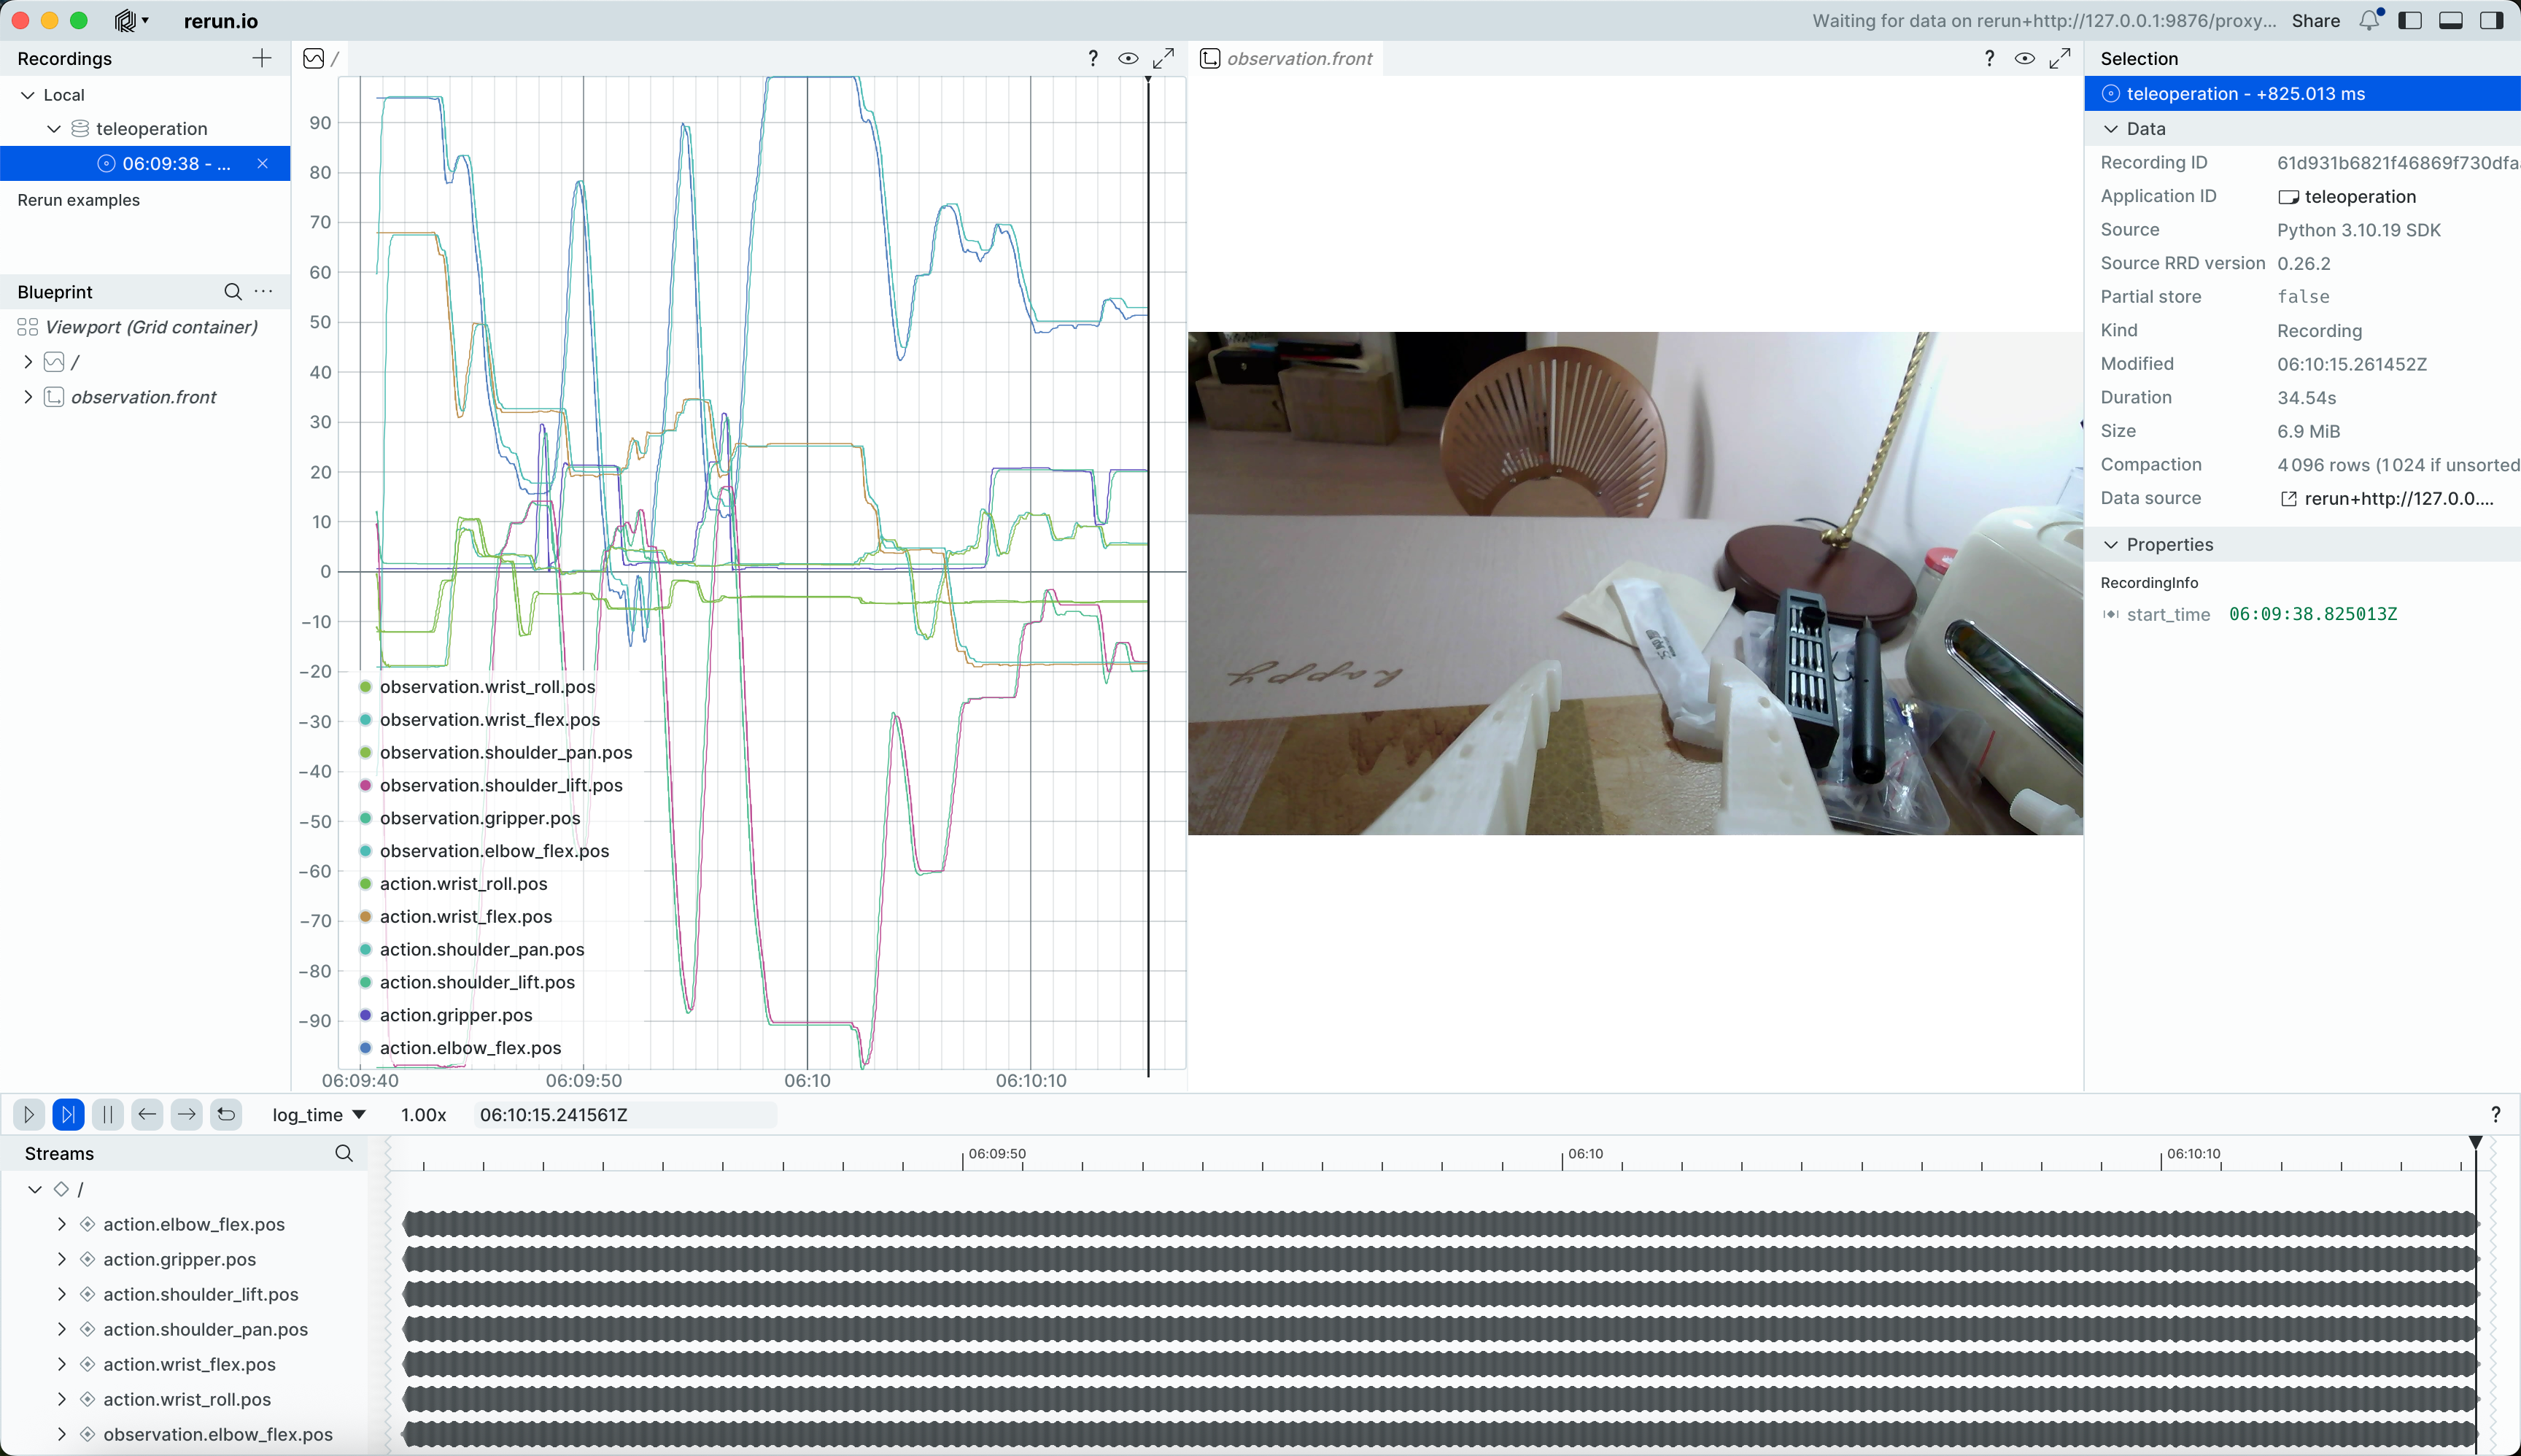
lerobot-teleoperate --robot.type=so101_follower --robot.port=COM6 --robot.id=my_follower_arm --robot.cameras="{ front: {type: opencv, index_or_path: 1, width: 640, height: 480, fps: 60, fourcc: "MJPG"}}" --teleop.type=so101_leader --teleop.port=COM7 --teleop.id=my_leader_arm --display_data=trueA rerun.io window opens, displaying the trajectory of each servo joint and the live camera feed in real time
The images are also saved to the C:\Users\<username>\outputs\captured_images directory
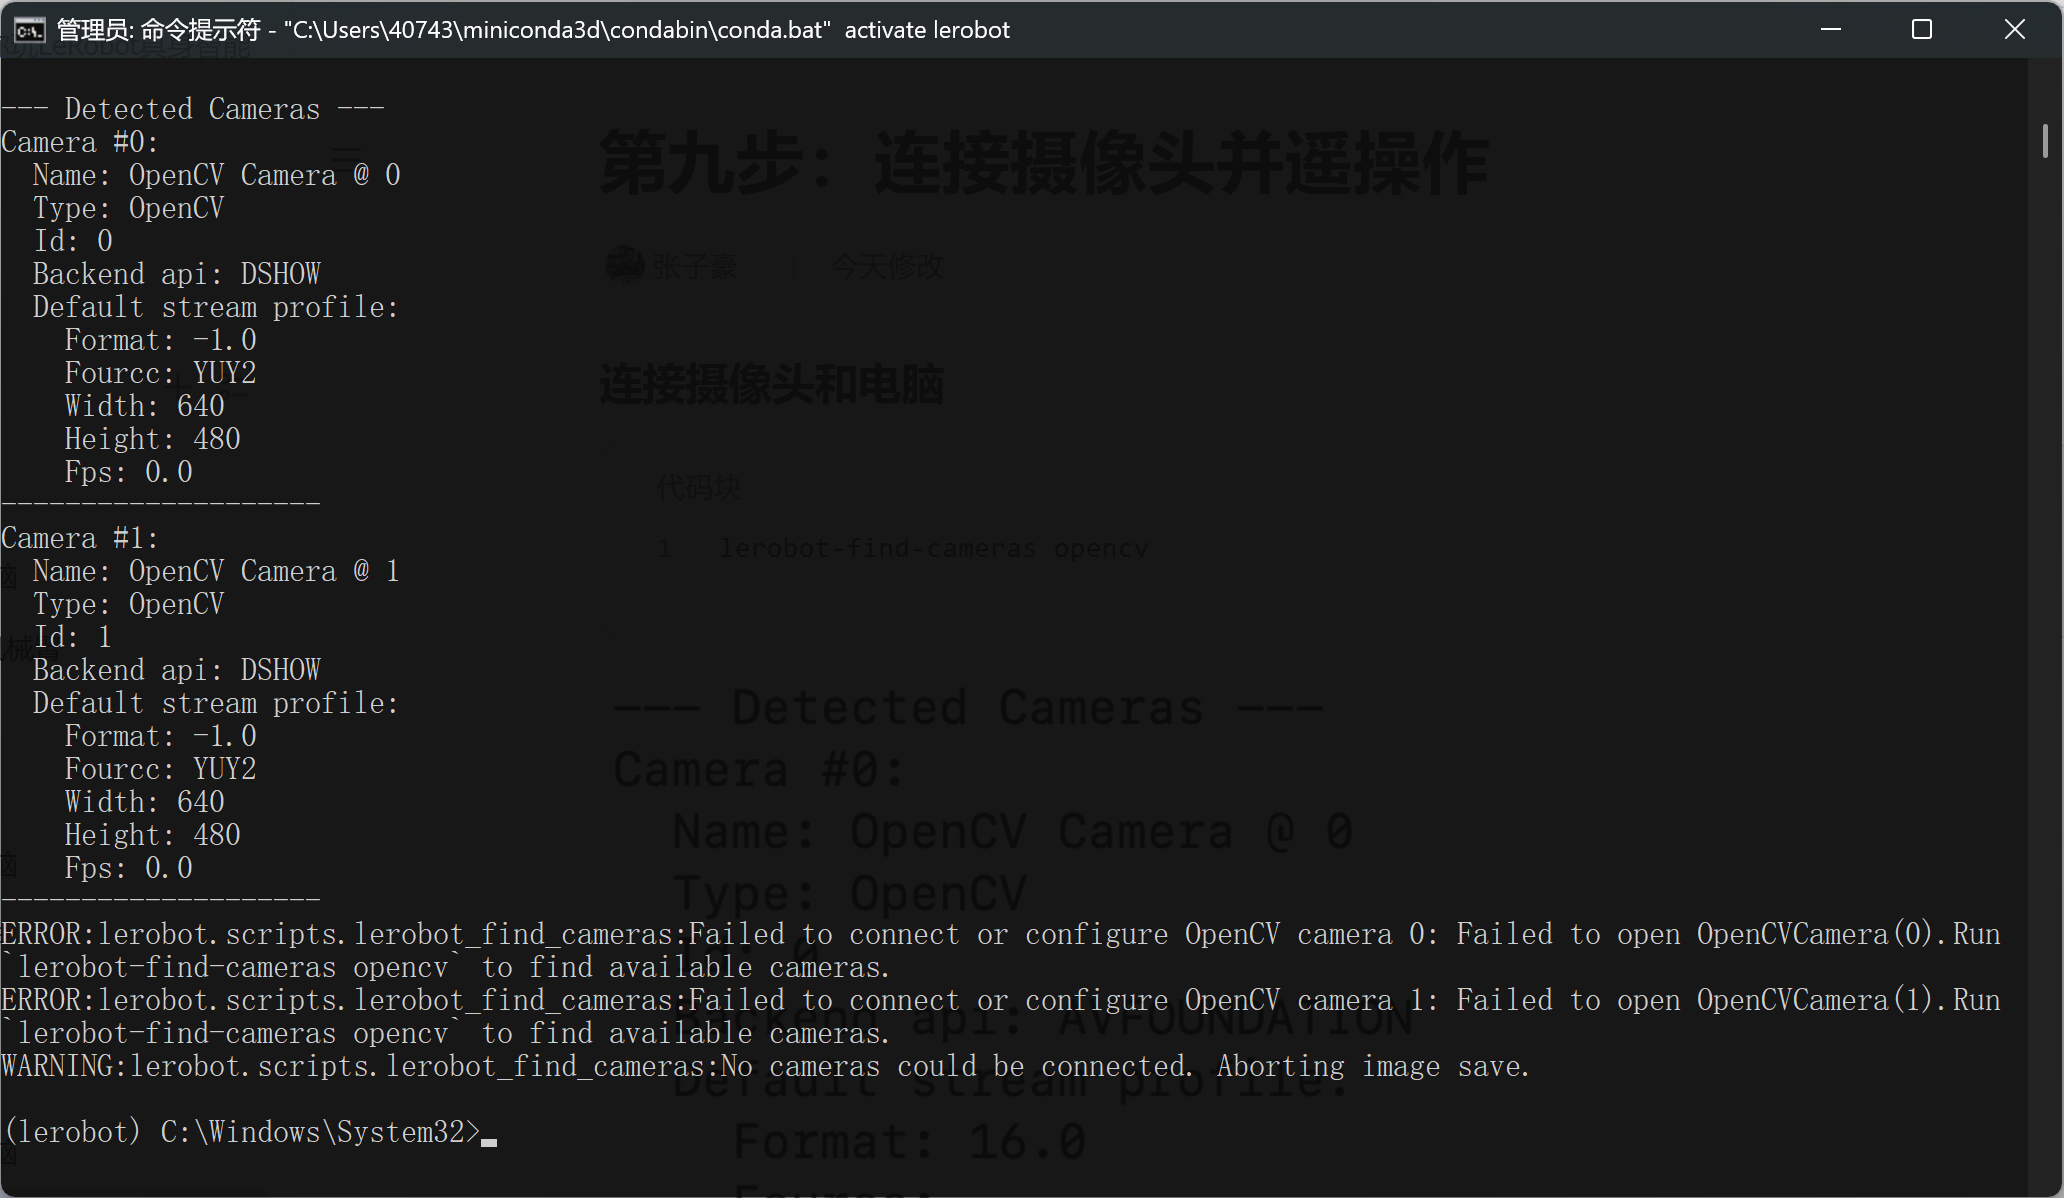
If you encounter the following error
The camera cannot be connected, but switching cameras in Tencent Meeting can still open it normally
Modify the lerobot\src\lerobot\cameras\utils.py file and change the OpenCV backend to cv2.CAP_SHOW
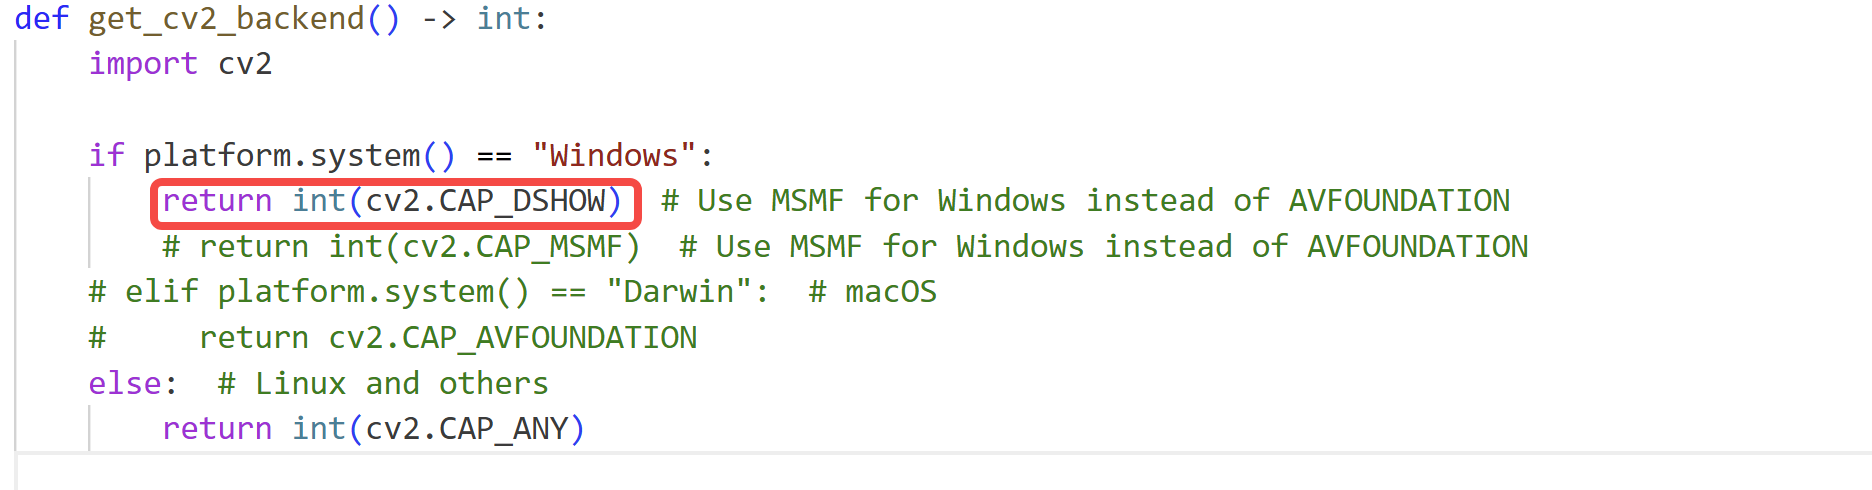
This is a bug that even Doubao cannot solve. It is because the lerobot library is wrapped too deeply, making it very hard for beginners to debug.
Connect multiple cameras, teleoperate and display the camera feed
Shell
lerobot-teleoperate --robot.type=so101_follower --robot.port=COM6 --robot.id=my_follower_arm --robot.cameras="{ front: {type: opencv, index_or_path: 0, width: 640, height: 480, fps: 60, fourcc: "MJPG"}, side: {type: opencv, index_or_path: 1, width: 640, height: 480, fps: 60, fourcc: "MJPG"}}" --teleop.type=so101_leader --teleop.port=COM7 --teleop.id=my_leader_arm --display_data=true