

Step 7: Training — Cloud GPU Setup
Read this before training
The dataset has already been collected in step 6, and the next thing is to train a model. This step involves three things, and this page covers the first two:
- Prepare the training environment: open an instance on a cloud GPU platform and install LeRobot, ffmpeg, wandb, etc. (this page)
- Upload the dataset to the cloud GPU: the data collected in step 6 is still on your own computer (see the "Mounting the dataset" section of this page)
- Run the training command: for how to choose an algorithm and tune parameters, see the following pages
Datasets used in this tutorial
In the training and inference commands, the dataset used is the handshake task lerobot_my_dataset_shake_hands (the third page of step 6 demonstrates exactly this one), and the local path is ~/lerobot_my_dataset_shake_hands. Before running the training command, make sure this directory really exists and that the name matches exactly.
If the task you want to train is one you collected yourself, just replace all occurrences of lerobot_my_dataset_shake_hands in the commands with your own dataset name.
How to choose a training algorithm
| Algorithm | Documentation | Features |
|---|---|---|
| ACT | Training command-ACT | Recommended for beginners; small model, fast training, results visible in one hour on a single GPU |
| SmolVLA | Training command-smolvla | Recommended as a next step; can be fine-tuned from a pretrained model |
| pi0 | Training command-pi0 | Best results, but high VRAM usage and slow training |
| pi0.5 | Training command-pi0.5 | An improved version of pi0 |
| pi0fast | Training command-pi0fast | Faster inference speed |
It is recommended to first run through the complete workflow with ACT, and switch to another algorithm once you are familiar with it.
After training
- To upload the trained model to Hugging Face (backup, switching machines, sharing with others), see Upload a model to HuggingFace (Optional)
- To download the model back to your local computer, see Obtain the model weight file
Training on your own machine
If your computer already has an NVIDIA GPU, you can skip the cloud GPU and train directly on it, see Local Ubuntu training.
Turn off the network proxy on your own computer
Otherwise the Jupyter command line may not open
Log in to the cloud GPU platform Featurize
https://featurize.cn?s=d7ce99f842414bfcaea5662a97581bd1
Launch a cloud GPU instance
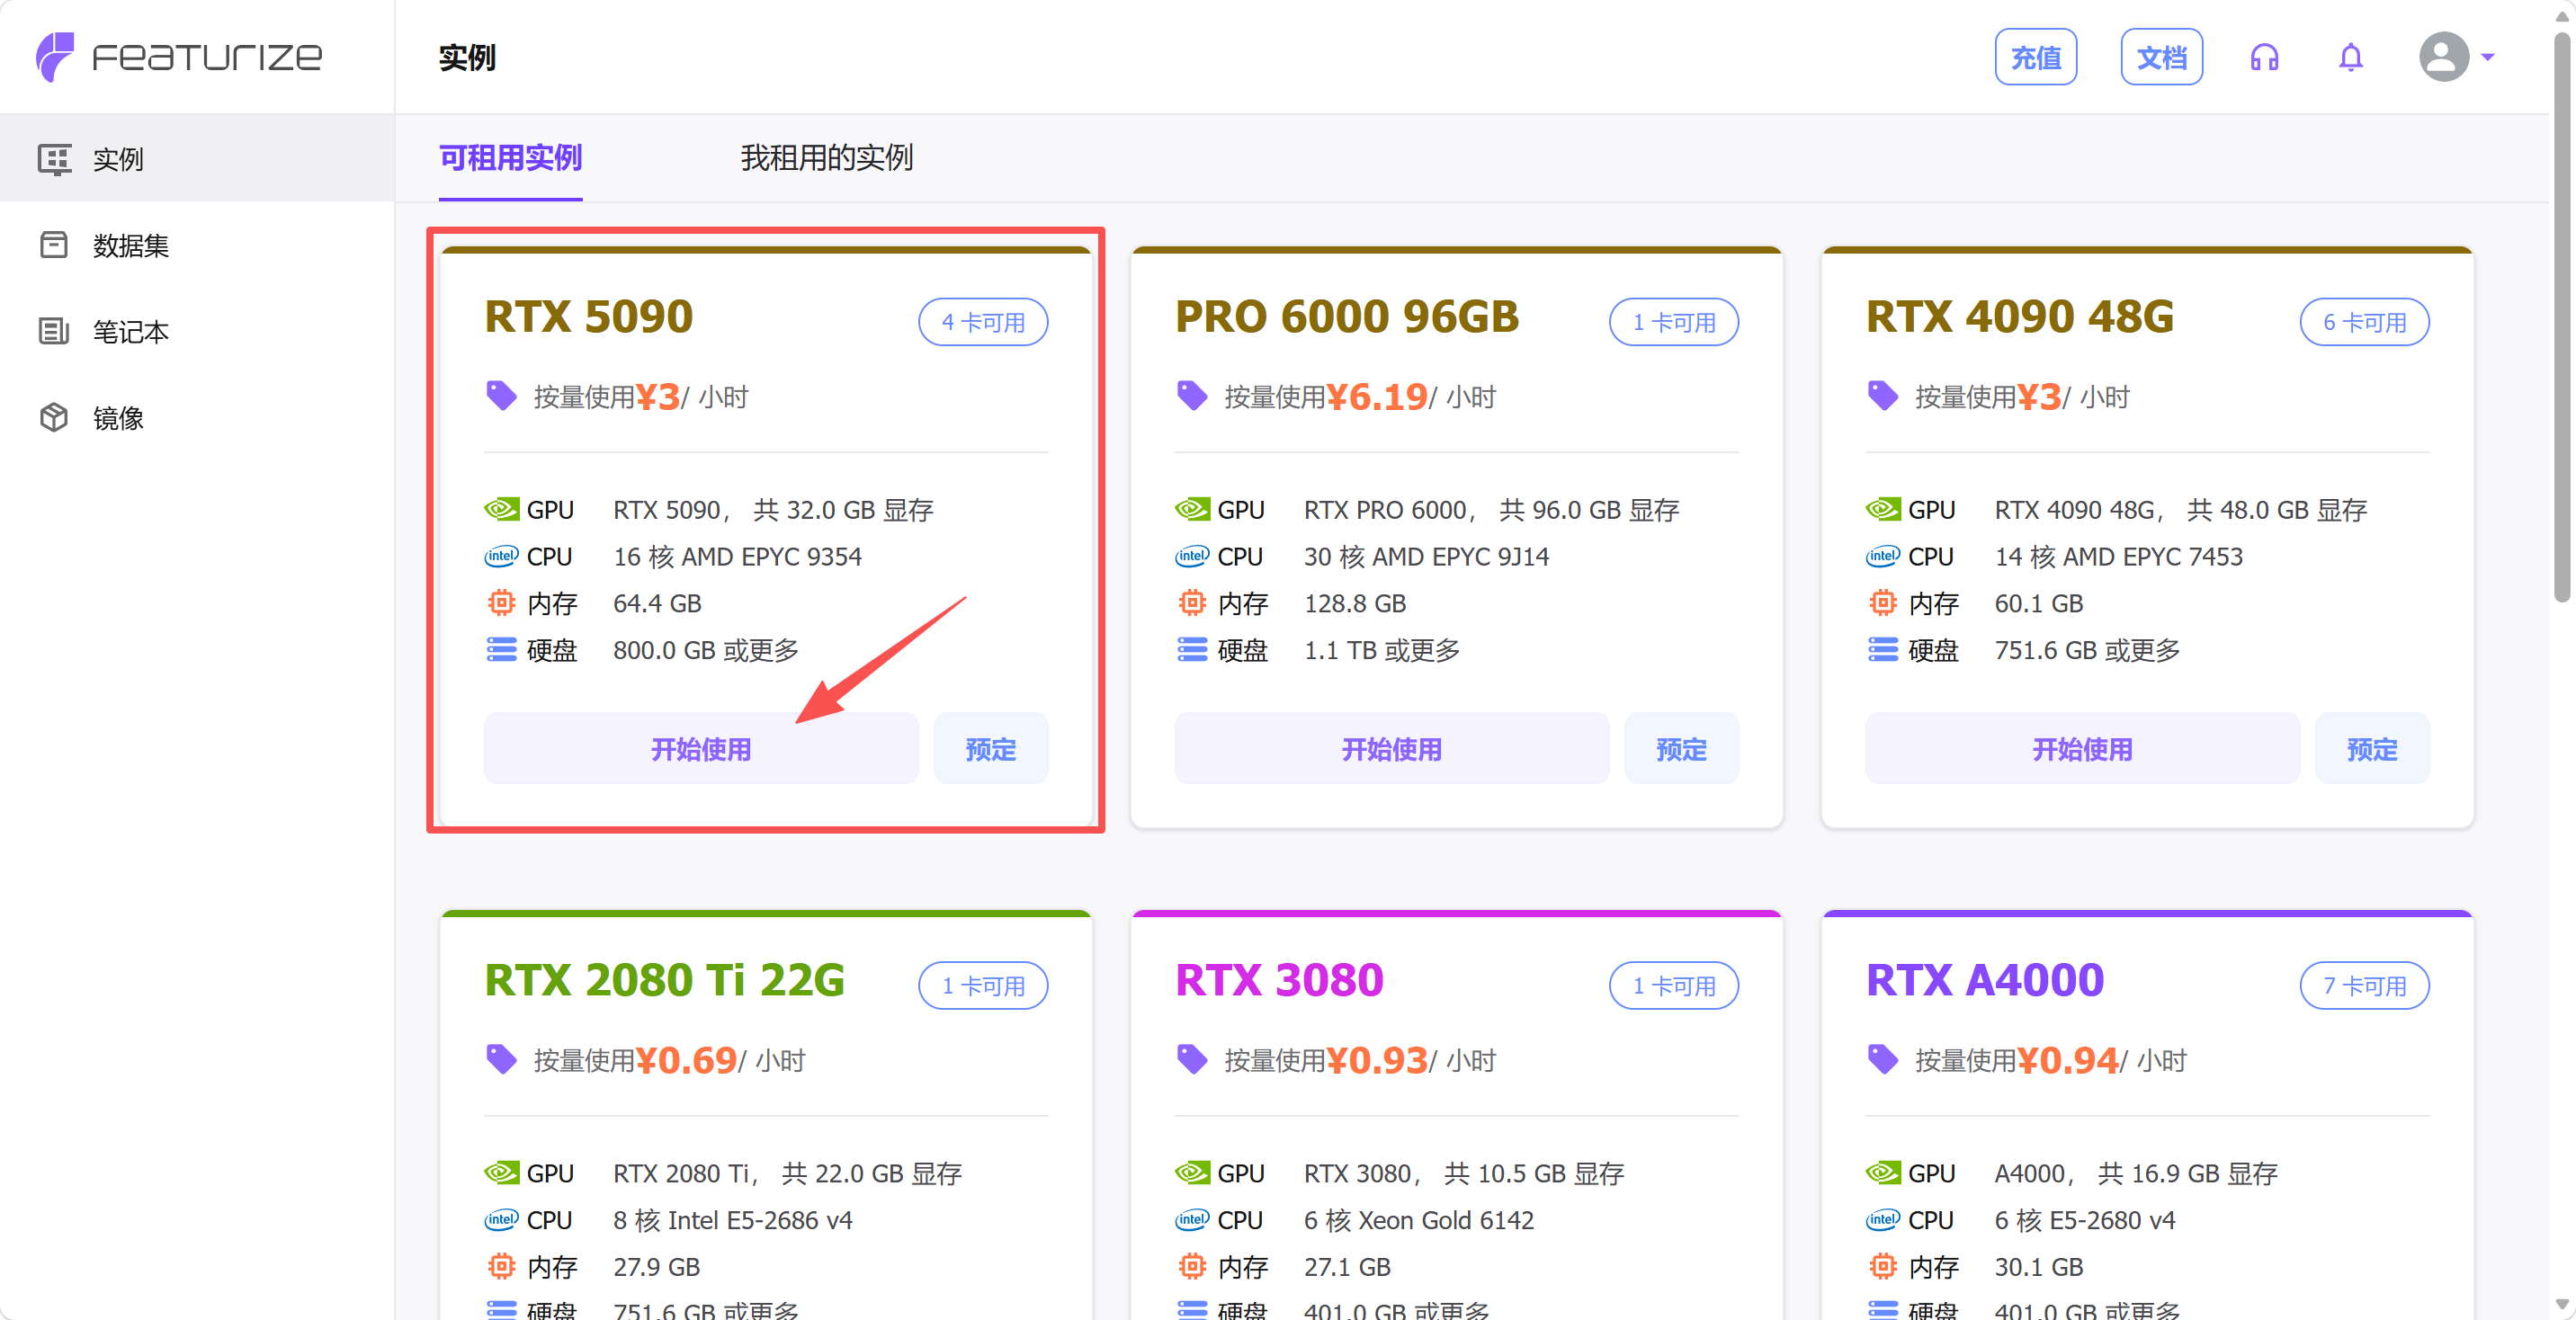
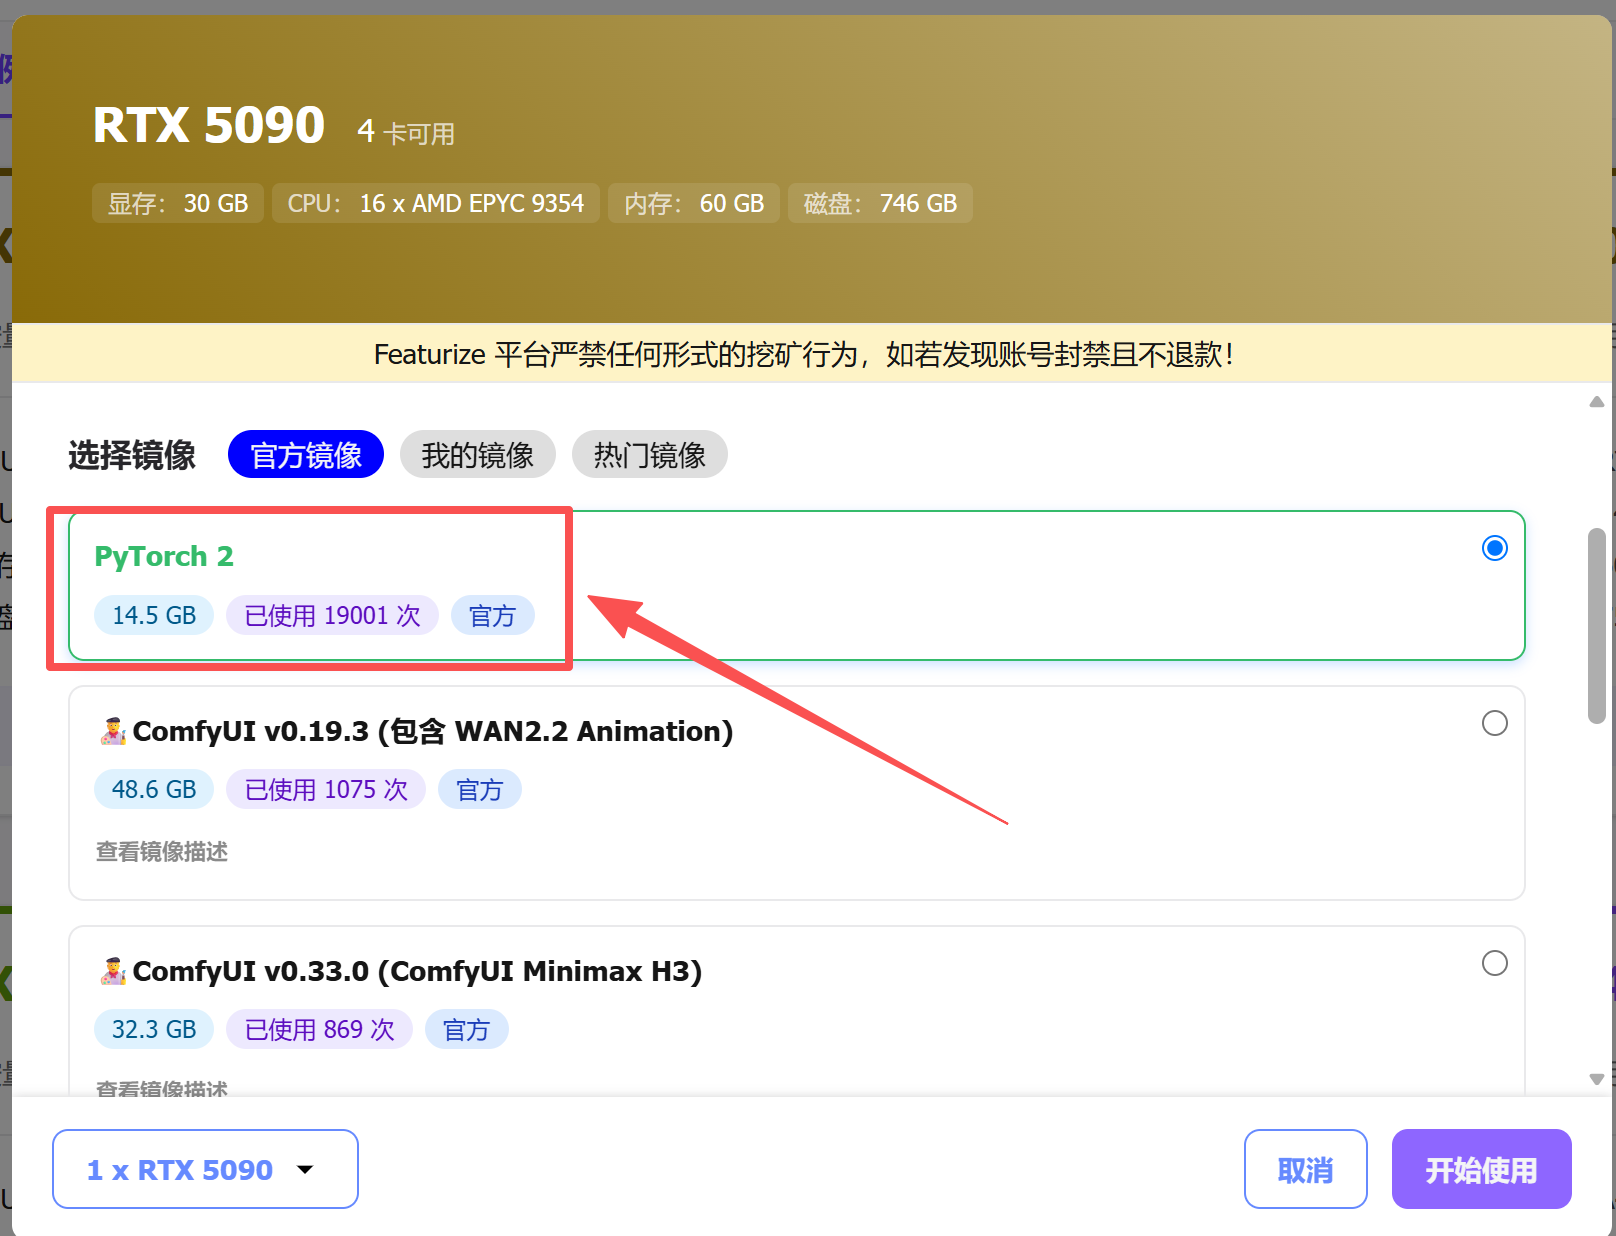
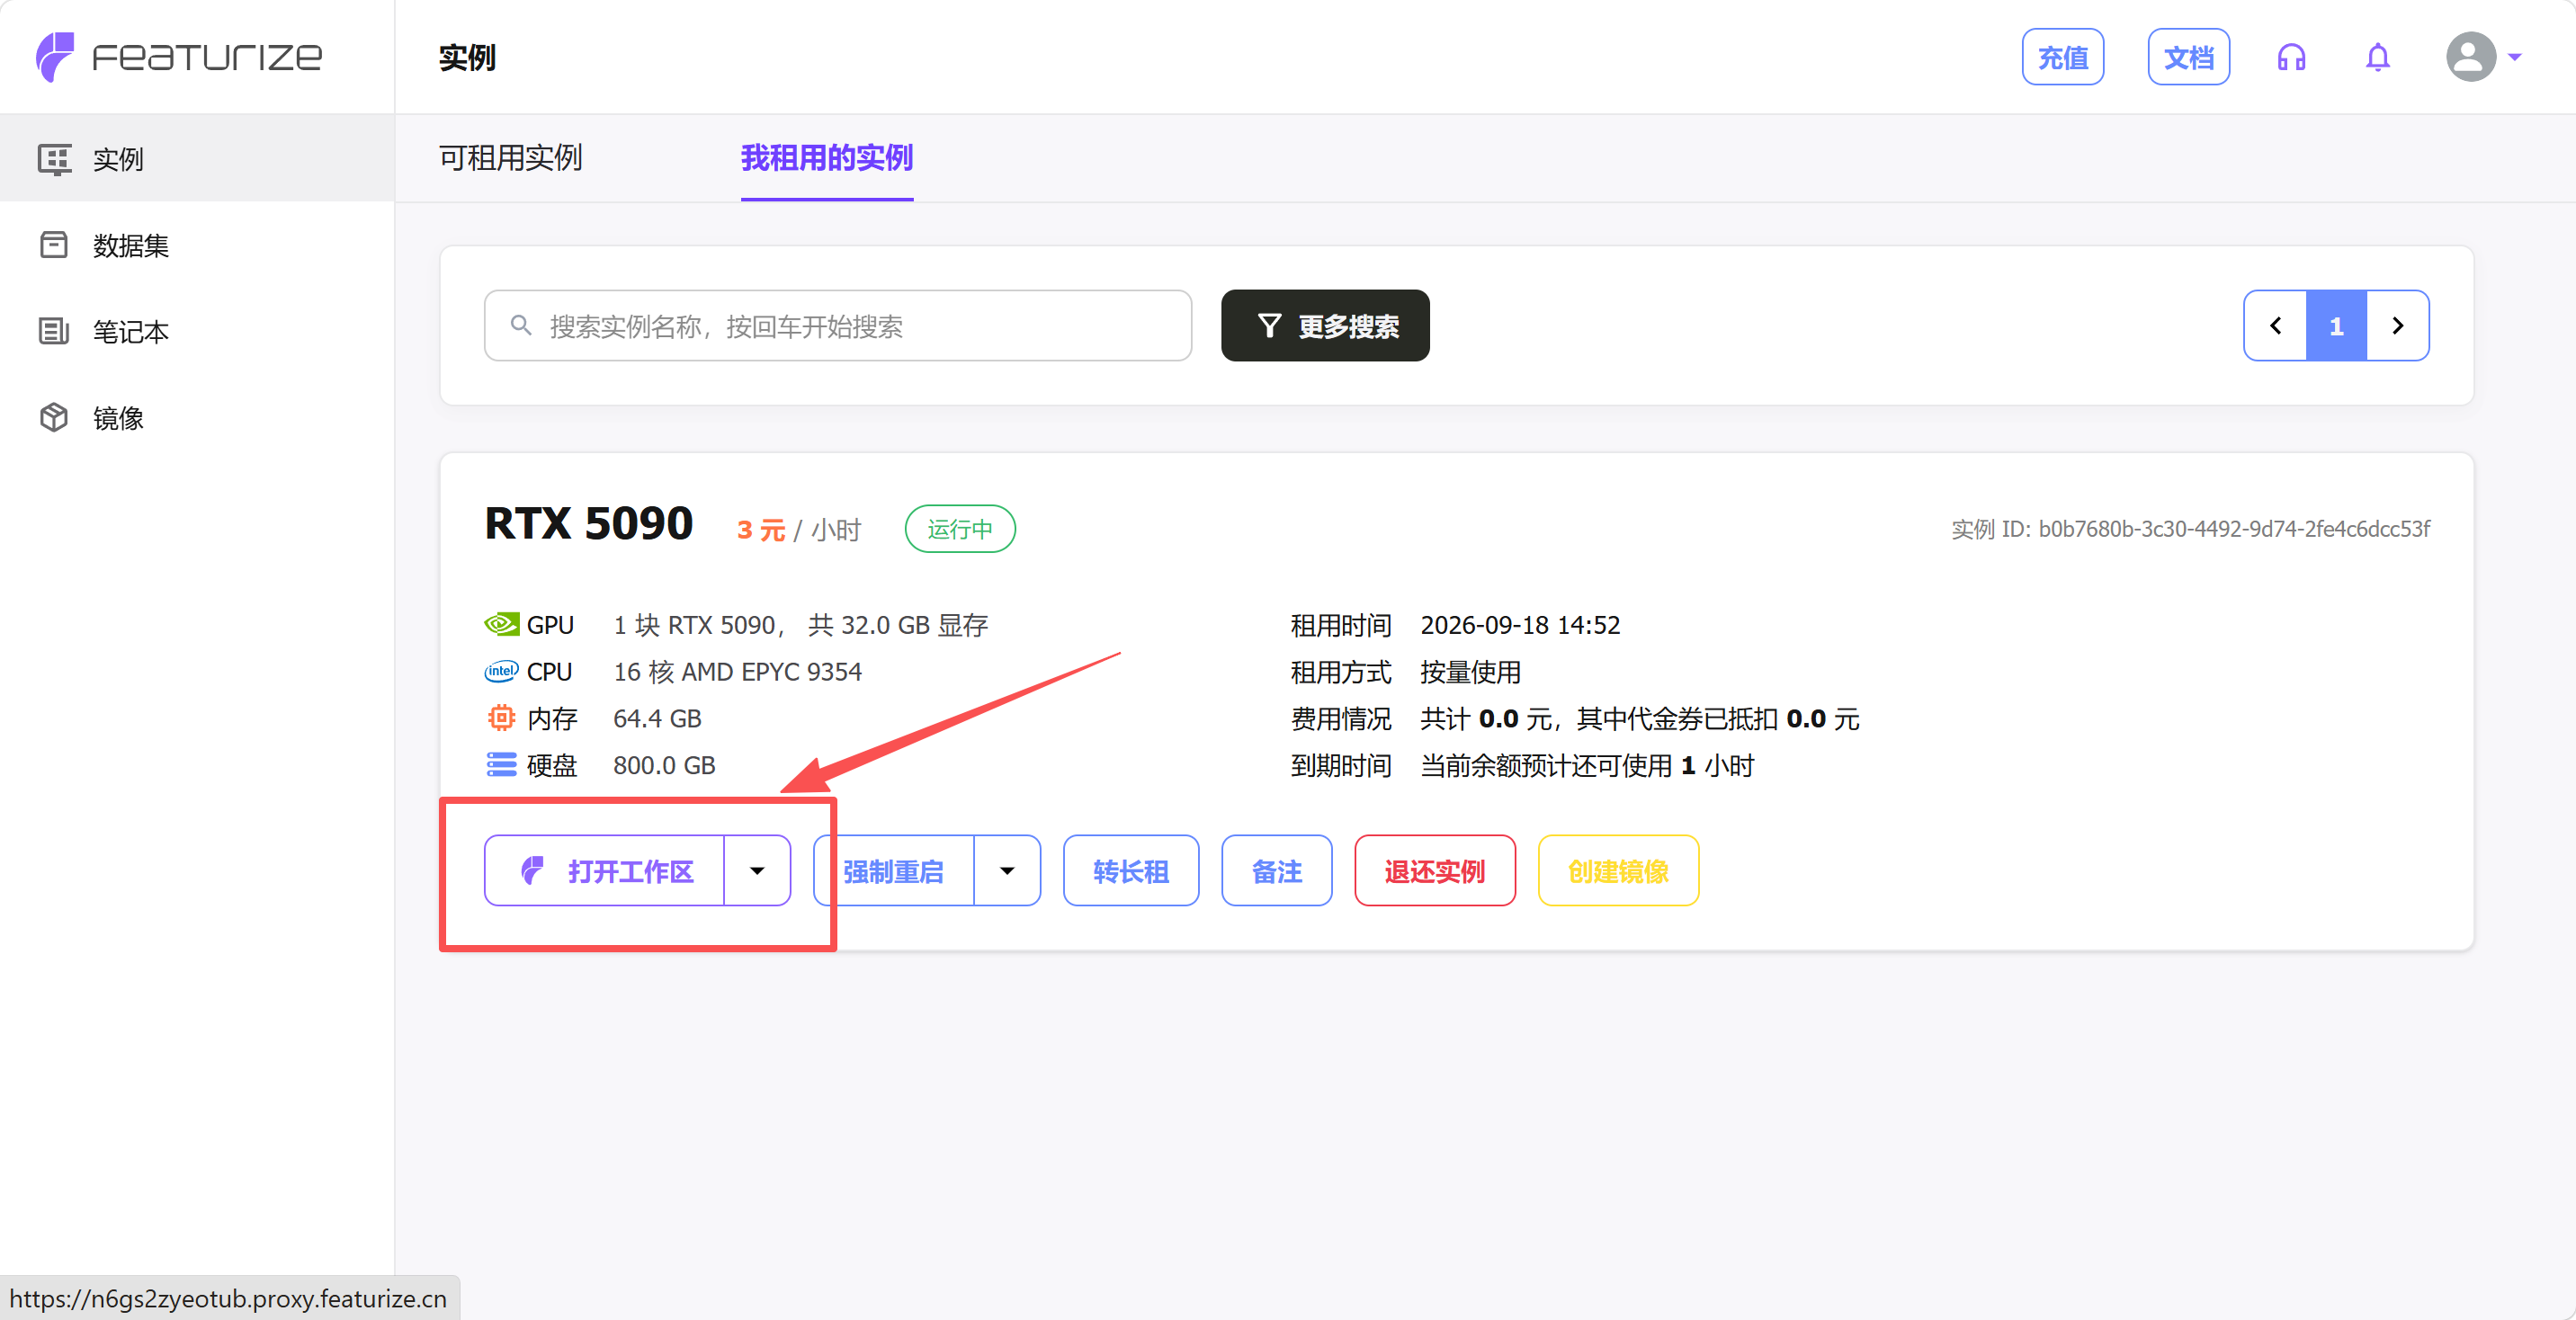
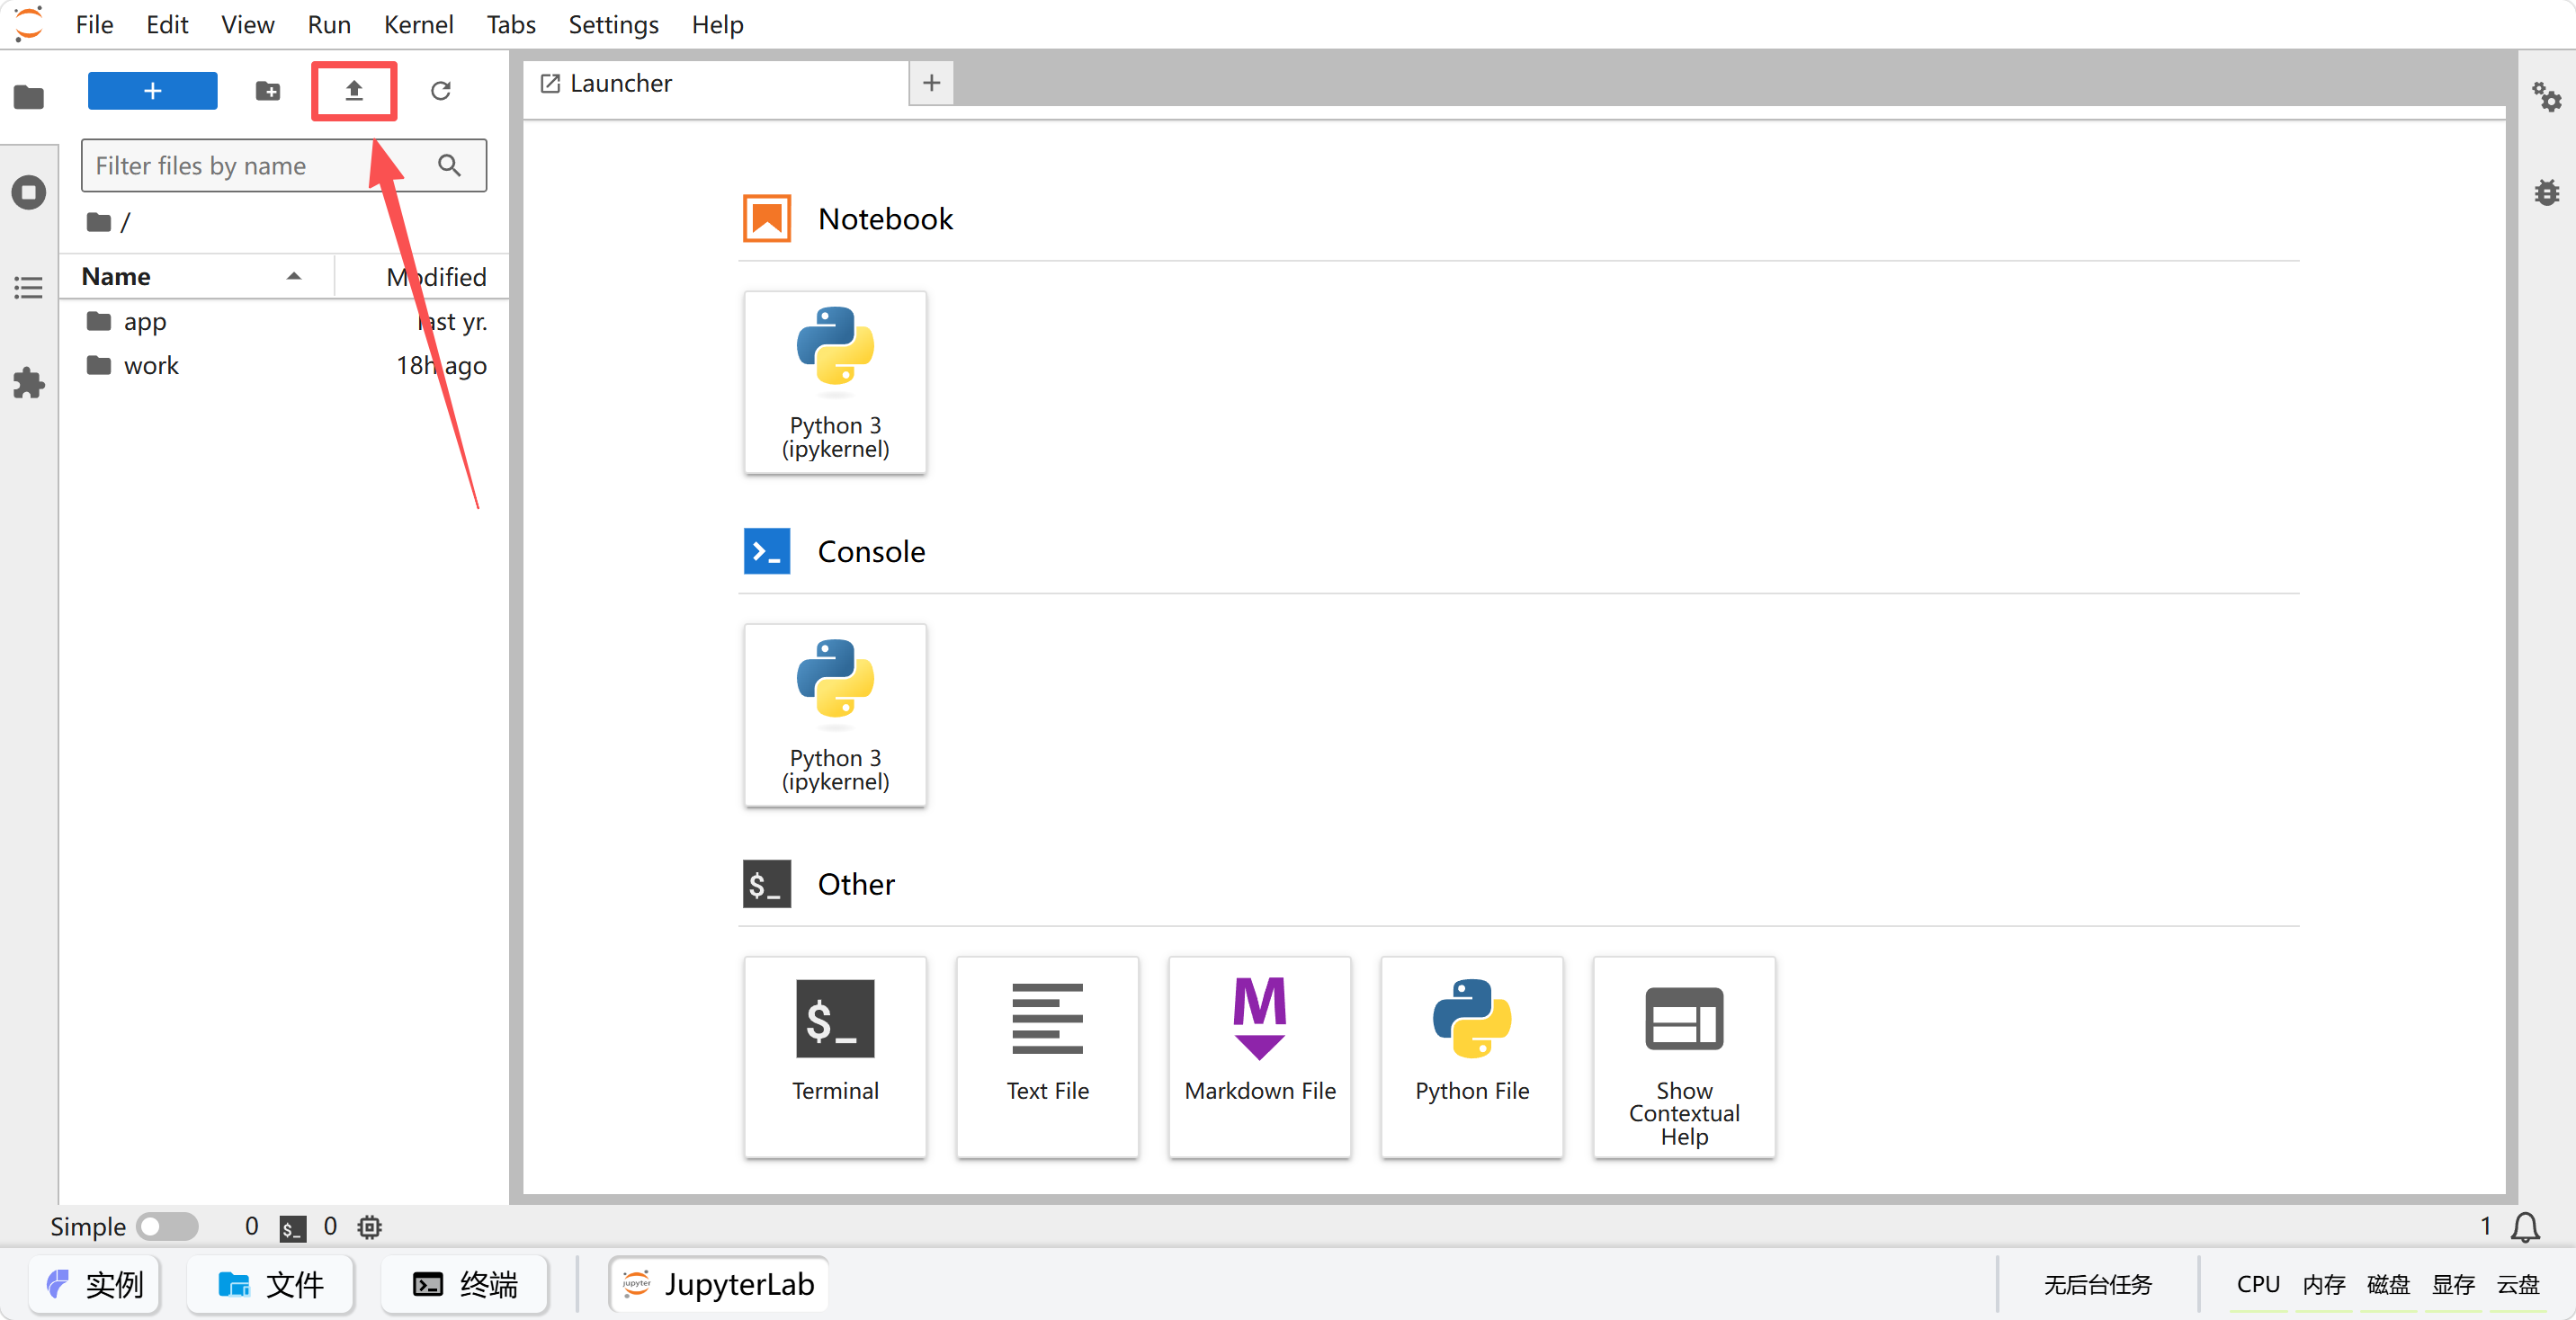
Click "JupyterLab" at the bottom; there is an upload button in the top-left corner, where you can upload code and datasets
Install and configure the environment
conda create -y -n lerobot python=3.12
conda activate lerobot
conda install ffmpeg=7.1.1 -c conda-forge -y
# git clone https://github.com/Seeed-Projects/lerobot.git ~/work/Lerobot
git clone https://github.com/huggingface/lerobot.git
cd lerobot
pip install -e ".[pi]"
pip install wandb --upgrade
# export HF_ENDPOINT=https://hf-mirror.com
hf auth login

# Skip this if you are not uploading to Huggingface and do not need wandb
If
trainingis missing during the model installation, you need to install it separately
pip install -e ".[training]"
Log in to wandb
wandb login
Copy and paste the API key, then press Enter
Mounting the dataset
First, compress the dataset collected in step 6 into a zip and upload it to the "Datasets" section of the cloud GPU platform (there is an upload button in the top-left corner of JupyterLab). After the platform finishes processing it, it will give you a download command.
Second, run this download command in the instance's command line and decompress it:
Copy the instance download command, similar to:
featurize dataset download 7f40bdaa-b1a4-4c00-9652-ff26fd079109

unzip lerobot_my_dataset_shake_hands.zip
The dataset will appear under the ~ directory.
After decompressing, you can confirm it with ls ~. The directory name must match --dataset.root in the training command exactly (this page and the following pages all use ~/lerobot_my_dataset_shake_hands). If decompression produces an extra layer of a same-named directory, for example ~/lerobot_my_dataset_shake_hands/lerobot_my_dataset_shake_hands, then move the contents of the inner layer out to the outer layer, or simply point --dataset.root at the actual level.
Changing the weight save frequency (optional)
Open lerobot/src/lerobot/configs/train.py
Change save_freq from 20_000 to 5_000
This way you can obtain a model weight file earlier in training