

Parallel Finger Gripper Installation
Onshape to view the model files
Parallel Finger Gripper Installation Steps.mp4(平行指夹爪安装步骤.mp4, larger than the site's per-file size limit — request it from support@juxitech.com)
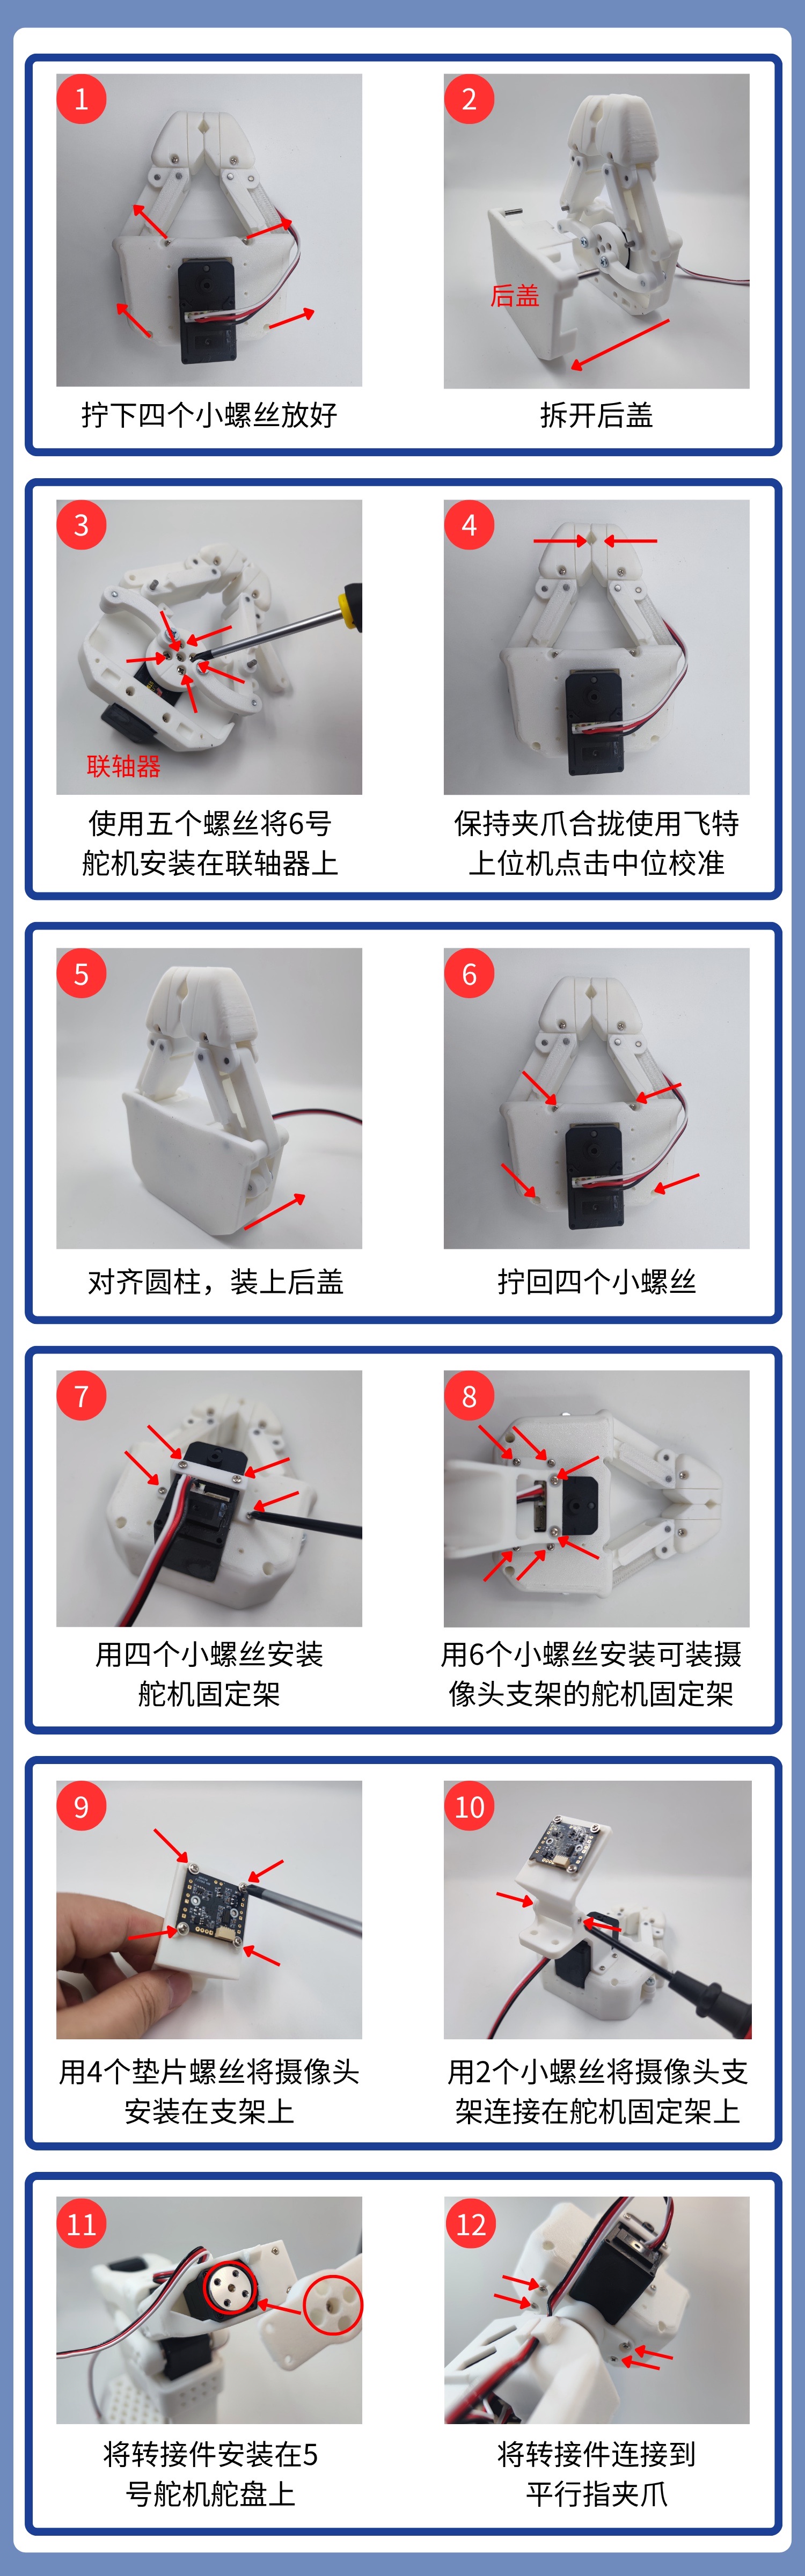
1. Unscrew the four small screws and remove the back cover
2. Use five screws to mount servo #6 on the coupling
3. Use the Feetech host software and click center calibration (keep the gripper closed!)
Download the Feetech servo debugging tool
- Windows
https://gitee.com/ftservo/fddebug
Download FD1.9.8.5(250729).7z, extract it, and run the exe program inside
- Ubuntu
https://github.com/Kotakku/FT_SCServo_Debug_Qt
Open the Feetech host debugging tool, select the COM port, set the baud rate to one million, and click "Open"
Click "Search"; once "STS3215" appears, click "Stop" and then click "STS3215"
Select "Programming" at the top
Click "Center Calibration"