

Quick Start
This page takes your NVIDIA Jetson Orin Nano Super Developer Kit (8 GB) from the box to a working JetPack 7.2.1 system (Jetson Linux / L4T r39.2.1). It follows NVIDIA's recommended first-time path: the Jetson ISO method, installed from a USB flash drive. No Ubuntu host PC is needed.
The path in three phases:
- Pass the firmware gate. Older factory firmware must be updated before JetPack 7.2 can be installed (Step 1).
- Create the installer USB. Download the Jetson ISO and write it to a USB flash drive with Balena Etcher (Steps 2–3).
- Install and set up. Install to a microSD card or an NVMe SSD, complete the Ubuntu initial setup, then add the JetPack components (Steps 4–7).
Important Starting with JetPack 7.2, NVIDIA no longer publishes microSD card images for this kit. There is no SD-card image to flash. The installation media is a USB stick. The microSD card (or NVMe SSD) is only the install target. Older tutorials that begin with "write the image to a microSD card" no longer apply.
What's in the box
- The Jetson Orin Nano 8 GB module with heat sink, mounted on the reference carrier board
- A 19 V power supply
- An 802.11ac/ab/gn wireless network interface controller (installed in the M.2 Key-E slot)
- A quick start and support card
No storage medium is included. The box has no microSD card and no NVMe SSD, and the module has no built-in eMMC storage. All storage comes from the card or drive that you install.
What you must supply
- Storage — one of the following:
- A microSD card, 64 GB UHS-1 or larger (recommended). It goes into the slot on the underside of the module. Insert it before booting the installer.
- An NVMe SSD for one of the M.2 Key-M slots on the carrier board. Optional, but recommended for more capacity and better storage performance.
- A USB flash drive, 16 GB or larger — this becomes the installer.
- A laptop or PC (Windows, Mac, or Linux) with at least 25 GB free — to download the ISO and write the USB flash drive.
- A DisplayPort monitor, plus a USB keyboard and mouse. DisplayPort is the only display output on this kit; HDMI output and DisplayPort over USB-C are not supported. An active DisplayPort-to-HDMI adapter works with an HDMI monitor.
- Without a monitor: a USB-to-TTL serial cable for a headless serial console (see Step 1).
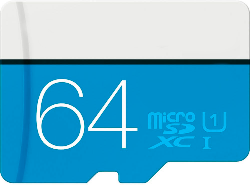 Target storage option 1: a 64 GB UHS-1 microSD card.
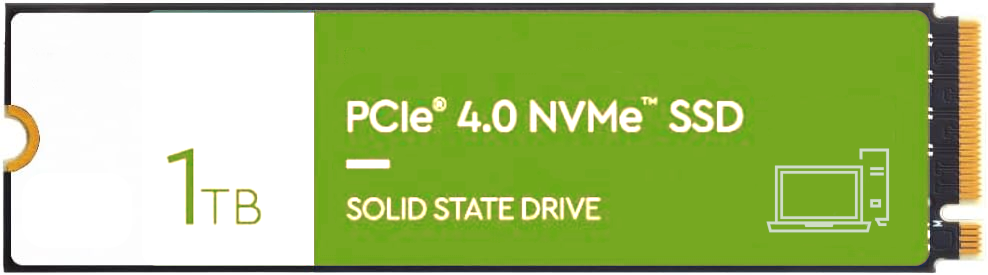 Target storage option 2: an NVMe SSD in the M.2 Key-M slot.
Juxi note: The Juxi store bundle for this kit additionally includes a 64 GB microSD card and an M.2 Wi-Fi module. The card ships not pre-imaged (blank), so follow the ISO procedure on this page to install the system onto it.
Step 1 — Check the firmware gate
JetPack 7.2 and later installations require JetPack 6.x-generation UEFI/QSPI firmware on the developer kit. If your kit still has older factory firmware, complete the JetPack 6.x Update Path first.
With a monitor connected:
- Connect the DisplayPort monitor and a USB keyboard. Connect the 19 V power supply — the kit powers on automatically, and a green LED next to the USB-C connector lights up.
- Repeatedly press
Escafter the NVIDIA boot splash appears. This opens the UEFI setup menu. - Check the firmware version line near the top of the screen:
| Firmware version | What to do |
|---|---|
| 36.x or newer | Continue with Step 2 |
| Older than 36.0 | Complete the JetPack 6.x Update Path first (see below) |
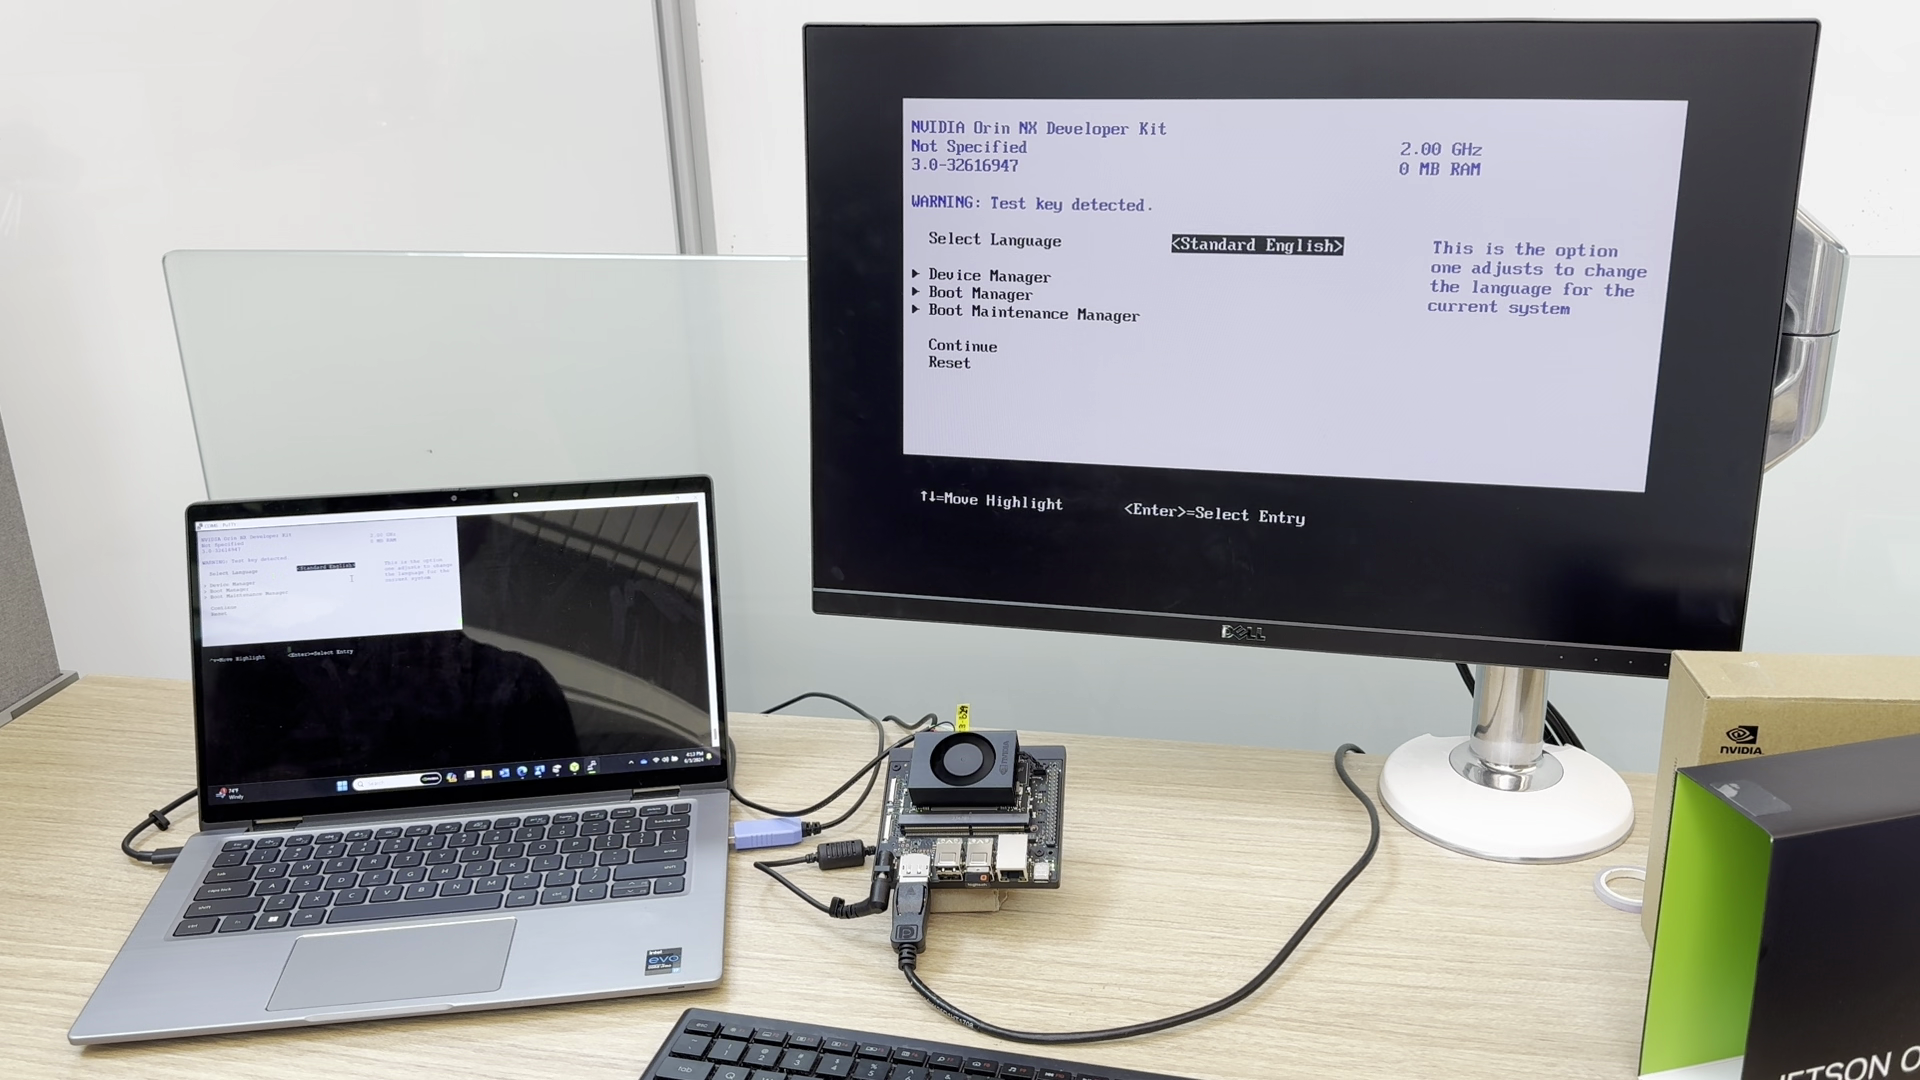 The firmware version is shown near the top of the UEFI setup menu.
Headless alternative: connect a USB-to-TTL serial cable to the Button Header (adapter TX wire to pin 3 / RXD, adapter RX wire to pin 4 / TXD, adapter ground wire to pin 7 / GND), open a serial console on your PC, and press Esc in the console while the pre-boot options are shown.
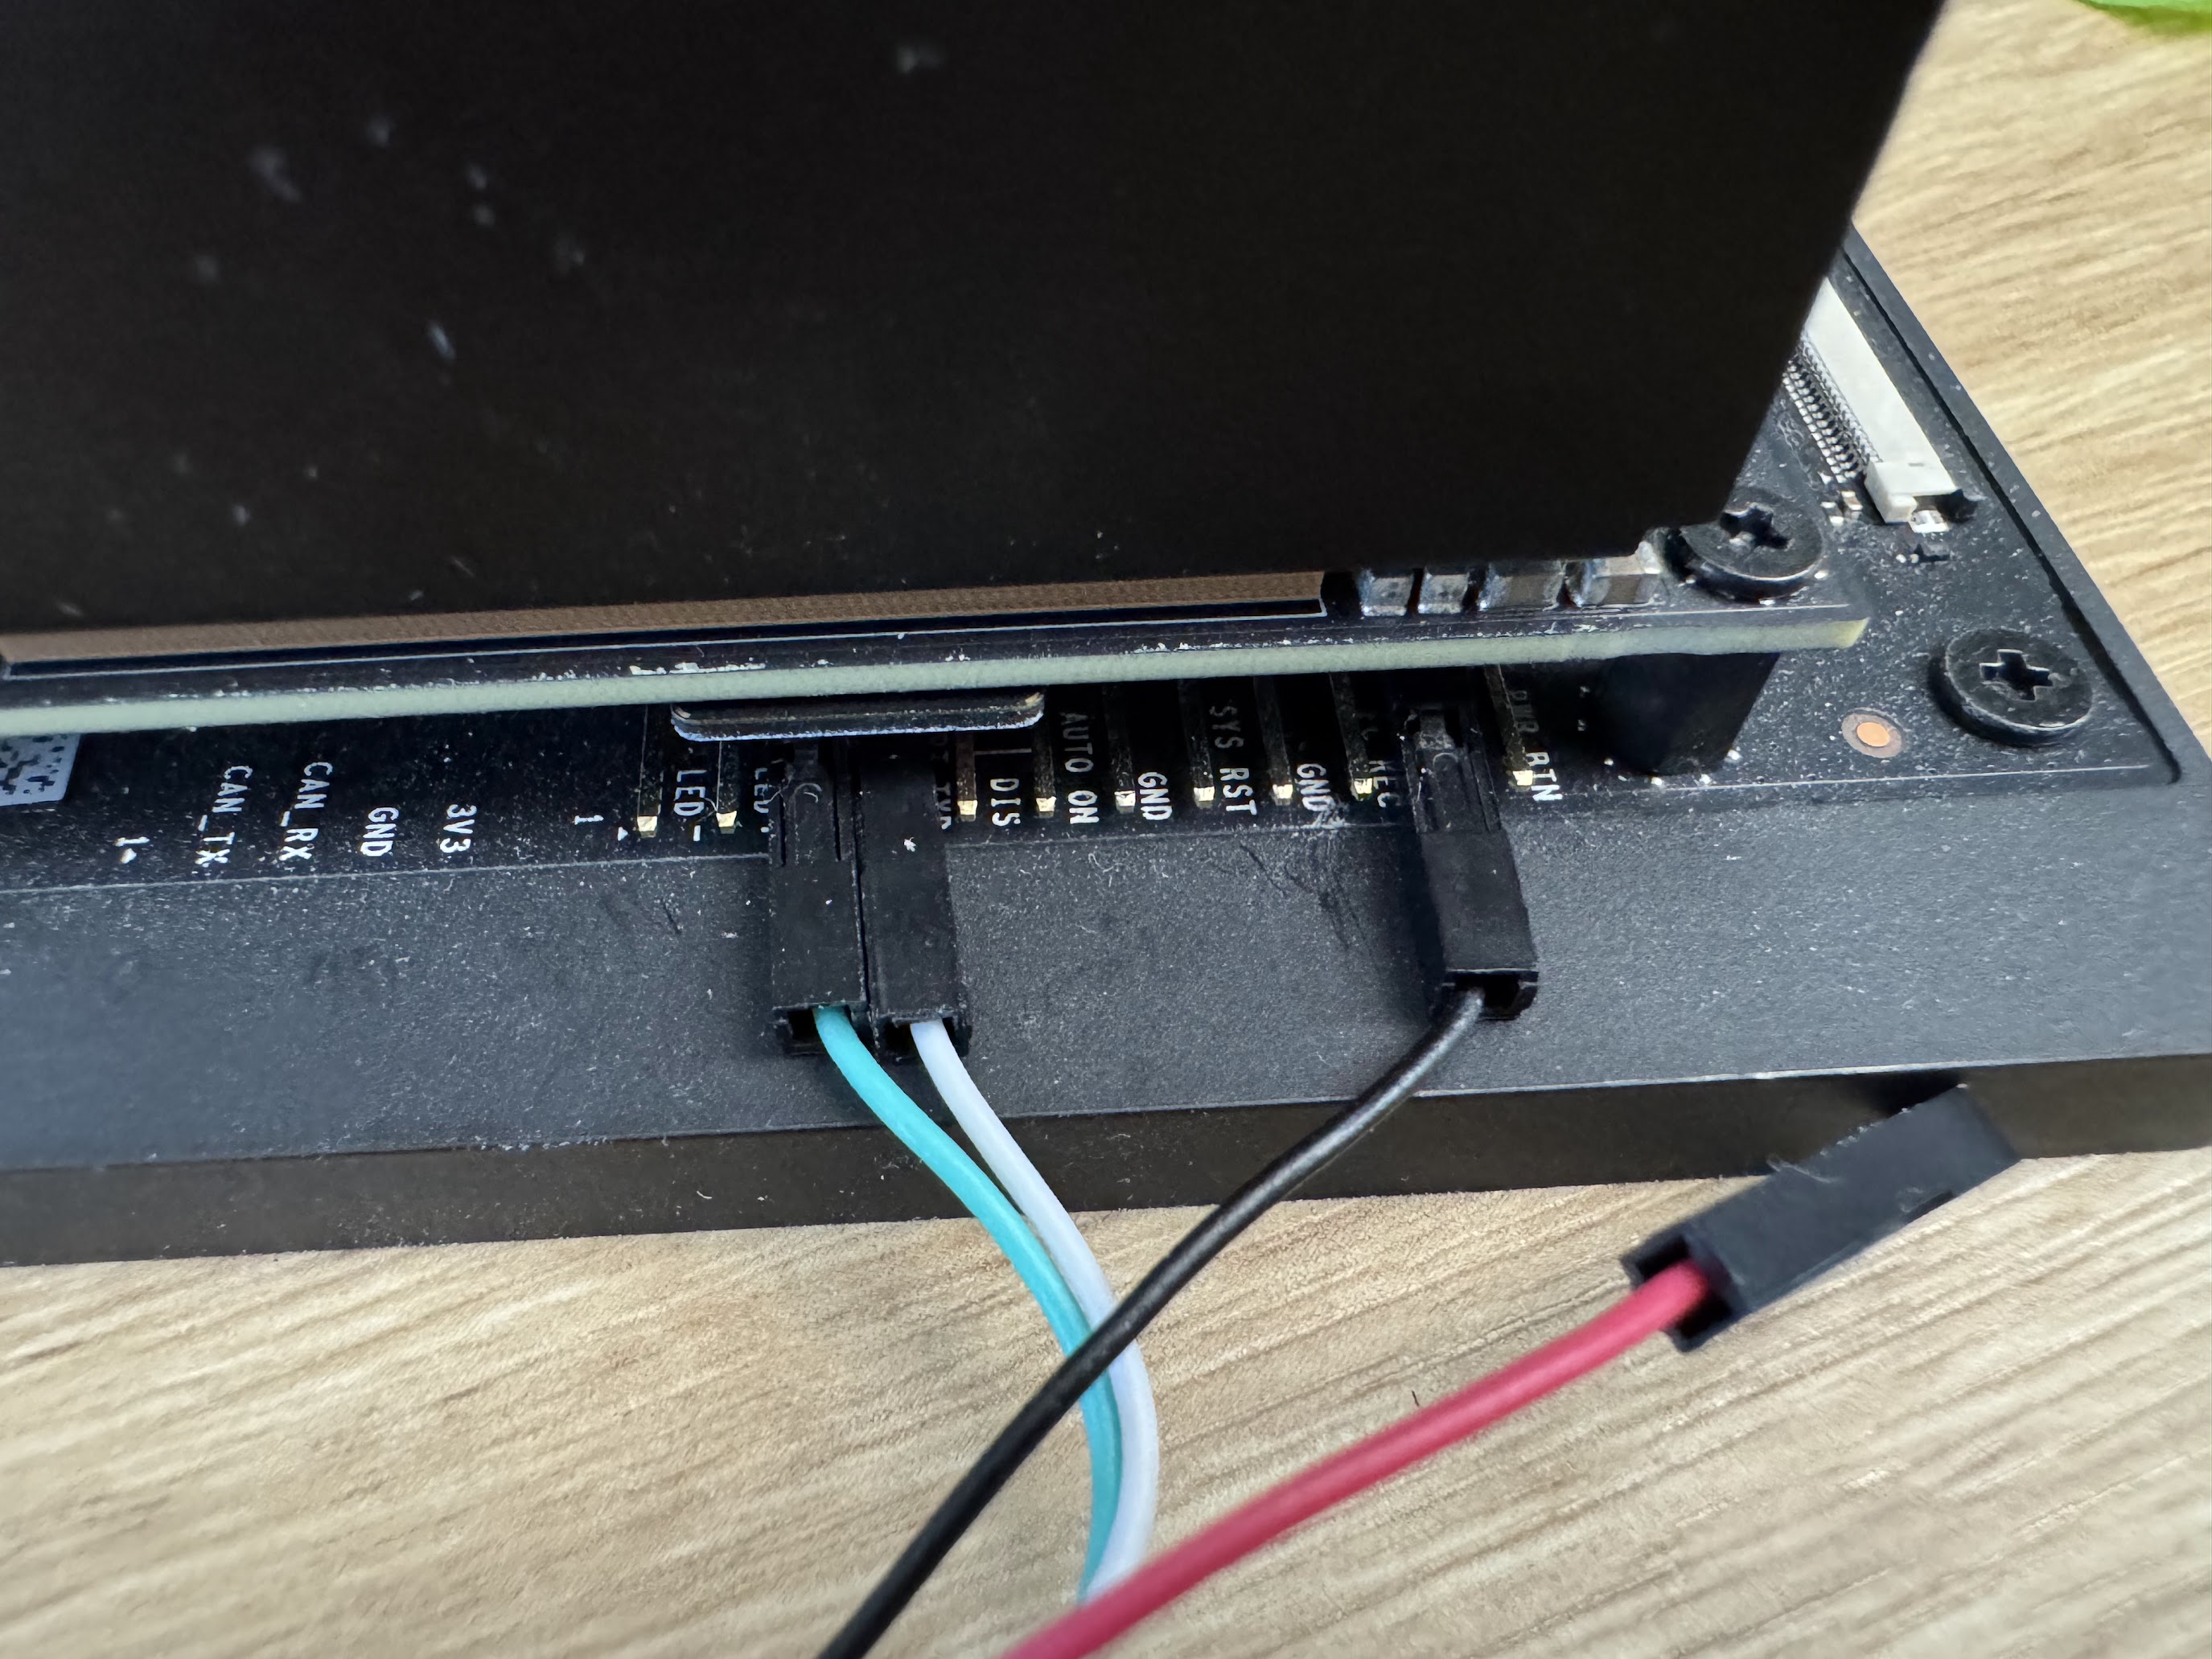 Headless route: a USB-to-TTL serial cable connected to the Button Header.
If the firmware is too old
The JetPack 6.x Update Path brings the firmware forward. In short (full steps in Flashing & Updates):
- Boot the JetPack 5.1.3 bridge image (file name
JP513-orin-nano-sd-card-image_b29.zip) from a microSD card. - A background service schedules a bootloader update (check with
sudo systemctl status nv-l4t-bootloader-config). - Reboot. The firmware update runs during this boot (check with
sudo nvbootctrl dump-slots-info). - Install the QSPI updater:
sudo apt update, thensudo apt install nvidia-l4t-jetson-orin-nano-qspi-updater, then reboot. - Power off, remove the bridge card, insert your target storage, and continue with Step 2.
This path needs a microSD card and a card reader. Without one, SDK Manager on an Ubuntu host is the alternative (see Flashing & Updates). One more case: if the firmware comes from BSP 36.2 (JetPack 5.0 DP), the in-installer capsule update does not support it — bring the kit to any later release before running the JetPack 7.2.1 ISO installation.
If you boot the installer anyway and the display stays black or drops to a UEFI shell, the firmware is probably too old. Do not retry the boot repeatedly. Power off, complete the update path, and retry.
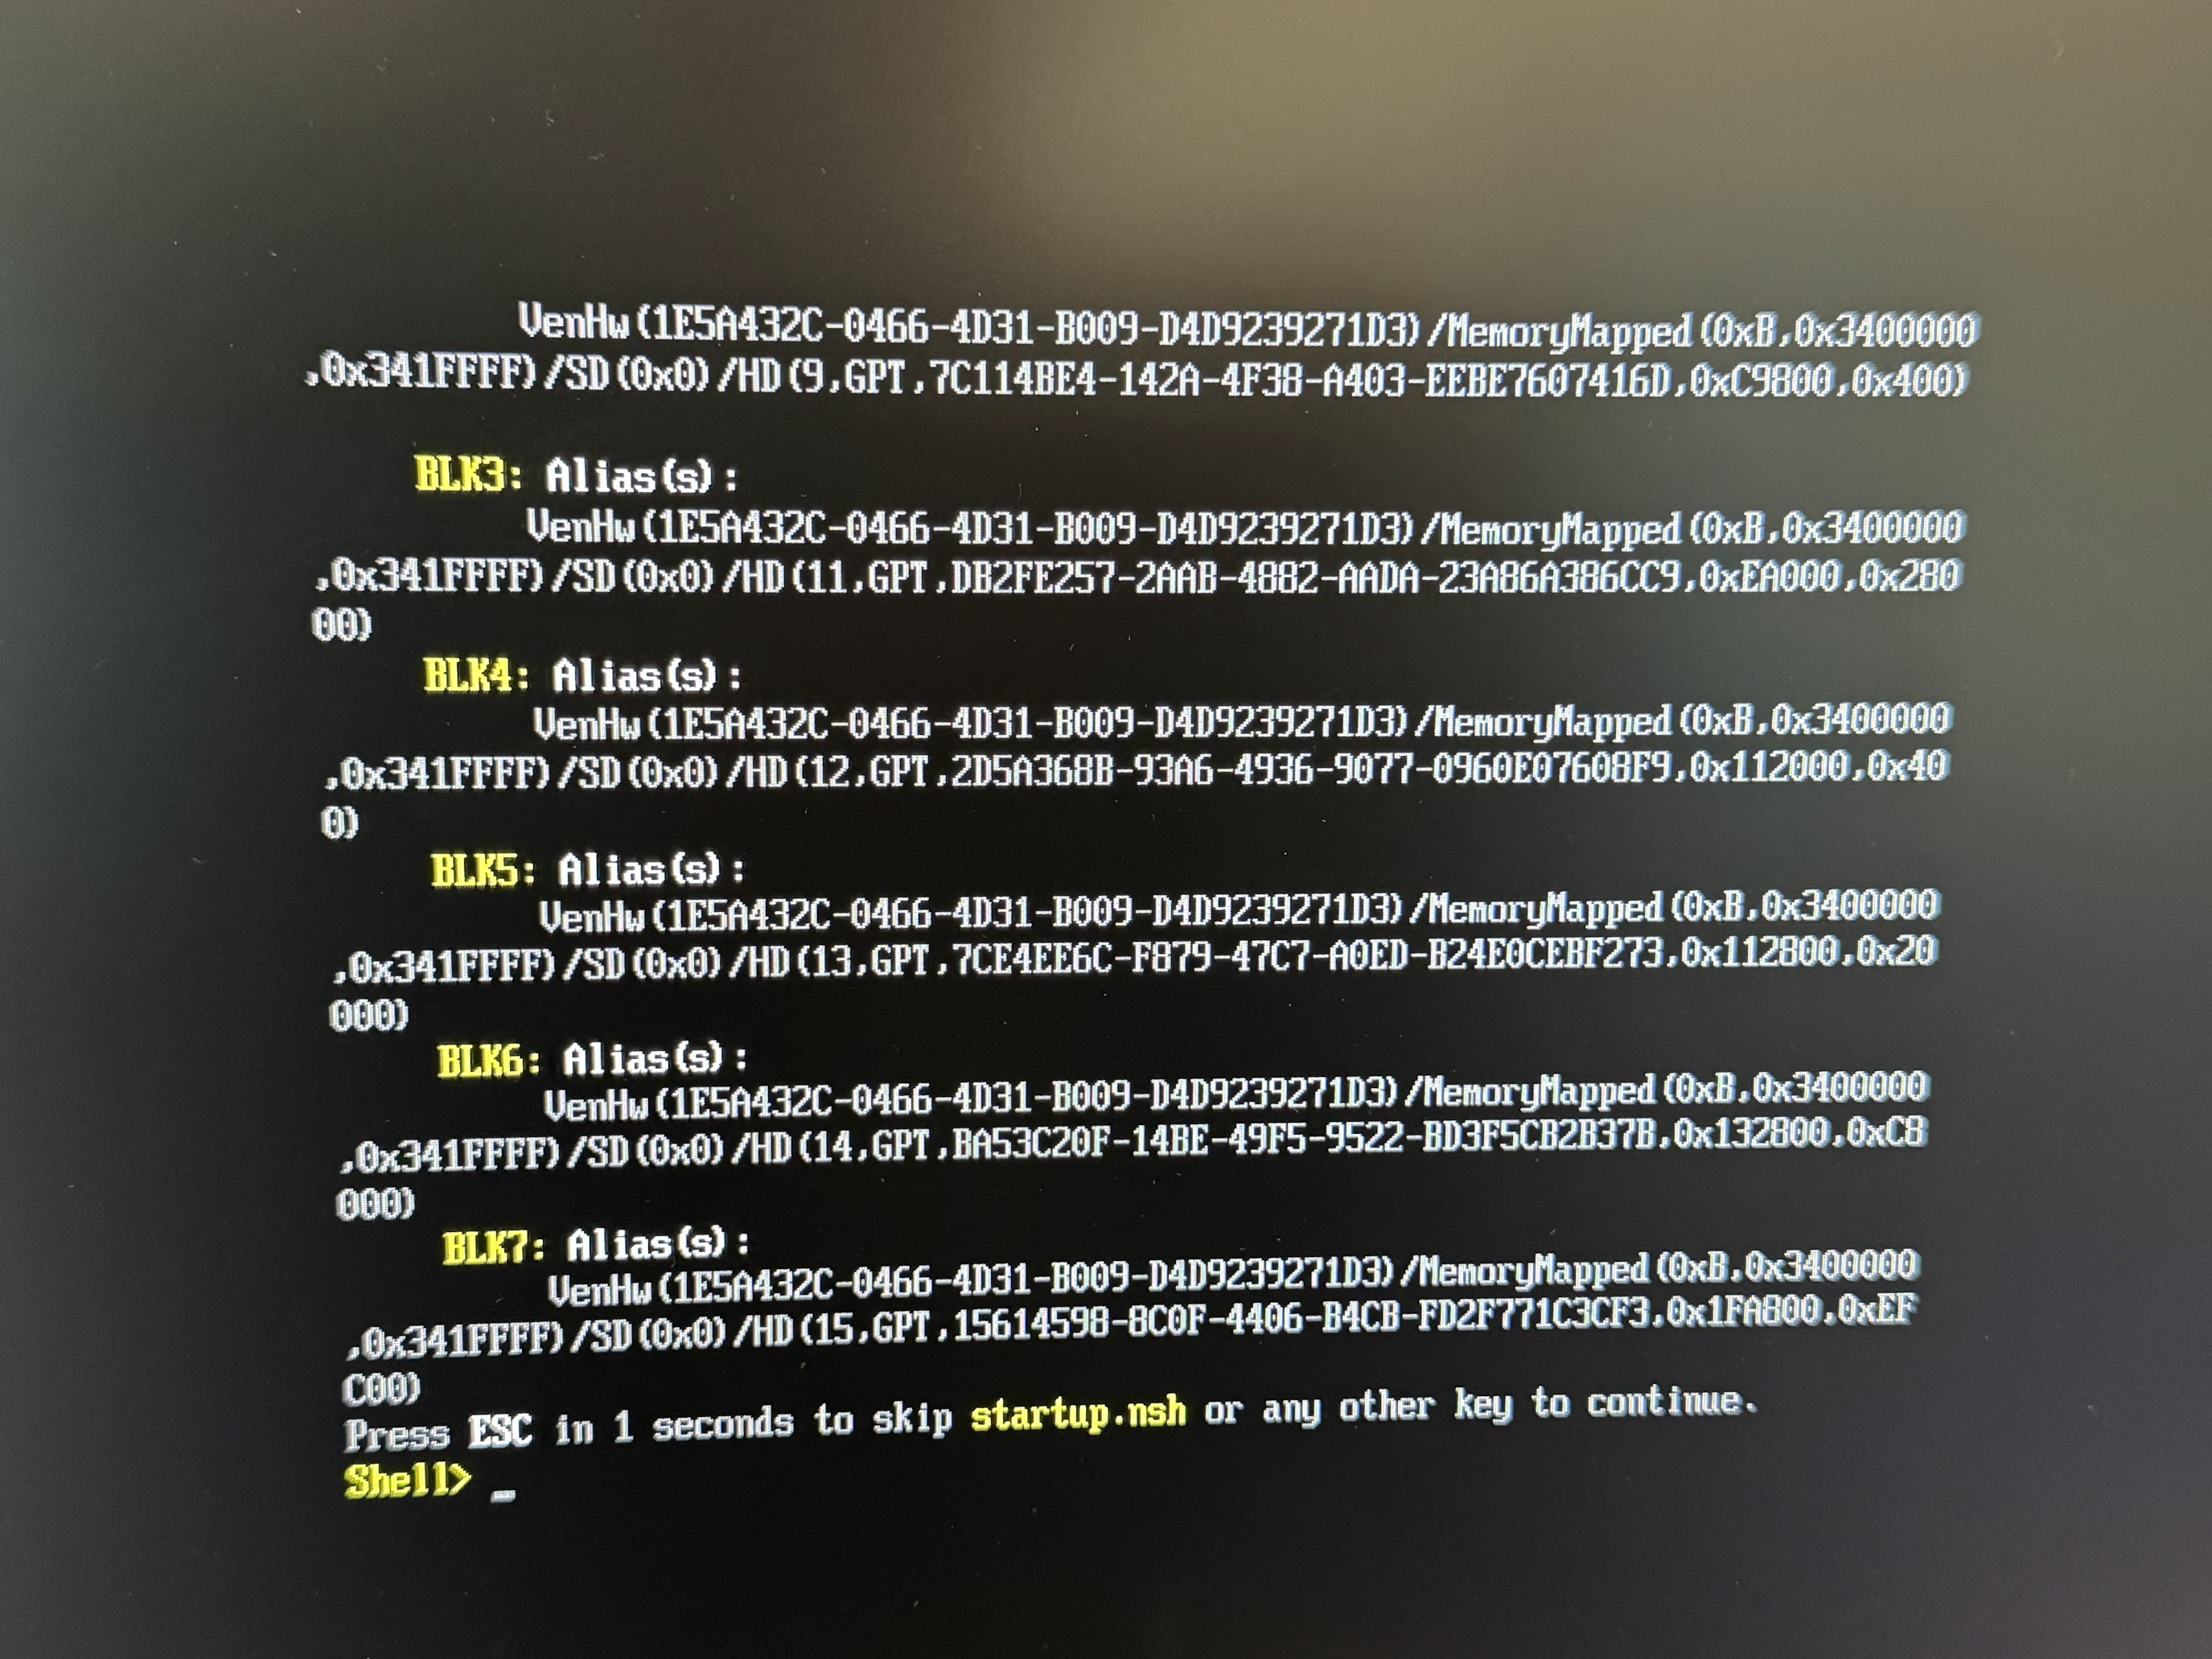 A UEFI shell (or a black screen) instead of the installer usually means the firmware is too old for the target JetPack release.
Step 2 — Download the Jetson ISO
Download the JetPack 7.2.1 installer ISO (label: Jetson ISO (r39.2.1)) from the JetPack downloads page, or use this direct link:
ISO file names follow the pattern jetsoninstaller-r<L4T version>-<timestamp>-arm64.iso (for this release: jetsoninstaller-r39.2.1-2026-08-07-18-30-47-arm64.iso). NVIDIA's download pages do not list the ISO file size or checksums.
Step 3 — Write the ISO to a USB flash drive
- Install Balena Etcher from https://etcher.balena.io/#download-etcher (Windows, Mac, or Linux).
- Insert the USB flash drive into your PC.
- In Etcher, select the ISO file, select the USB drive, and start the write.
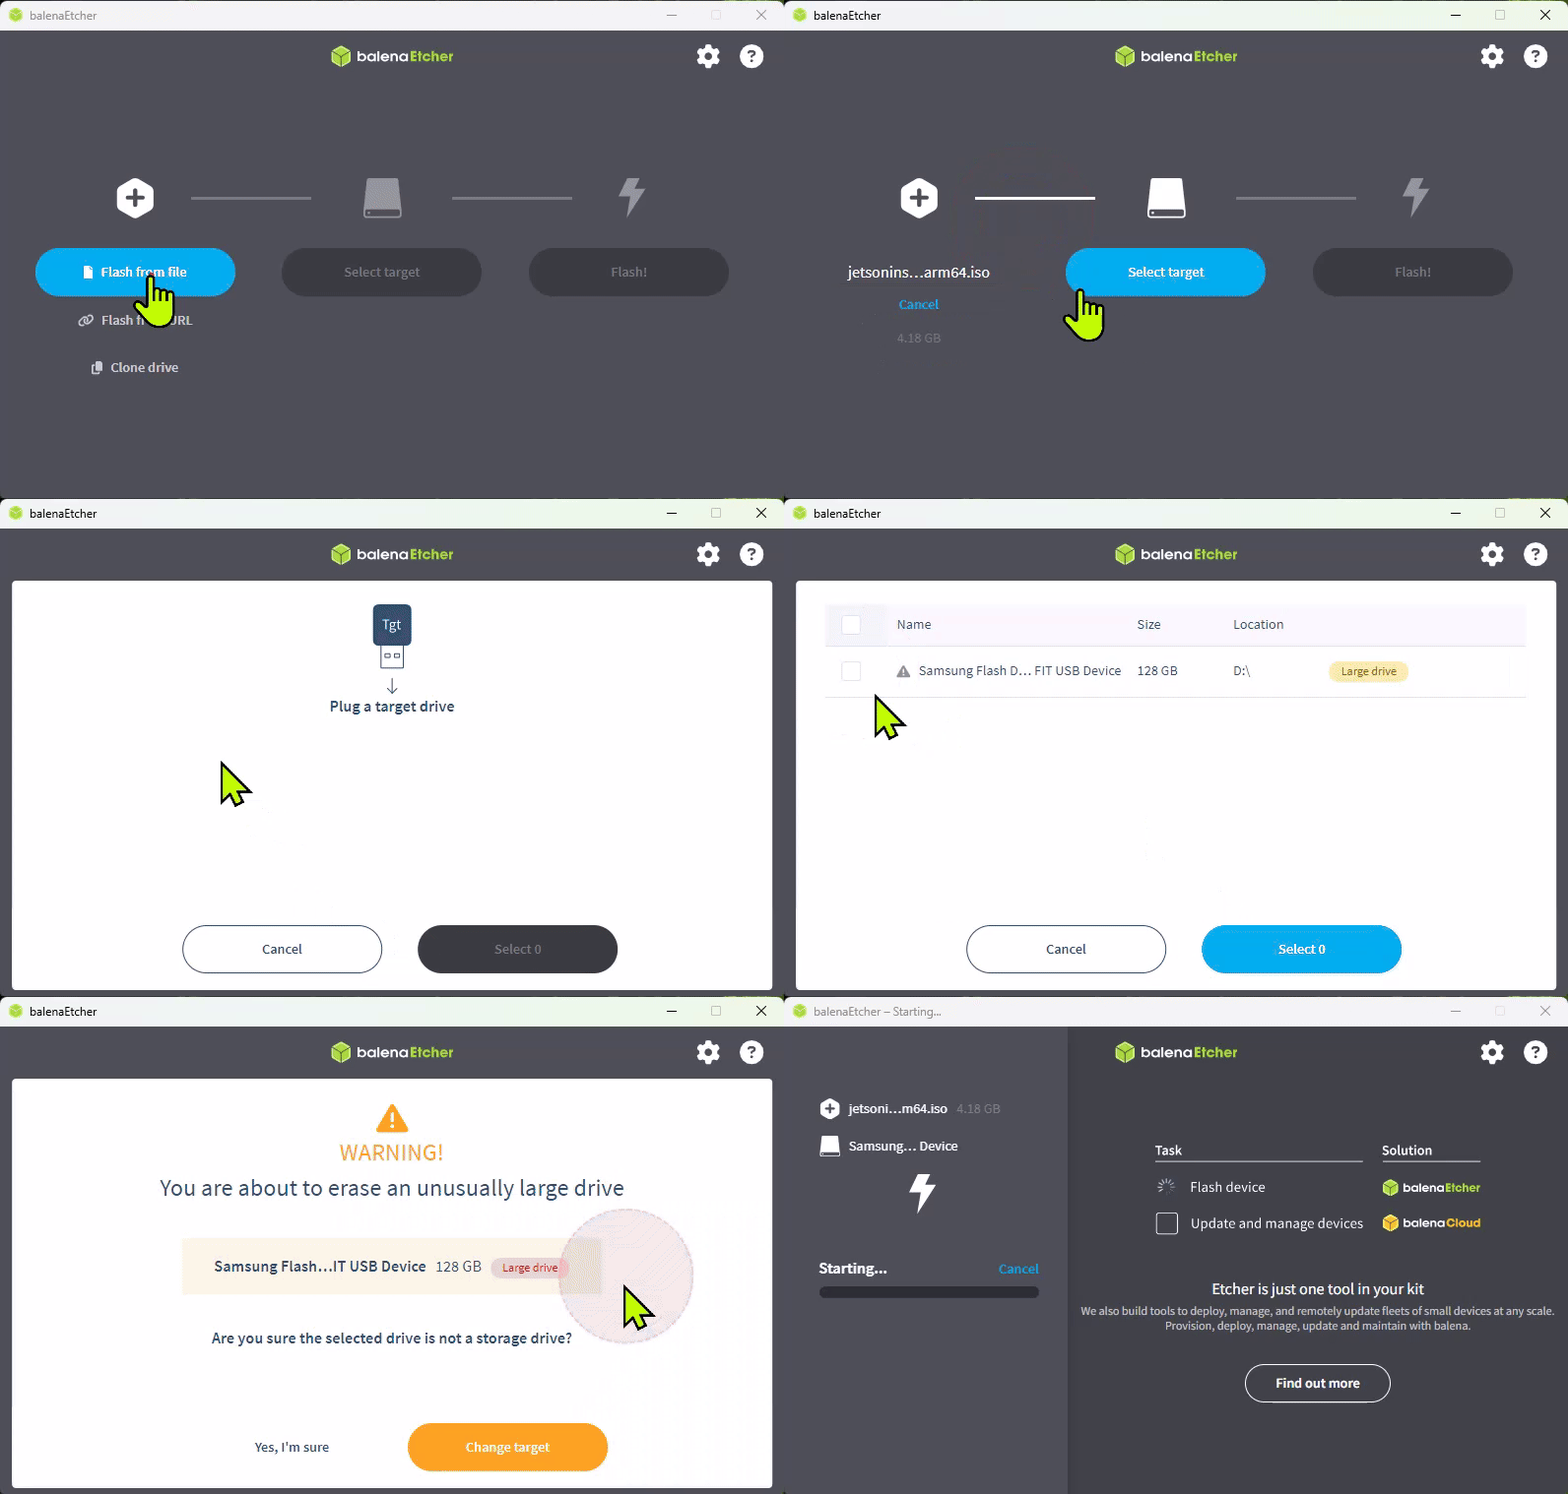 Writing the Jetson ISO to the USB flash drive with Balena Etcher.
AttentionDo not write the ISO to a microSD card. Starting with JetPack 7.2, SD-card images are no longer supported. Write the ISO to a USB flash drive, then use it to install Jetson Linux onto your microSD card or NVMe SSD.
Copying the ISO file to the stick with a file manager does not work — it must be written as a disk image. The finished stick is only an installer; it cannot boot into a usable desktop.
Step 4 — Boot the installer and install
- Power off the kit, then install the target storage:
- microSD card: insert it into the slot on the underside of the module.
- NVMe SSD: install it in the M.2 Key-M slot on the carrier board. Install the target storage before you boot the installer.
- Insert the installer USB flash drive. Connect the monitor, keyboard, and mouse, then connect the power supply. Plug the installer drive directly into the kit rather than through a hub: NVIDIA documents one USB 3.0 hub (model UH400) that breaks ISO installation, and one USB-to-Ethernet adapter (TRENDnet TU2-ET100) that can make flashing fail. See Troubleshooting.
- Press
Escwhen the NVIDIA logo boot splash appears. Select Boot Manager, select your USB disk, and press Enter to boot from it. NVIDIA recommends selecting the USB disk explicitly, so you know the correct installer is running. - When the QSPI capsule update prompt appears, press
Ywithin 30 seconds. This is the most commonly missed step. The prompt is easy to miss in real time. If it times out and the installation continues without the update, the install fails later — restart the installation and pressYwhen the prompt appears. The capsule update runs in two passes, and the kit may reboot between or after them. This is expected; wait for both passes to finish. Kits whose current QSPI firmware is r38.2.0/r38.2.1 must confirm the firmware update a second time after the first pass completes (r39.2.1 release-note issue 6480645) — pressYagain if prompted. - At the Jetson BSP installation GRUB menu, select Install Jetson ISO r39.2.1. Select the target storage device (the microSD card or the NVMe SSD) and confirm. The installation erases the selected device — check the selection before you confirm.
- Wait for the installation to complete. NVIDIA's instructions say white text scrolls on the screen for several minutes; reboot when prompted. Community reports of install time vary widely — from about 15 minutes to much longer (unconfirmed, forum reports).
- Remove the USB flash drive so the kit boots the new system from the target storage and not the installer again.
NVIDIA staff on the forums also recommend keeping a display connected during the ISO installation.
Step 5 — First boot and Ubuntu initial setup
After the installer reboots, the kit starts the Ubuntu initial setup (oem-config):
- Review and accept the NVIDIA Jetson software EULA.
- Select the system language, keyboard layout, and time zone.
- Connect to a network.
- Create a username, password, and computer name.
- Log in to the Ubuntu desktop.
Step 6 — Install the JetPack components
The ISO installs the base system (Jetson Linux). CUDA, cuDNN, TensorRT, and the rest of the JetPack stack are added after first boot. On the kit's desktop, open a terminal and run:
sudo apt update
sudo apt install nvidia-jetpack
Reboot after installation if prompted.
Check the result:
cat /etc/nv_tegra_release
apt list --installed | grep nvidia-jetpack
/etc/nv_tegra_release should report an R39 release with revision 2.1. See Verify Your System for the full checklist.
Step 7 — Check the power mode
The default power mode is typically 25W. For maximum performance, click the current power mode in the Ubuntu desktop top bar, select Power Mode, and choose MAXN SUPER; on the command line, sudo /usr/sbin/nvpmodel -q shows the current mode. JetPack 7.2.1 ISO installs use the Super Mode flashing configuration by default, so 25W and MAXN SUPER should be available — if they are missing, see Troubleshooting.
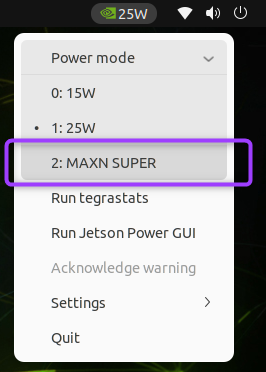 Select Power Mode → MAXN SUPER for maximum performance.
Troubleshooting quick hits
| Symptom | First thing to check |
|---|---|
| The kit does not power on | The 19 V supply must be connected to the DC jack. The kit powers on automatically; the green LED next to the USB-C connector should light. |
| The USB installer does not boot | Select the USB disk explicitly in the UEFI Boot Manager (Esc at the splash). Check that the firmware is 36.x or newer. |
| Black screen or UEFI shell instead of the installer | The firmware may be too old. Complete the JetPack 6.x Update Path first. |
| The installer skips language/network/username setup; first boot hangs at a black screen | The QSPI capsule prompt was missed. Restart the installation and press Y within 30 seconds. |
| The installer does not show the target storage | microSD: check that it is fully inserted in the slot on the module's underside. NVMe: reseat the drive and restart the installer. |
| Only 7W/15W power modes; 25W and MAXN SUPER are missing | See Troubleshooting. |
Sources
- Jetson Orin Nano Developer Kit User Guide — Quick Start (checked 2026-09-26)
- Jetson Orin Nano Developer Kit User Guide — JetPack 6.x Update Path (checked 2026-09-26)
- Jetson Orin Nano Developer Kit User Guide — JetPack SDK Setup (checked 2026-09-26)
- Jetson Orin Nano Developer Kit User Guide — Hardware Layout (checked 2026-09-26)
- JetPack SDK Downloads (checked 2026-09-26)
- Jetson Linux 39.2.1 Release Notes (PDF) (checked 2026-09-26)
Status: draft, pending review by cheny. Grounded in NVIDIA's official documentation as of the dates listed; not yet verified on physical hardware by Juxi Technology.
Image credits: The images on this page are from NVIDIA's official Jetson Orin Nano Developer Kit User Guide (downloaded 2026-09-26) and remain © NVIDIA Corporation. They are reproduced here to illustrate the official setup flow.
NVIDIA® and Jetson™ are trademarks of NVIDIA Corporation. This page is published by Juxi Technology and is not an NVIDIA publication.