

Quick Start
This page takes your Jetson AGX Orin Developer Kit (64GB) from the box to a fully updated JetPack 7.2.1 system. The path below follows NVIDIA's recommended, current setup flow; every step has been checked against NVIDIA's official developer kit documentation on the date listed at the bottom of this page.
The three-step path:
- Boot out of the box and complete the Ubuntu initial setup (
oem-config). - Update the BSP to L4T r39.2.1 (JetPack 7.2.1) using the Jetson ISO method — a bootable USB stick, no Ubuntu host PC required.
- Install the JetPack components (CUDA, cuDNN, TensorRT, ...) with one
aptcommand.
Why a USB ISO update instead of SDK Manager? NVIDIA now recommends the Jetson ISO method for the developer kit: it updates the board directly from a USB stick and does not require a separate Ubuntu host machine. SDK Manager remains available as an alternative (see Step 3b).
What you need
In the box:
- Jetson AGX Orin module and reference carrier board
- Wi-Fi module
- USB Type-C power supply
- USB Type-C to USB Type-A cable
You supply:
- A monitor with a DisplayPort input and a DisplayPort cable, plus a USB keyboard and mouse — or a second computer (Windows/Mac/Linux) if you prefer a headless setup
- Internet connection (Ethernet cable, or Wi-Fi configured during setup)
- A USB flash drive large enough for the ISO image (check the size shown on the download page when you get there) — needed for the ISO update in Step 2
- A PC to write the installation USB (Balena Etcher runs on Windows/Mac/Linux)
Step 1 — First boot and Ubuntu initial setup
Your developer kit ships with an L4T BSP image pre-flashed on eMMC and boots into the Ubuntu desktop out of the box. Newly shipped units may carry an older L4T version (for example r35.x / JetPack 5.x); Step 2 brings any unit to the current release.
With a display attached:
- Connect a DisplayPort monitor, a USB keyboard and mouse, and (optionally) an Ethernet cable.
- Connect the included power supply to the USB Type-C port above the DC jack. The kit powers on automatically — the white LED near the power button lights up. If not, press the power button.
- Within about a minute the Ubuntu screen appears. The first boot walks you through
oem-config: accepting the NVIDIA software EULA, choosing language/keyboard/time zone, creating your user account, and configuring networking. - After
oem-configfinishes, the kit reboots into the Ubuntu desktop.
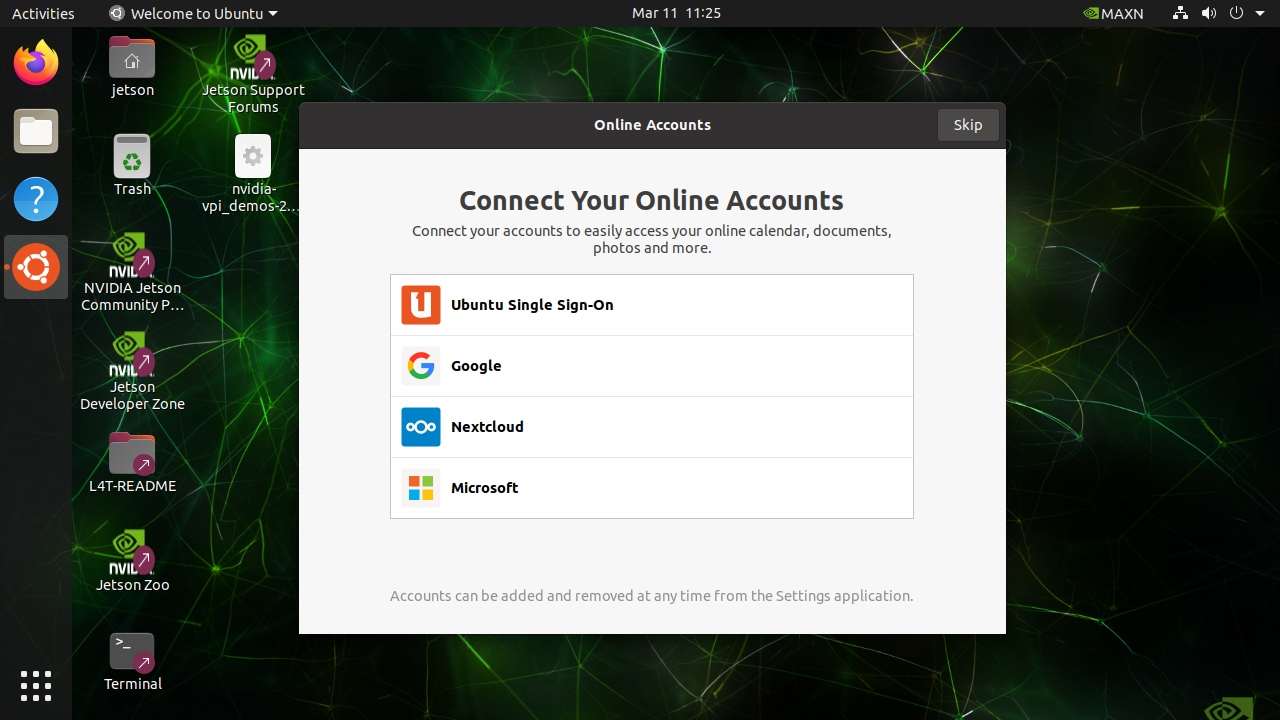
Headless setup is also possible from another computer — see NVIDIA's Quick Start Guide (link at the bottom) for the exact wiring.
Juxi tip: If you plan to run the system from an NVMe SSD, keep it in mind for Step 2 — the ISO installer can install directly to the NVMe drive.
Step 2 — Update the BSP with the Jetson ISO (recommended)
Prerequisite: the installed BSP must be L4T r35.5 or newer for the ISO method to work. Check first:
cat /etc/nv_tegra_releaseA JetPack 7.2.1 system reports # R39 (release), REVISION: 2.1. If the output shows an older release, update to L4T r35.5 or newer first (see Caveats below).
- Download the Jetson ISO for JetPack 7.2.1 / L4T r39.2.1: https://developer.nvidia.com/downloads/embedded/l4t/r39_release_v2.1/iso
- Create the installation USB. Write the ISO to a USB flash drive with Balena Etcher ("Flash from file" → select the ISO → select the USB drive).
Do not simply copy the ISO file onto the drive with a file manager — it must be written as a disk image, or it will not boot.
- Insert the USB drive into the developer kit and power it on. If it does not boot from the USB automatically, open the UEFI boot manager during boot and select the USB drive.
- Boot and install:
- If you are prompted to confirm a QSPI capsule update, press
Y. This firmware update runs before the ISO installation and runs twice. Do not skip it — it is required for compatibility. If you miss the prompt, restart the installation and confirm it when prompted. - In the GRUB menu, select Install Jetson ISO r39.2.1 and press Enter.
- Choose the storage target with the arrow keys: eMMC (default internal storage) or NVMe (recommended if you installed an SSD).
- Installation takes roughly 15 minutes, with text output scrolling on screen.
- If you are prompted to confirm a QSPI capsule update, press
- Remove the USB drive after installation completes and the system reboots — otherwise the kit may boot from the stick again instead of the new system.
- The updated system starts its first-boot
oem-config— complete the Ubuntu setup again to create the user account for the new installation.
What you'll see (in order)
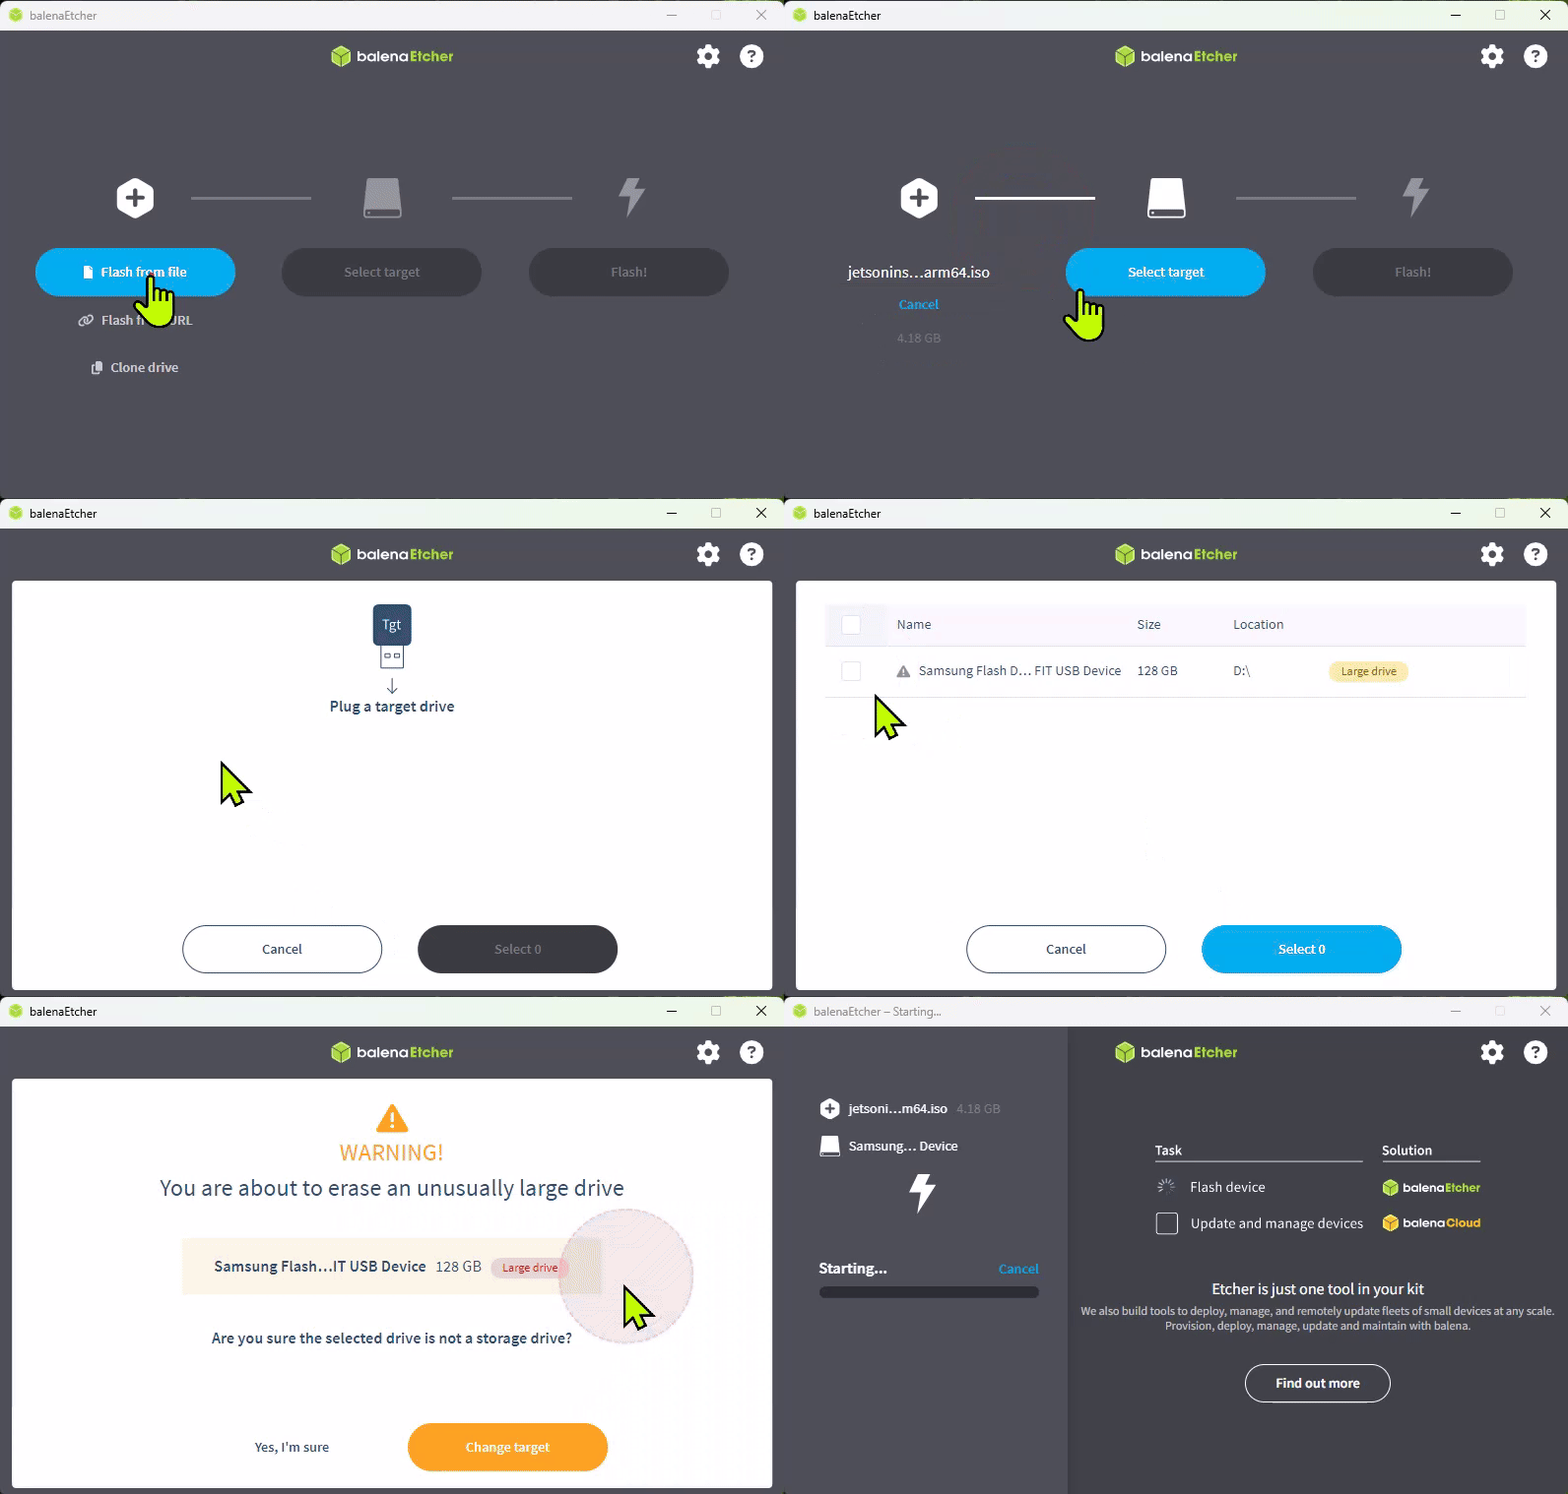 Writing the Jetson ISO to a USB drive with Balena Etcher.
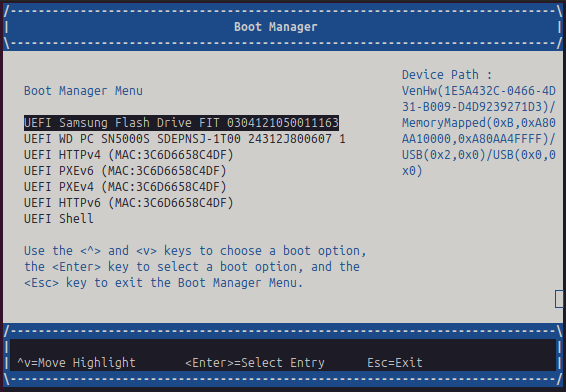 If the kit does not boot from the USB drive automatically, select it in the UEFI Boot Manager.
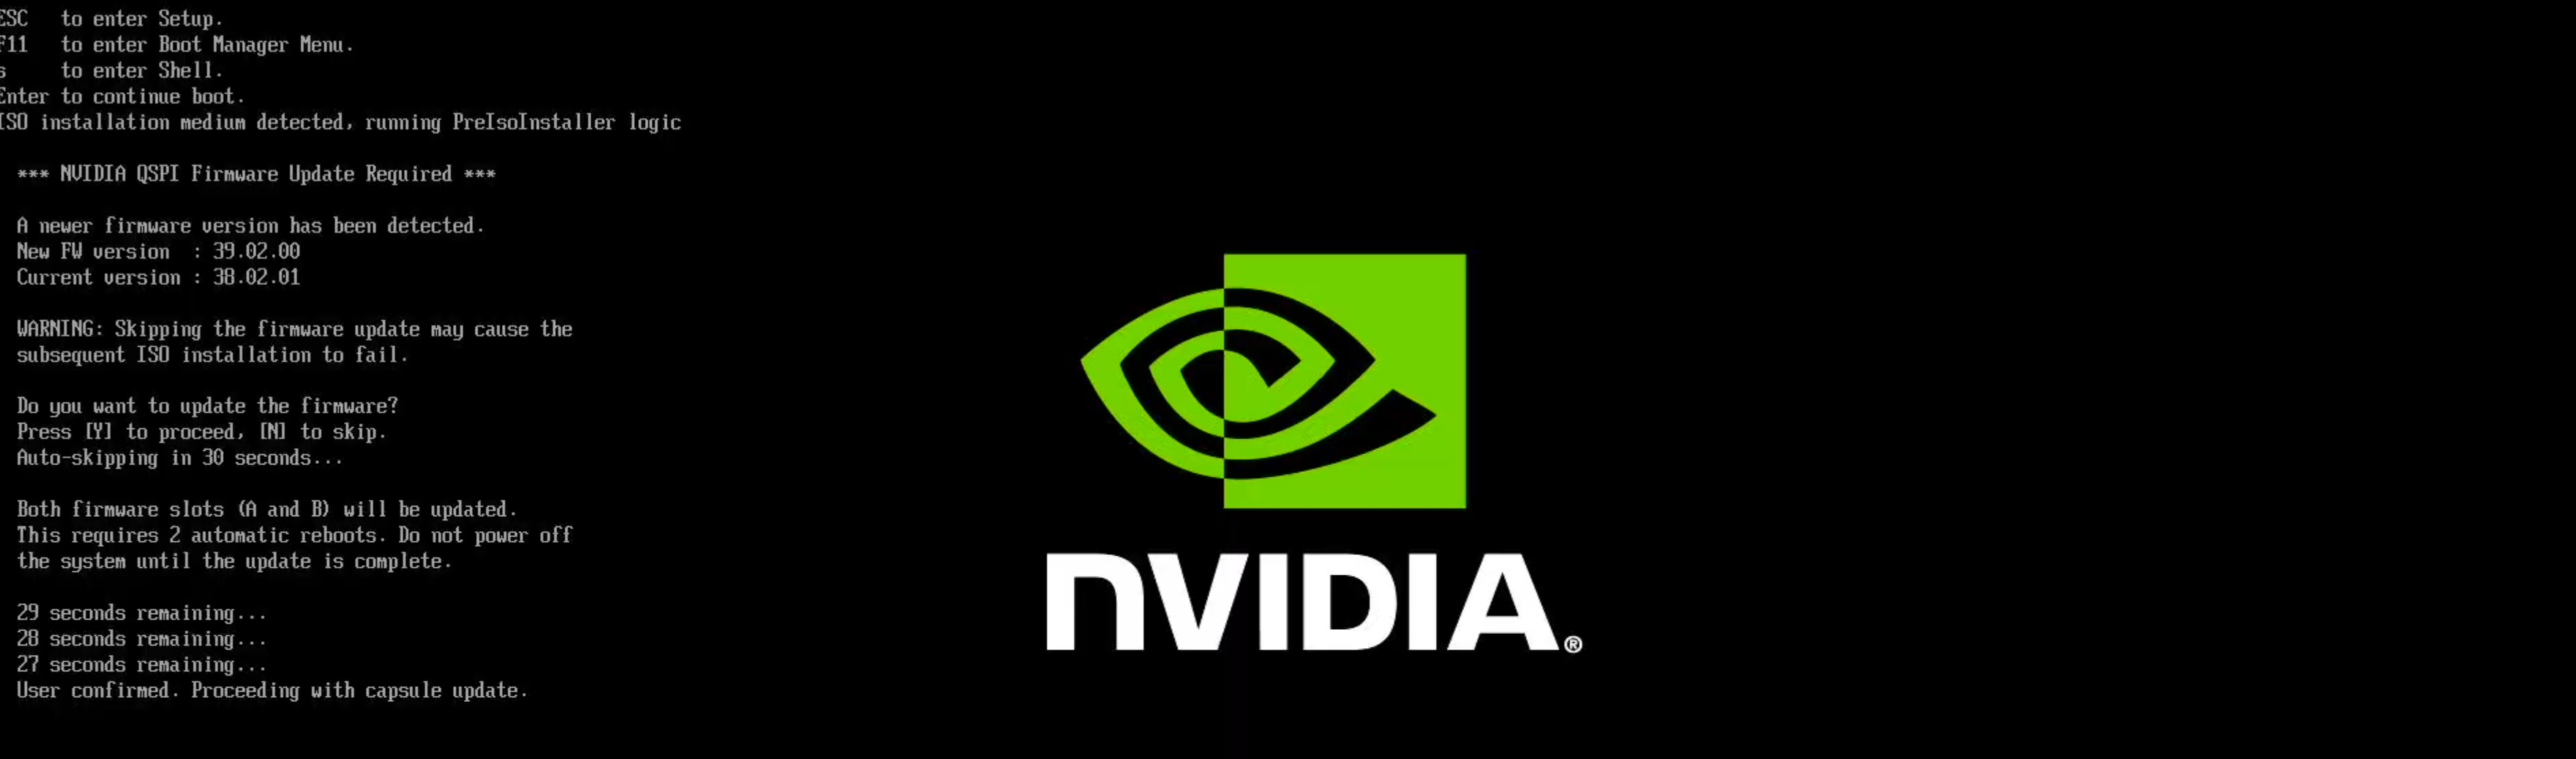 The QSPI capsule update prompt — press
 Y. It is required for compatibility and runs twice.
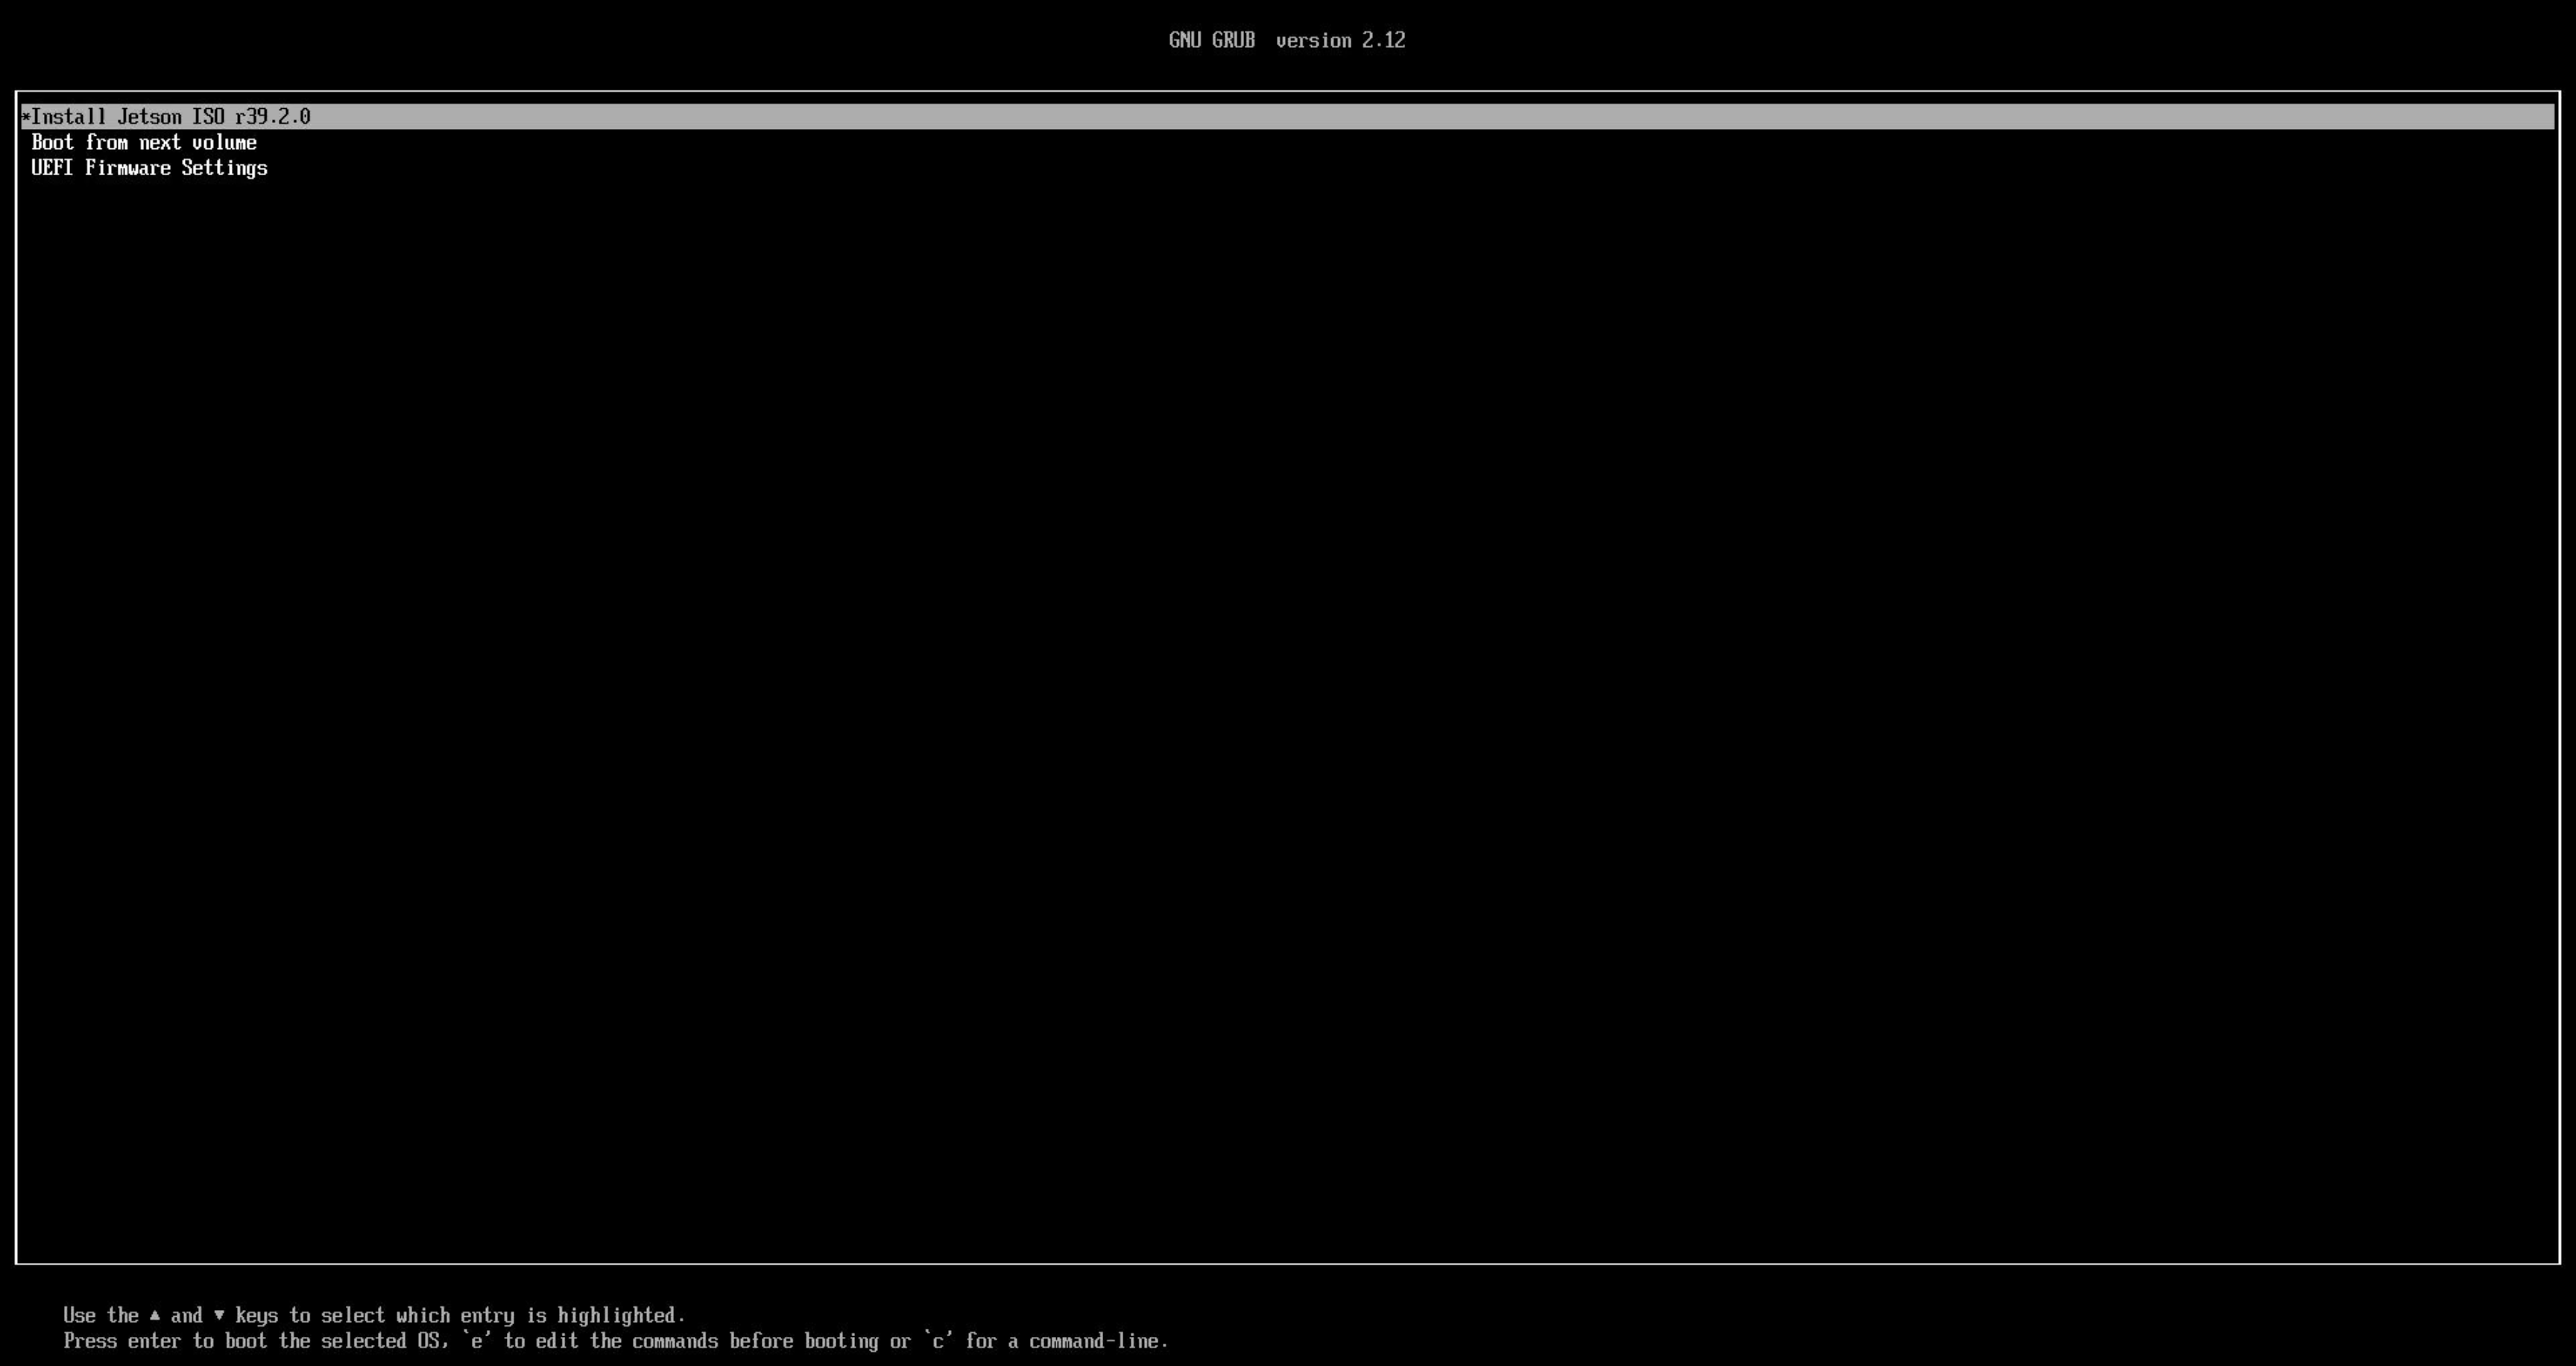 Select "Install Jetson ISO r39.2.1".
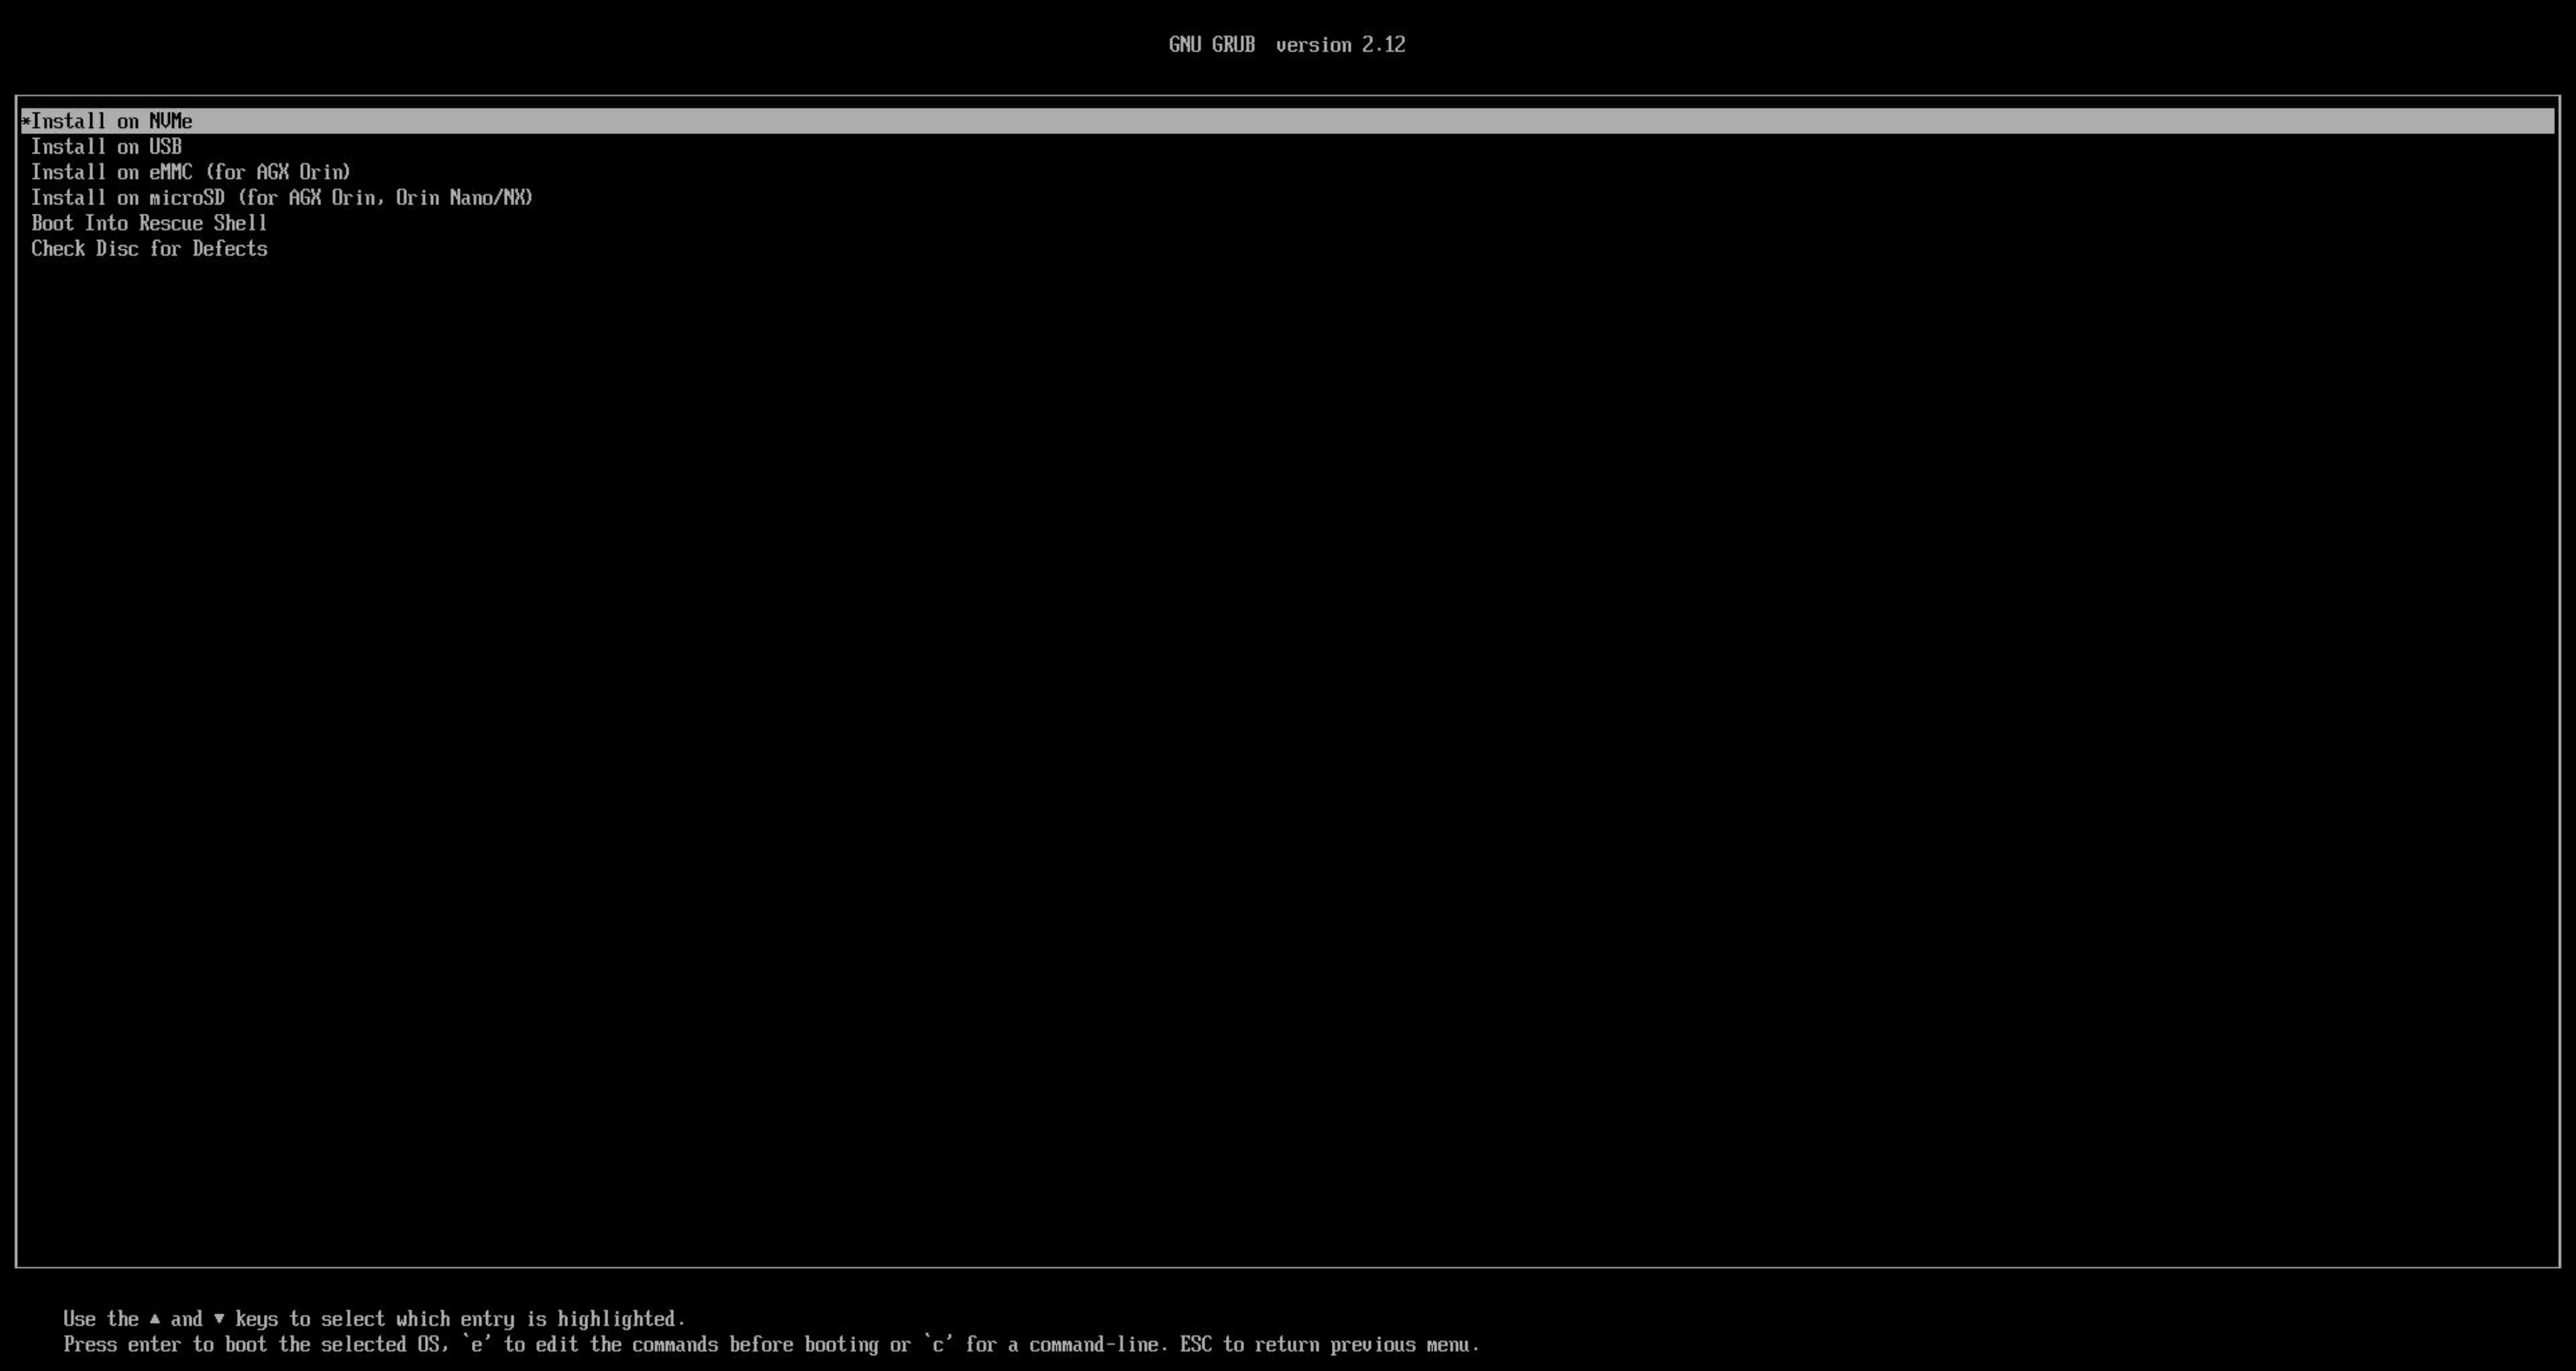 Choose eMMC or NVMe as the installation target.
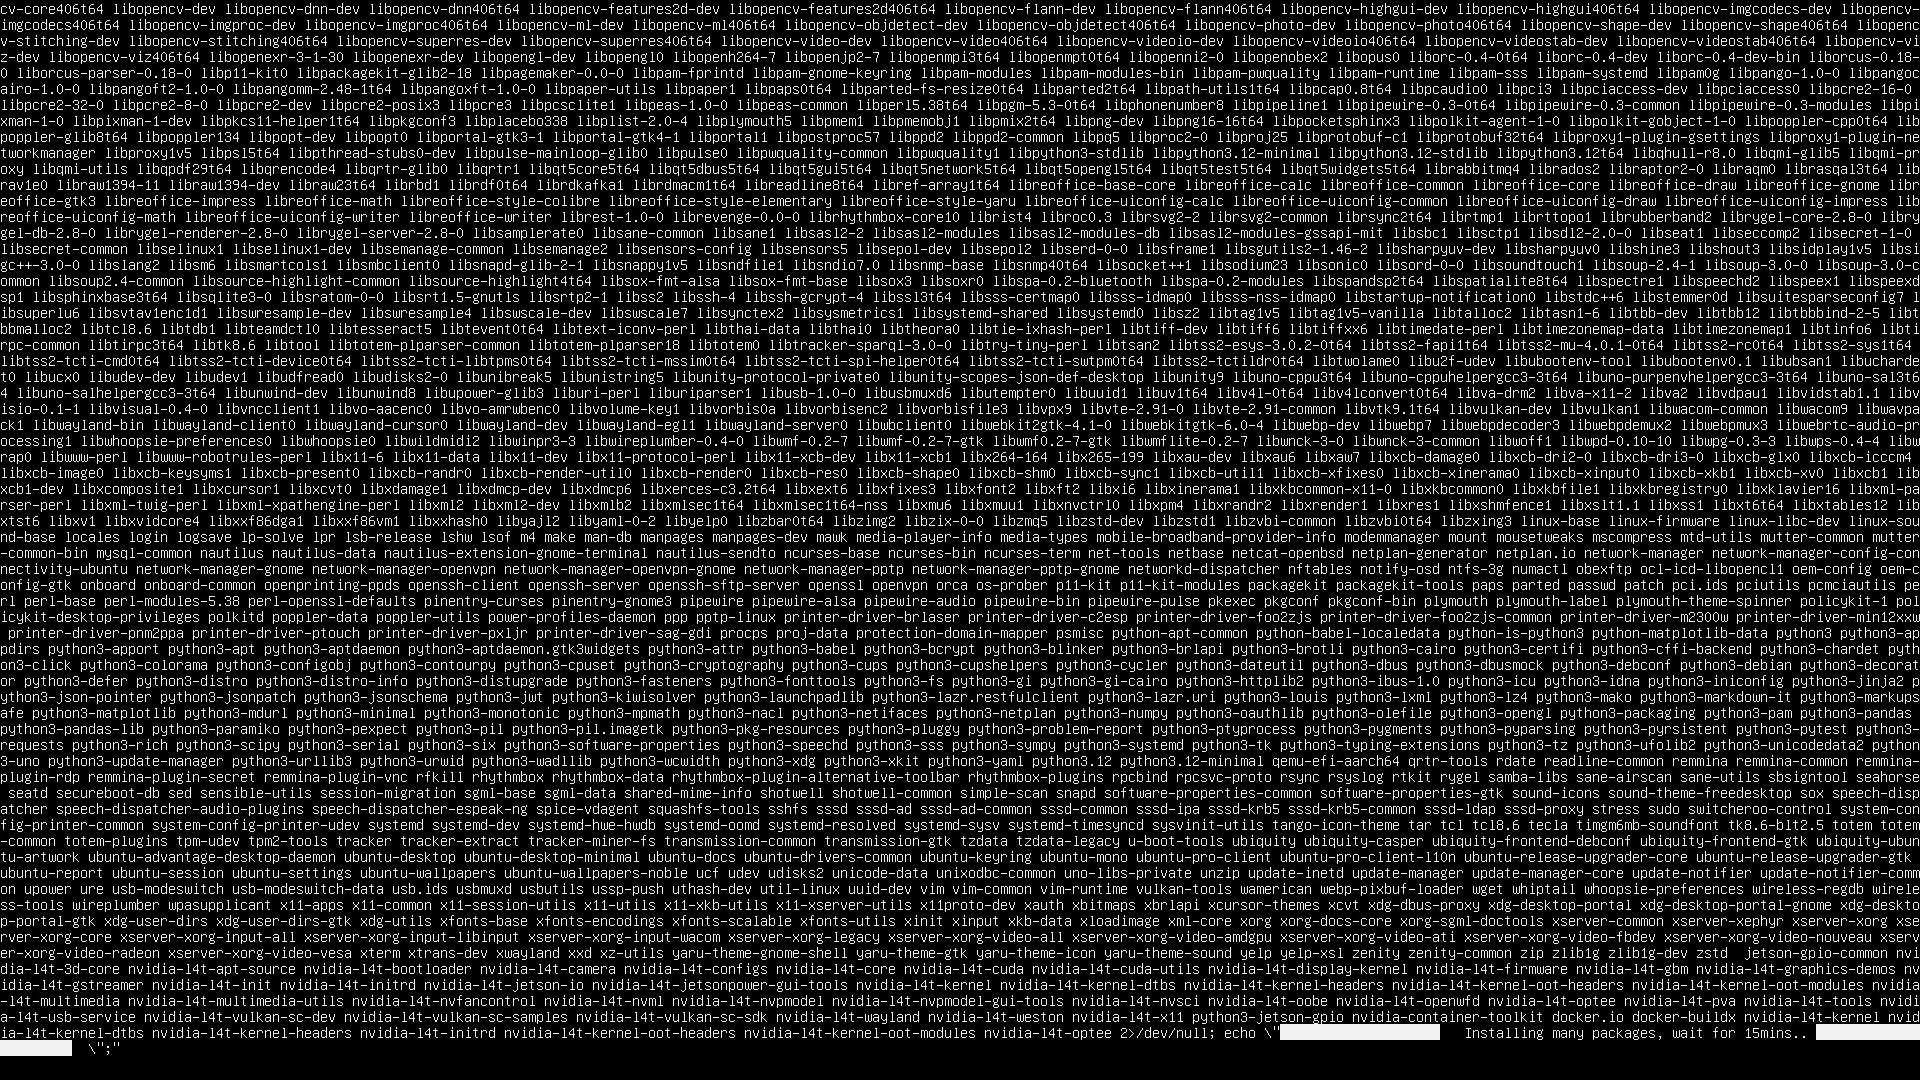 The installer runs for roughly 15 minutes.
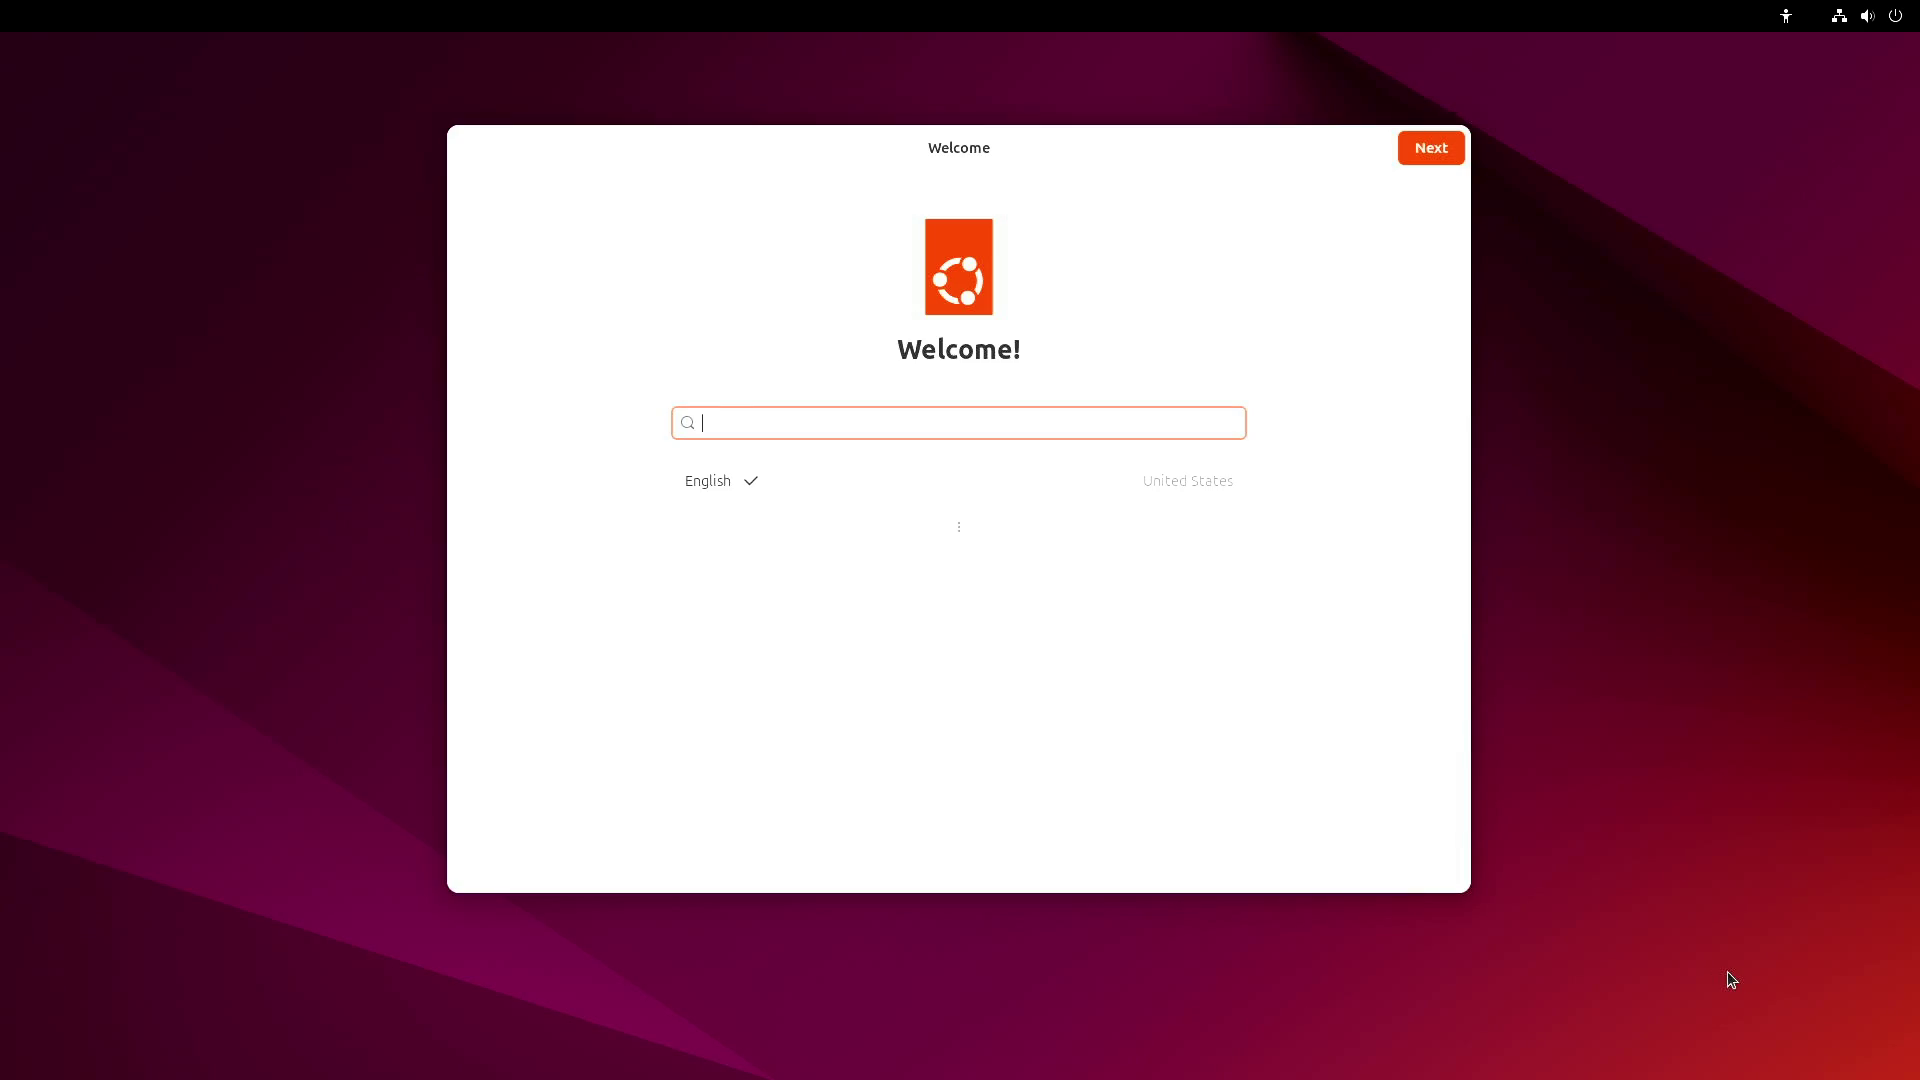 After the update,
 oem-config runs again to set up the new system.
Caveats and known issues
- Older units (< L4T r35.5): the Jetson ISO path requires an installed BSP of r35.5 or newer. To bring an older kit up first, use one of the host-PC methods (SDK Manager or the
flash.shscript) — see Flashing & Updates. - QSPI capsule prompt missed? Restart the ISO installation and press
Y. - Black screen during installation: some KVM switches handle the AGX Orin video output poorly during ISO installation. Connect the monitor directly to the developer kit and retry.
Step 3 — Install the JetPack components
3a. Via apt (simplest — no host PC needed)
On the kit's desktop, open a terminal (Ctrl+Alt+T) and run:
sudo apt update
sudo apt dist-upgrade
sudo reboot
sudo apt install nvidia-jetpack
This installs CUDA, cuDNN, TensorRT, and the rest of the JetPack stack. Expect it to take about an hour depending on connection speed.
Verify the result: cat /etc/nv_tegra_release should report R39 / REVISION 2.1, and the CUDA toolkit becomes available (nvcc --version). See Verify Your System for the full checklist.
3b. Via SDK Manager (alternative)
SDK Manager installs JetPack components from a host PC over USB:
- With the kit powered on, connect it to the host PC using the bundled USB Type-C to Type-A cable, plugged into the USB Type-C port next to the 40-pin connector on the kit.
- In SDK Manager choose the Jetson AGX Orin target and select Jetson SDK Components (rather than flashing "Jetson OS" again), then follow the on-screen steps (USB connection, address
192.168.55.1).
Full SDK Manager instructions are maintained by NVIDIA (see links below) and will be covered in depth in our Flashing guide.
Troubleshooting quick hits
| Symptom | First thing to check |
|---|---|
| Kit does not power on | Power supply plugged into the USB-C port above the DC jack; press the power button |
| No display output | DisplayPort cable (use an active DP→HDMI adapter for HDMI monitors); try booting without the ISO USB inserted |
| ISO installer does not start | USB written with Etcher (not file-copied); select the USB in the UEFI boot manager |
| QSPI prompt appeared | Press Y — required; the update runs twice |
| Screen goes black mid-install | KVM switch interference — connect the monitor directly |
Sources and verification
This page was written and checked by Juxi Technology against NVIDIA's official documentation:
- Jetson AGX Orin Developer Kit User Guide — Quick Start (checked 2026-09-23)
- Jetson AGX Orin Developer Kit User Guide — JetPack SDK Setup (checked 2026-09-23)
- BSP Installation (SDK Manager / flash script)
Status: draft. Steps have not yet been verified on physical hardware by Juxi Technology; they are grounded in NVIDIA's official documentation as of the dates above.
Image credits: All screenshots on this page are from NVIDIA's official Jetson AGX Orin Developer Kit User Guide (downloaded 2026-09-23) and remain © NVIDIA Corporation. They are reproduced here to illustrate the official setup flow.
NVIDIA® and Jetson™ are trademarks of NVIDIA Corporation. This guide is published by Juxi Technology and is not an NVIDIA publication.