

Flashing & Updates — BSP Installation Options
NVIDIA supports three official ways to install or update the BSP (Jetson Linux) on the Jetson Orin Nano Super Developer Kit. Two hardware facts shape all of them: there is no storage in the box (no eMMC, no microSD card, no SSD), and JetPack 7.2 removed SD-card images — the unified ISO on a USB stick replaces them, while the microSD card itself remains a valid install target.
| Jetson ISO (recommended) | NVIDIA SDK Manager | Linux_for_Tegra flash script | |
|---|---|---|---|
| Short summary | Boot the kit from a USB installer created on any PC; pick the target storage on the kit | GUI tool on a host PC; flashes the BSP to your chosen storage over USB-C | Command-line flashing tools on a host PC; direct control of the target |
| Ubuntu host PC | Not required | Required (x86_64) | Required (x86_64) |
| Typical time | Not published; installer shows output "for several minutes" | Not published; host downloads the BSP and root file system first | Depends on your setup |
| Who it is for | First-time setup on a new kit; most users | Users with an Ubuntu PC; NVIDIA's preferred route for flashing directly to an NVMe SSD; also used for firmware updates | Advanced users and product developers |
NVIDIA publishes no install times; forum reports range from about 15 minutes to two hours (unconfirmed).
Juxi note: the current release is JetPack 7.2.1 (L4T r39.2.1). On a new kit, start with Quick Start — it walks the recommended ISO path end to end. Come back here to compare routes, choose storage, or update an older kit.
Option 1 — Jetson ISO (recommended)
The Jetson ISO is NVIDIA's recommended first-time path and the only route that needs no Ubuntu host PC: write one ISO file to a USB stick on any computer, boot the kit from the stick, and install onto storage you prepared. Prepare these items:
- Target storage (the kit has none; see the storage section below): a microSD card, 64 GB UHS-1 or larger (recommended), inserted into the slot on the underside of the module before you boot the installer, or an NVMe SSD (optional; recommended for more capacity and better storage performance).
- A USB flash drive, 16 GB or larger — this becomes the installer.
- A laptop or PC (Windows, Mac, or Linux) with at least 25 GB free, to write the ISO.
- A DisplayPort monitor and USB keyboard (or a USB-to-TTL serial cable for headless setup; HDMI is not supported), plus the included 19 V power supply.
Two cautions decide success: the firmware must be JetPack 6.x-generation — if the display stays black or a UEFI shell appears, run the JetPack 6.x Update Path below first — and at the QSPI capsule prompt press Y within 30 seconds; a timed-out prompt makes the install fail later, so restart the installation and press Y.
Important — write the ISO to the USB flash drive, not a microSD card ("Do not flash the Jetson ISO to a microSD card"). The install also erases the selected target storage; confirm which device you selected before starting.
The full step-by-step procedure — ISO download, Balena Etcher, UEFI Boot Manager, the GRUB menu, storage selection, first-boot Ubuntu setup — is in Quick Start. The installer USB is not a "Live USB" (it only installs), so remove it after the install when prompted.
Option 2 — NVIDIA SDK Manager (host PC)
SDK Manager is the host-PC route: it flashes the BSP over USB-C and can also update the kit's firmware (see the update-path section below).
Host PC requirements (per the kit's BSP Setup page): an x86 PC running Ubuntu 22.04 or Ubuntu 20.04; internet access and a free NVIDIA Developer Program account; a USB cable for the kit's USB-C port plus "a jumper pin or metal paper clip"; and a display or USB-to-TTL serial cable for the kit.
Juxi note: NVIDIA's sources disagree here. The kit setup page lists Ubuntu 22.04 or 20.04; the L4T r39.2.1 release notes list "Ubuntu 24.04 and 22.04" as the host distribution for flashing. Check NVIDIA's SDK Manager requirements before preparing a host PC.
Install SDK Manager on the host. NVIDIA's setup page gives the exact commands for Ubuntu 22.04 and 20.04; launch it with sdkmanager, then log in with your NVIDIA Developer credentials (a browser window opens; two-factor authentication may appear).
Flash the BSP (summary; follow the on-screen instructions). SDK Manager flashes over USB, so put the kit into Force Recovery Mode first (see below):
- Select Jetson Orin Nano [8GB developer kit version] and click OK; clear Host Machine so only the Jetson target stays selected; click Continue; keep only Jetson Linux selected at the next step; accept the license and enter the host's sudo password.
- At the flashing prompt (SDK Manager downloads the packages first): select Runtime for OEM Configuration; select NVMe or SD Card as the storage; click Flash.
- When flashing completes, remove the jumper from the J14 header, power-cycle the kit, and complete the Ubuntu initial setup (oem-config).
Juxi note — the module SKU: this kit contains the P3767-0005 module, which NVIDIA documents as "Jetson Orin Nano 8GB (P3767-0005, for development only)". The commercial 8GB Orin Nano module is P3767-0003 — a separate SKU, not part of this kit. Use the target entry NVIDIA names for this kit: Jetson Orin Nano [8GB developer kit version].
Option 3 — Linux_for_Tegra flash script
For advanced users and product developers: command-line flashing with the Jetson Linux Driver Package. From NVIDIA's setup page: download the Driver Package and the sample root file system for your JetPack release; extract the Driver Package on an Ubuntu x86_64 host; extract the sample root file system into Linux_for_Tegra/rootfs and run apply_binaries.sh from Linux_for_Tegra; put the kit into Force Recovery Mode (below); then run the appropriate flash command for the Jetson Orin Nano Developer Kit target. Target names and detailed commands are in the Jetson Linux Developer Guide.
- The kit's target names are
jetson-orin-nano-devkitandjetson-orin-nano-devkit-super; NVIDIA notes the Super configuration has "a higher power budget and extended clock-frequency steps". - The Developer Guide's example for this kit — NVMe with the Super configuration:
sudo ./l4t_initrd_flash.sh --erase-all jetson-orin-nano-devkit-super internal(the--erase-alloption erases data on the target storage). - From the L4T r39.2.1 release notes: flashing host — Ubuntu 24.04 / 22.04; toolchain — GCC 13.2; source tag —
jetson_39.2.1_GA. From the JetPack Downloads page: BSP package —Jetson_Linux_R39.2.1_aarch64.tbz2.
Choosing target storage: microSD vs NVMe SSD
The installer only offers storage that is already attached when it boots. Decide first, install the storage, then start the installer.
| microSD card | NVMe SSD | |
|---|---|---|
| Specification | 64 GB UHS-1 or larger, recommended | A PCIe NVMe drive in an M.2 Key-M slot |
| Where it goes | Slot on the underside of the module | M.2 Key-M 2280 slot (PCIe 3.0 x4) or 2230 slot (PCIe 3.0 x2) |
| Why choose it | The module's default storage; the simplest, lowest-cost option | More capacity and better storage performance; recommended for AI models, containers, datasets, and project files |
microSD is still a valid install target. JetPack 7.2 removed the SD-card image file — not the microSD target: with the ISO flow, boot the USB installer with the card inserted and select it (SDK Manager can also flash a microSD card from the host). The microSD slot sits on the underside of the module. Every install route erases the selected target storage, so do not select a drive that holds data you need. If the installer does not offer your NVMe drive, see Troubleshooting; for buying advice, see the FAQ.
Older kits: the JetPack 6.x Update Path
When this is needed: JetPack 7.2 and later require JetPack 6.x-generation UEFI/QSPI firmware. NVIDIA's rule: firmware 36.x or newer — the kit is ready; older than 36.0 — complete this path first (check the version at the UEFI menu; steps in Quick Start). Two official routes: the microSD bridge flow (below) needs a microSD card but no Ubuntu host PC; SDK Manager (Option 2) needs an Ubuntu host PC and is NVIDIA's named alternative for the firmware/QSPI update.
The bridge flow, in NVIDIA's documented order:
Write the JetPack 5.1.3 bridge image (
JP513-orin-nano-sd-card-image_b29.zip— use the updated image) to a microSD card, boot the kit from it, complete the first-boot Ubuntu setup, and connect the kit to the internet.A background service then schedules a bootloader update (a desktop notification may appear). Confirm with
sudo systemctl status nv-l4t-bootloader-config— "A completed scheduling run shows the service as inactive with a successful exit status."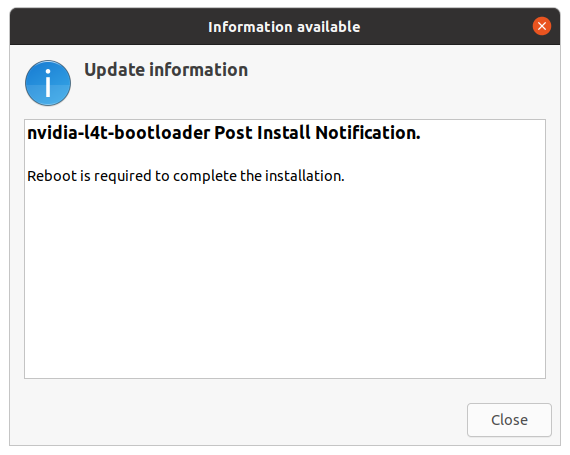
Reboot; the firmware update runs during boot. Check the state afterward with
sudo nvbootctrl dump-slots-info— NVIDIA's example output at this stage is "Current version: 35.5.0".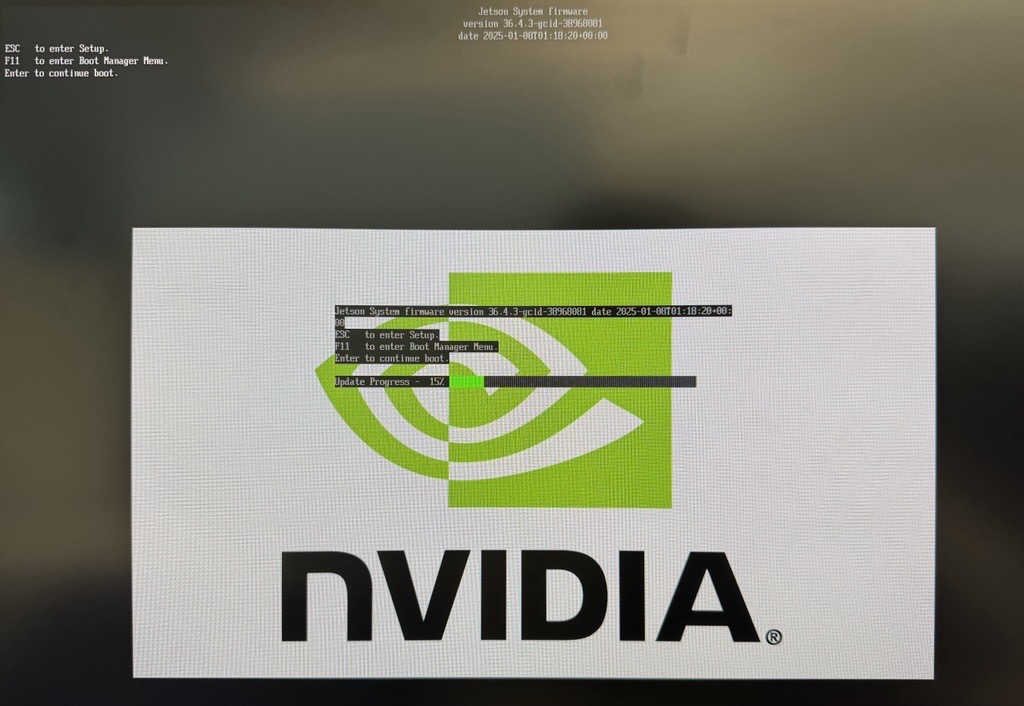
Install the QSPI updater:
sudo apt update, thensudo apt install nvidia-l4t-jetson-orin-nano-qspi-updater; reboot and let the update complete.The firmware is now ready for the JetPack 6.x generation, and the 5.1.3 card is no longer the target boot media. Power off, then run the JetPack 7.2.1 install from the USB installer (see Quick Start).
Additional notes: passing through JetPack 6.2.x may schedule another UEFI firmware update after its first boot — reboot again when prompted. From the r39.2.1 release notes (known issue 6379600), the capsule update during an ISO install does not support units from the BSP 36.2 / JetPack 5.0 DP release — update those units to a later release first.
Force Recovery mode — how to enter
Force Recovery Mode (RCM) is the state a host PC needs for flashing. NVIDIA documents three ways:
- From a terminal on a running system:
sudo reboot --force forced-recovery. - Kit powered off: connect pin 9 and pin 10 of the button header (the setup page calls it the J14 header), then plug in the DC supply to power on.
- Kit already powered on: connect pins 9 and 10, then temporarily connect pins 7 and 8 to reset the system.
After entering RCM, remove the jumper(s) once the host detects the device. The USB-C port carries the flashing connection (it operates as USB Recovery mode), and on the host, lsusb should show an NVIDIA USB device before you start flashing.
Re-installing and upgrading
Update JetPack components on the running kit with sudo apt update, then sudo apt install nvidia-jetpack — see Quick Start.
Re-install the BSP (same or newer JetPack). Run any of the three routes again; the ISO flow is the on-device option. NVIDIA's caution for ISO re-installs: "If you're re-installing JetPack 7.2.1 using ISO on an already installed system, please carefully follow the instructions in the Getting Started Guide." Re-installing erases the target storage (back up first), and if the QSPI capsule prompt appears, press Y within 30 seconds. Remove the USB installer when done, so the kit boots the new system.
Super mode after a re-install. The 7.2.1 ISO "flashes the Jetson Orin Nano Developer Kit with Super Mode flashing configuration by default". On the earlier 7.2 release, an ISO-updated kit kept its previous profile and could end up without the 25 W / MAXN SUPER modes (r39.2 known issue 6279443; NVIDIA's guidance was to flash from a Linux host or SDK Manager). NVIDIA has not documented whether re-running the 7.2.1 ISO converts an existing non-Super install to Super. If your kit is missing the 25 W / MAXN SUPER modes, see Troubleshooting.
Moving between JetPack major versions. For the JetPack 6.x → 7.2.1 change list and rollback notes, see JetPack 6.x → 7.2.1. After any install or update, verify the result: Verify Your System.
Sources
- BSP Setup — Jetson Orin Nano Developer Kit User Guide (checked 2026-09-26)
- Quick Start — same guide (checked 2026-09-26)
- JetPack 6.x Update Path — same guide (checked 2026-09-26)
- How-To — same guide (checked 2026-09-26)
- Jetson Linux 39.2.1 Release Notes (PDF) (checked 2026-09-26)
- Jetson Linux Developer Guide (r39.2.1) — Quick Start (checked 2026-09-26)
- JetPack Downloads (checked 2026-09-26)
- SDK Manager — monitor-attached installation instructions (checked 2026-09-26)
Status: draft, pending review by cheny. Grounded in NVIDIA's official documentation as of the dates listed; not yet verified on physical hardware by Juxi Technology.
NVIDIA® and Jetson™ are trademarks of NVIDIA Corporation. This page is published by Juxi Technology and is not an NVIDIA publication.